How-To Guides
Clean refrigerator the right way in 6 steps
AZparts Team
Updated on July 31, 2025
7 min read
Keeping your refrigerator clean is essential for food safety, energy efficiency, and extending your appliance's lifespan. A dirty fridge can harbor bacteria, produce unpleasant odors, and even cause mechanical issues that require replacement parts. Whether you're dealing with spills, expired food, or general maintenance, knowing how to clean the refrigerator properly ensures your appliance runs smoothly for years to come. At AZParts, we understand the importance of proper refrigerator maintenance and provide genuine replacement parts to keep your appliance in top condition.

1. How Often Should You Clean Your Fridge?
Regular refrigerator cleaning prevents bacteria buildup and maintains optimal performance. The frequency depends on your usage patterns and household size, but following a consistent schedule ensures your appliance stays hygienic and efficient.
For most households, a thorough deep clean should occur every 3-4 months. However, busy families or those who frequently cook at home may need to clean monthly. Weekly spot cleaning helps manage spills and prevents sticky residue from hardening on shelves and drawers.

How Often Should You Clean Your Fridge? (Source: AZParts)
Seasonal cleaning aligns perfectly with grocery shopping habits. Spring cleaning removes winter storage items, summer cleaning prepares for fresh produce season, fall cleaning clears out summer leftovers, and winter cleaning makes room for holiday ingredients. This schedule also coincides with checking expiration dates and rotating stock.
Signs your refrigerator needs immediate cleaning include persistent odors, visible spills or stains, sticky surfaces, or unusual noises that might indicate mechanical issues. If you notice ice buildup or temperature fluctuations, these could signal problems with internal components that might require professional attention or replacement parts.
2. What to Use to Clean Your Refrigerator?
Essential Cleaning Supplies:
- Warm water and mild dish soap
- Baking soda (deodorizes and removes stains)
- White vinegar (antimicrobial and cuts grease)
- Soft microfiber cloths
- Soft-bristled brushes for crevices
- Cotton swabs for detailed areas
- Clean towels for drying
For Tough Stains/Odors:
- Baking soda paste (mix with water)
- Activated charcoal or coffee grounds
Preparation Items:
- Cooler or insulated bags (to preserve food during cleaning)
- Organized cleaning kit for easy access
Avoid:
- Abrasive cleaners
- Bleach or ammonia-based products
- Harsh chemicals that damage plastic components.
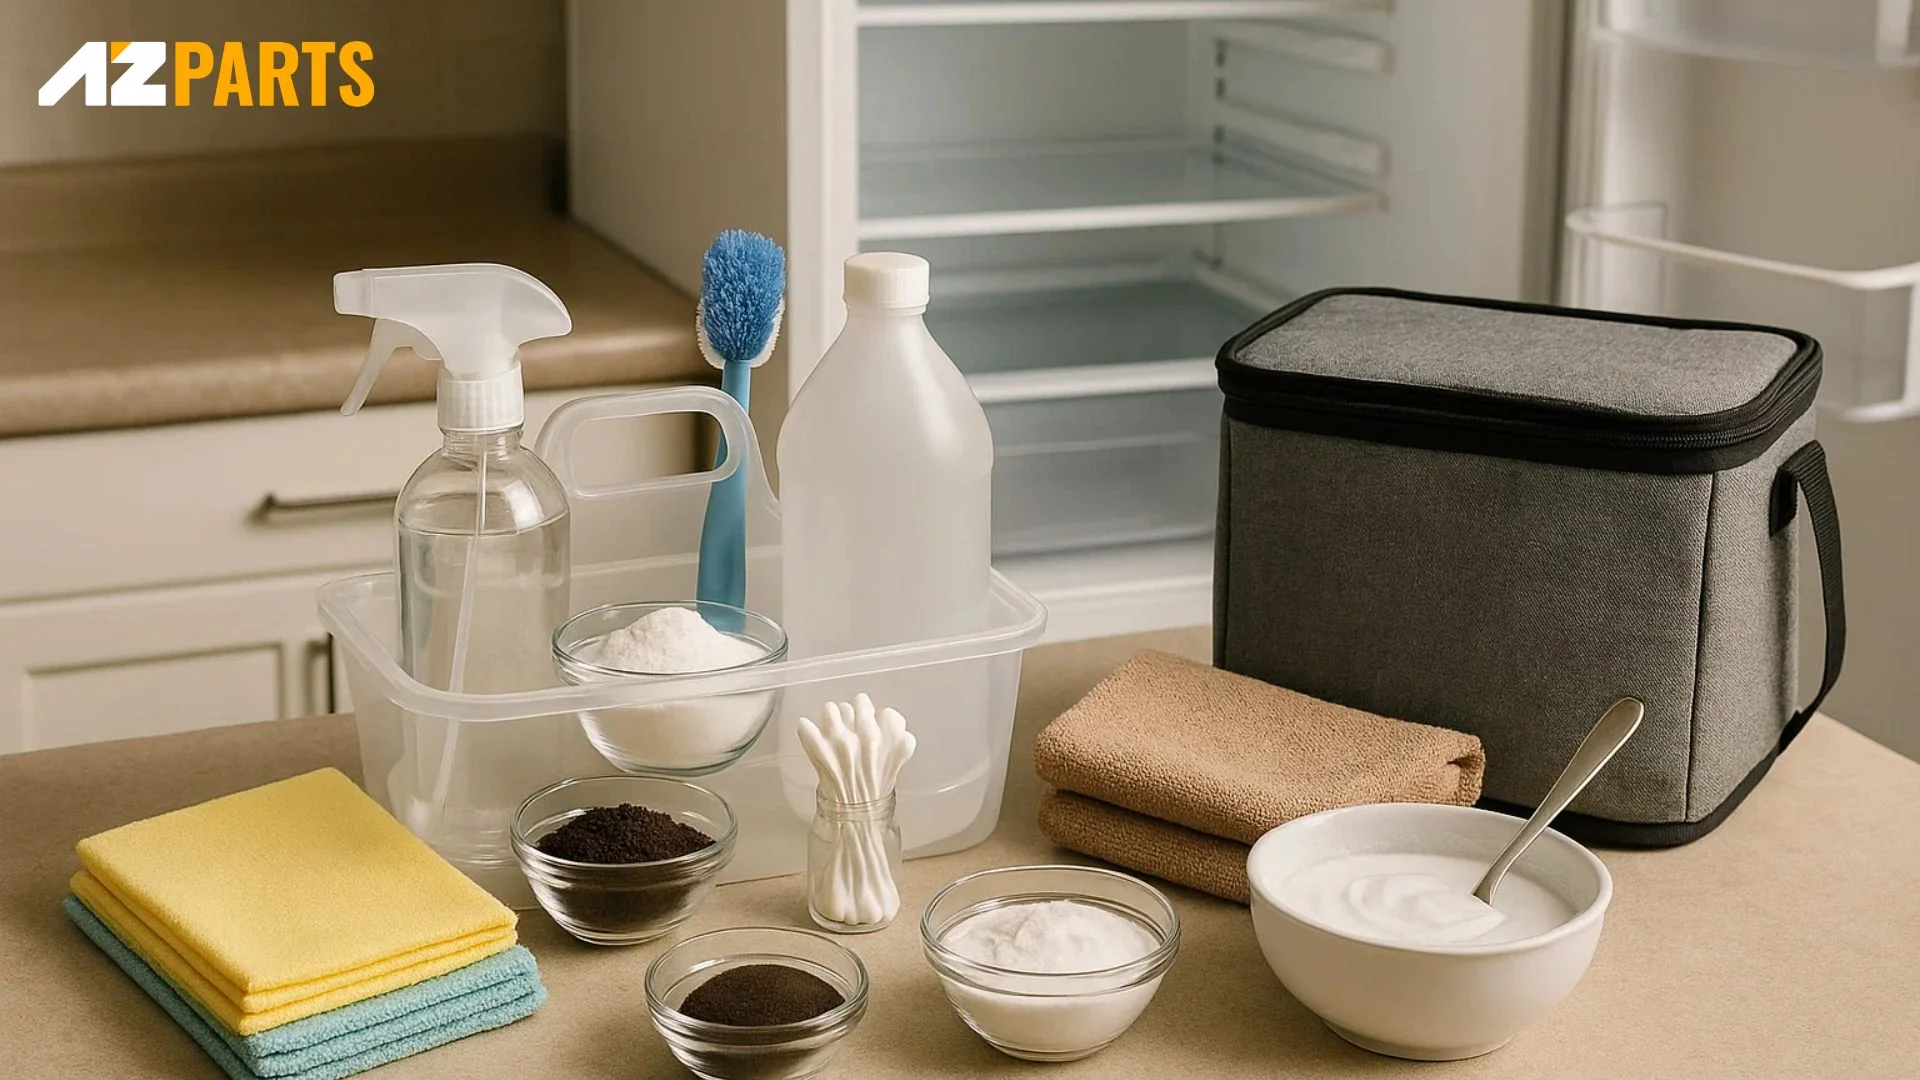
What to Use to Clean Your Refrigerator? (Source: AZParts)
3. Step-by-Step Guide to Clean Your Refrigerator
Following these six systematic steps ensures thorough cleaning while protecting your refrigerator's components and maintaining optimal performance.
3.1. Empty Your Fridge
Begin by removing all food items, checking expiration dates as you go. This step provides complete access to all surfaces and prevents food from spoiling during the cleaning process. Use insulated bags or a cooler to maintain food temperature, especially for perishables like dairy, meat, and frozen items.
Next, remove all removable components including shelves, drawers, and door bins. This allows thorough cleaning of both the parts and the areas they normally occupy. Check for any loose or damaged components during removal that might need replacement.
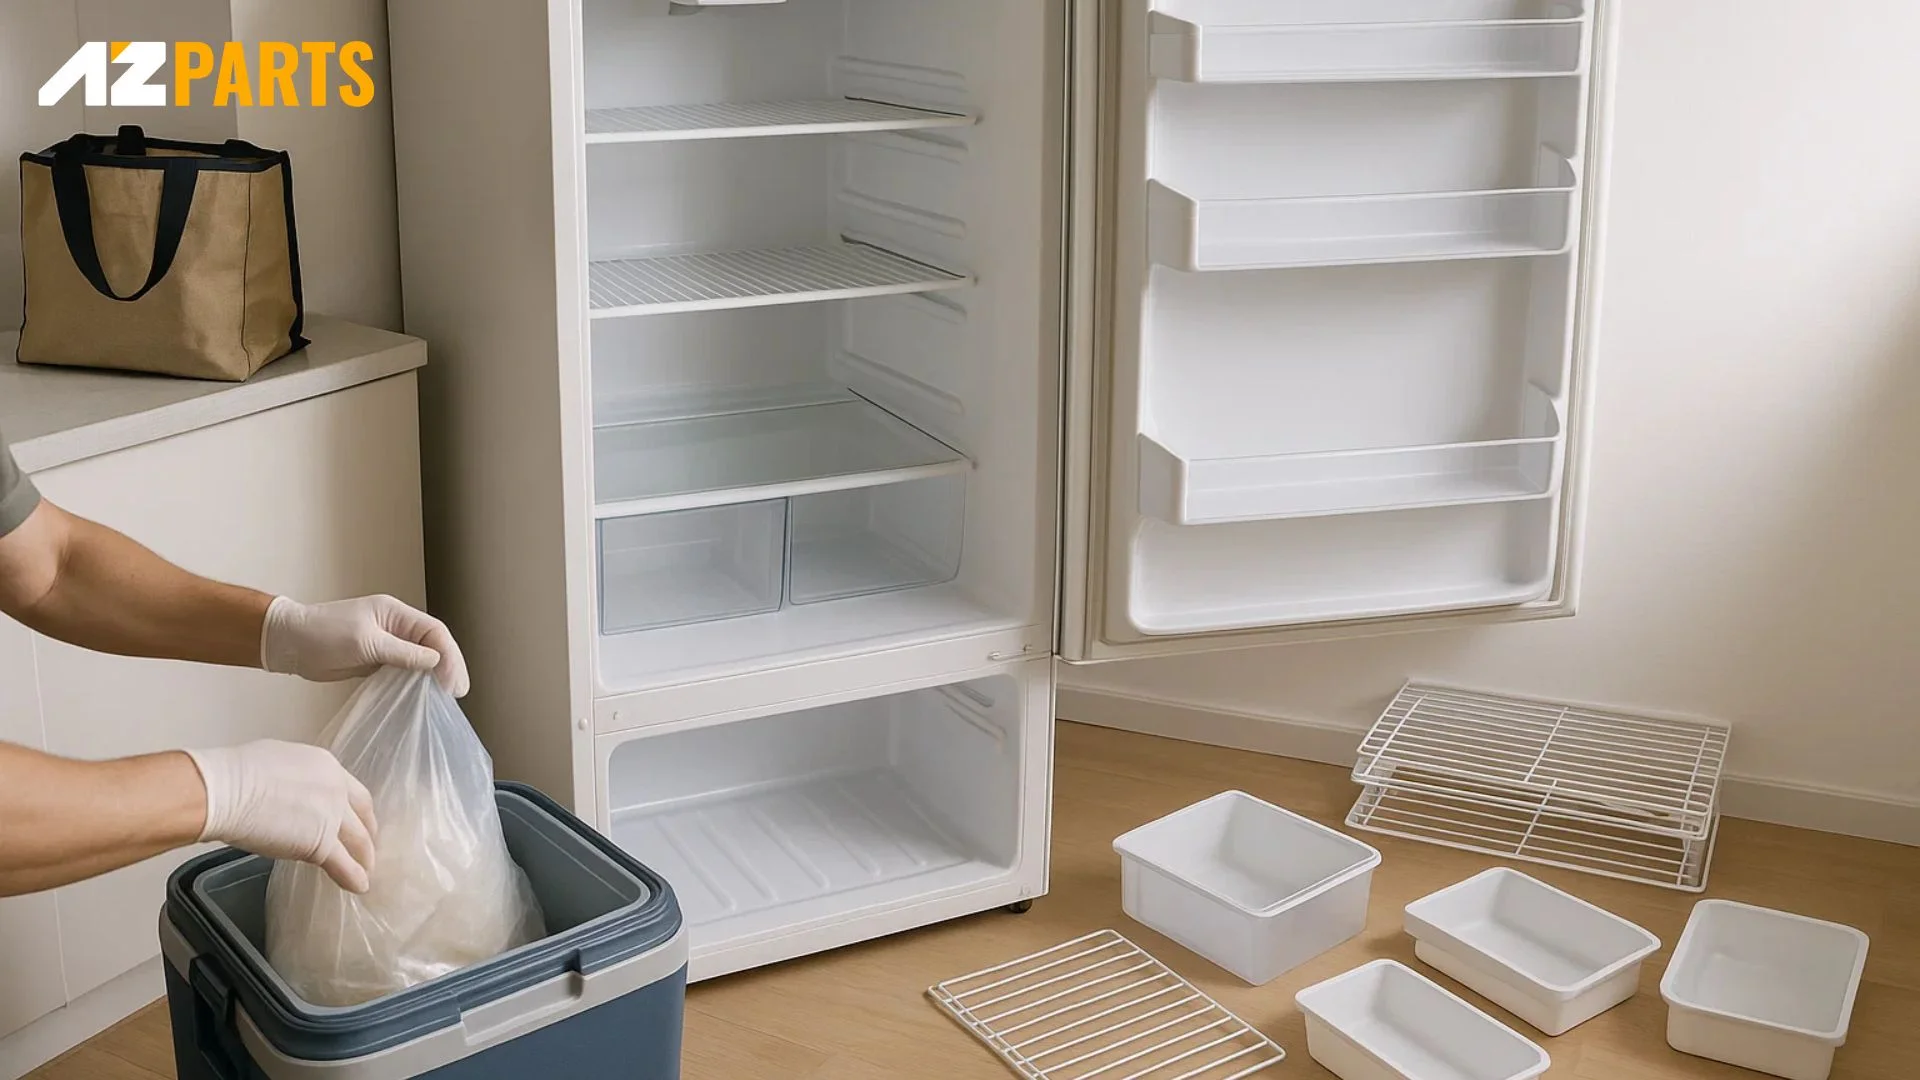
Removing All Items Out Of Your Fridge (Source: AZParts)
3.2. Remove and Wash Shelves & Drawers
Soak removable parts in warm, soapy water to loosen dried spills and food residue. Allow glass shelves to reach room temperature before washing to prevent thermal shock and cracking. For heavily soiled items, create a cleaning solution using warm water and mild dish soap.
If your refrigerator has damaged or worn crisper covers or shelf clips, replace new parts to restore proper function. These components ensure proper fit and maintain your refrigerator's efficiency. Rinse all components thoroughly with clean water and dry completely with clean towels before reassembly.
3.3. Wipe Down the Interior
Clean all interior surfaces systematically, starting from top to bottom. This prevents dirty water from dripping onto already-cleaned areas. Pay special attention to corners, crevices, and areas around vents where debris commonly accumulates.
Use a mild cleaning solution or baking soda paste for stubborn stains. Clean around air vents and temperature sensors carefully, as these components are crucial for proper refrigerator function.
Don't forget to clean the rubber door seals thoroughly, as these areas trap moisture and food particles. Use a soft brush to clean crevices and check for damage that might require seal replacement.
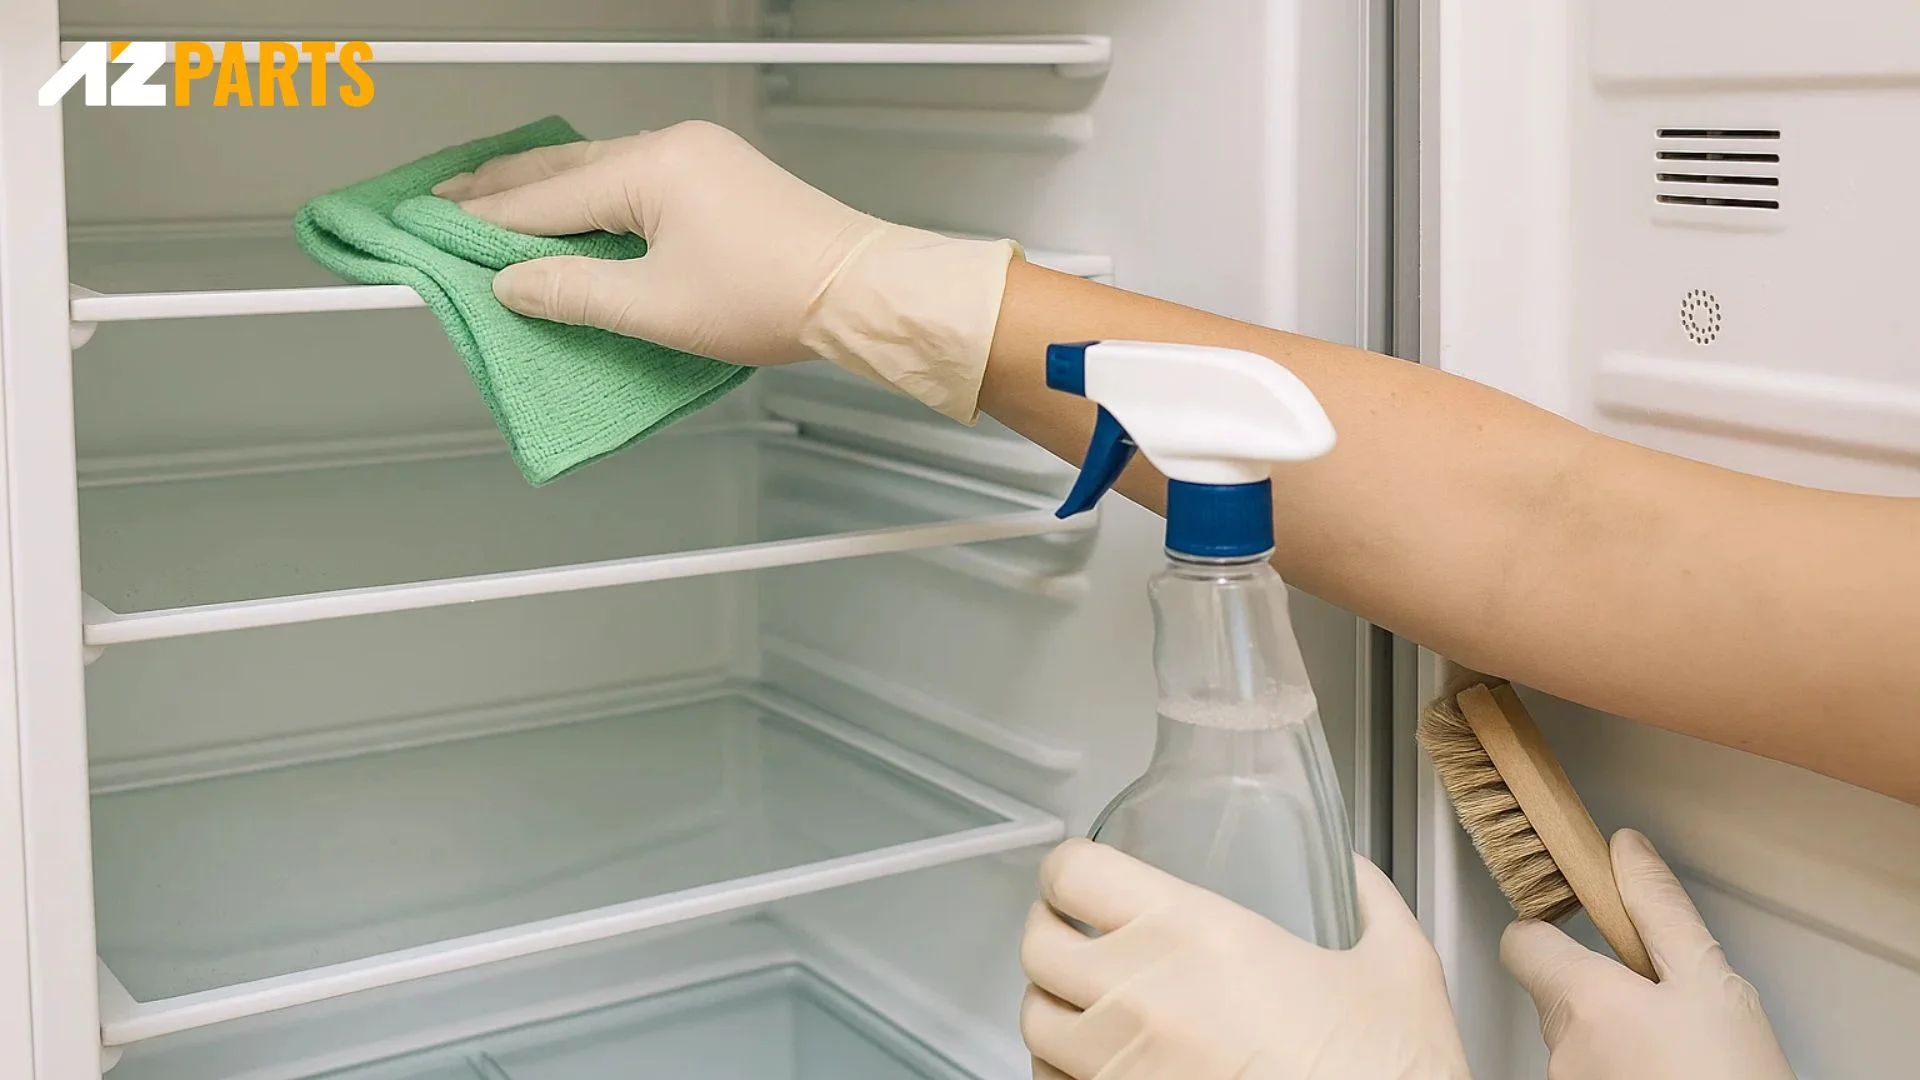
Clean all interior surfaces systematically (Source: AZParts)
3.4. Sanitize with Food-Safe Solution
After cleaning, sanitize all surfaces with a food-safe solution to eliminate remaining bacteria and ensure food safety. Mix one tablespoon of baking soda with one quart of warm water for an effective, natural sanitizer.
Apply the sanitizing solution with a clean cloth, ensuring complete coverage of all surfaces. Allow the solution to sit for several minutes to maximize antimicrobial effectiveness. For enhanced sanitization, you can follow with a light application of white vinegar solution.
Wipe all surfaces with a damp cloth to remove sanitizer residue, then dry thoroughly with clean towels. Proper drying prevents water spots and reduces humidity that could promote bacterial growth.
3.5. Clean the Exterior
External cleaning maintains your refrigerator's appearance and prevents buildup that could affect door seals and handles. For stainless steel exteriors, use specialized stainless steel cleaner or a mixture of warm water and mild dish soap.
Clean door handles thoroughly, as these high-touch areas harbor bacteria and fingerprints. If handles are loose, cracked, or damaged, AZParts offers replacement door handles and handle covers to restore both function and appearance.
Don't forget to clean the top of the refrigerator and the floor area underneath if accessible. This prevents dust accumulation and maintains overall kitchen cleanliness.

Clean the Exterior of Your Refrigerator (Source: AZParts)
3.6. Reassemble and Refill
Once all components are clean and dry, reassemble your refrigerator systematically. Replace shelves and drawers in their original positions, ensuring proper alignment and secure fitting. Check that all parts move smoothly and fit properly.
Damaged or worn components should be replaced to prevent future problems. AZParts provides genuine replacement parts for all major refrigerator brands, ensuring perfect fit and optimal performance.
Return food items to the refrigerator, organizing them logically for easy access and proper air circulation. Set appropriate temperatures: 37-40°F for the refrigerator section and 0-5°F for the freezer.
4. How to Clean the Drain Hole & Water Dispenser
These often-overlooked areas require special attention to prevent bacterial growth and maintain proper function.
4.1. Clean the Drain Hole
The drain hole removes condensation from your refrigerator, preventing water buildup that can cause odors and damage. Locate the drain hole, typically found at the back of the refrigerator compartment near the bottom.
Remove any visible debris using a soft brush or cotton swab. Create a cleaning solution using warm water and a small amount of dish soap, then use a turkey baster or syringe to flush the drain hole.
If the drain remains clogged after cleaning, consider replacing the drain components or the entire drain assembly. Persistent clogs often indicate worn-out parts that can be replaced with basic tools and readily available replacement components.
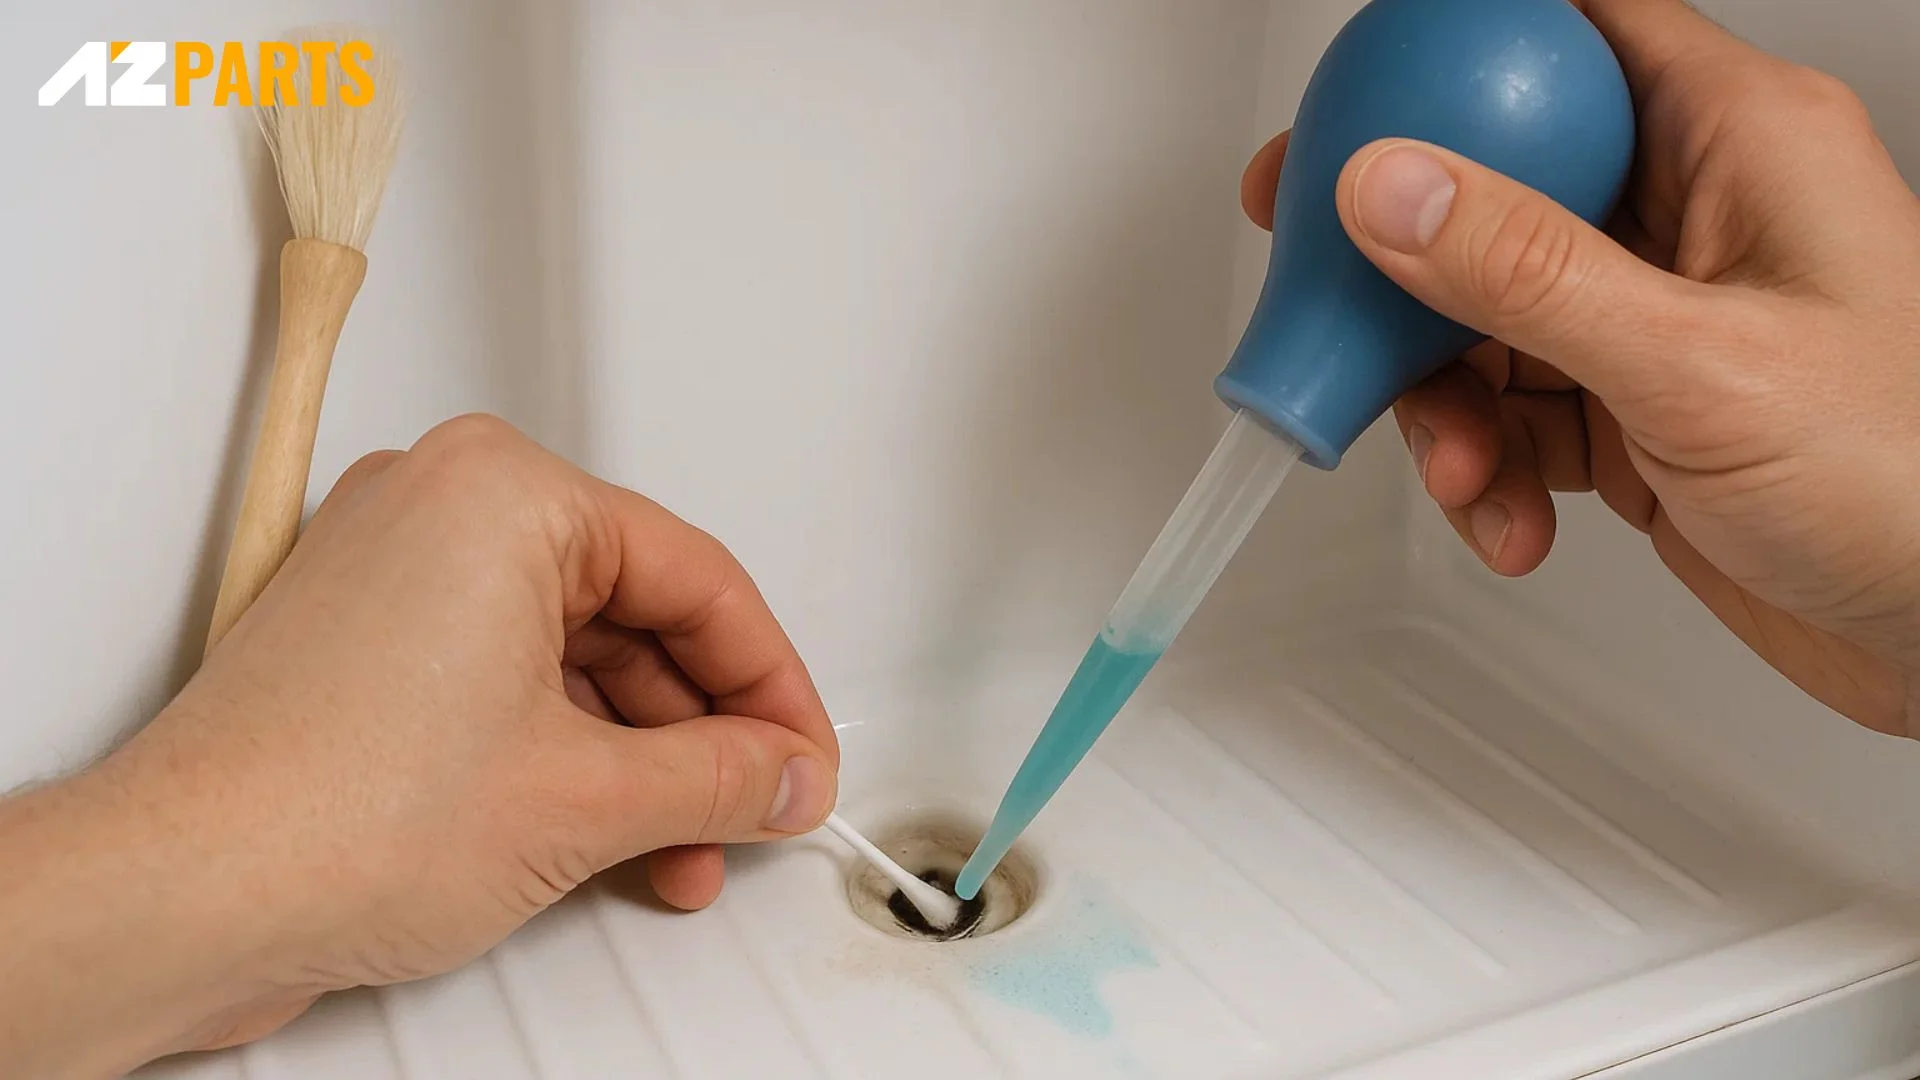
Clean the Drain Hole (Source: AZParts)
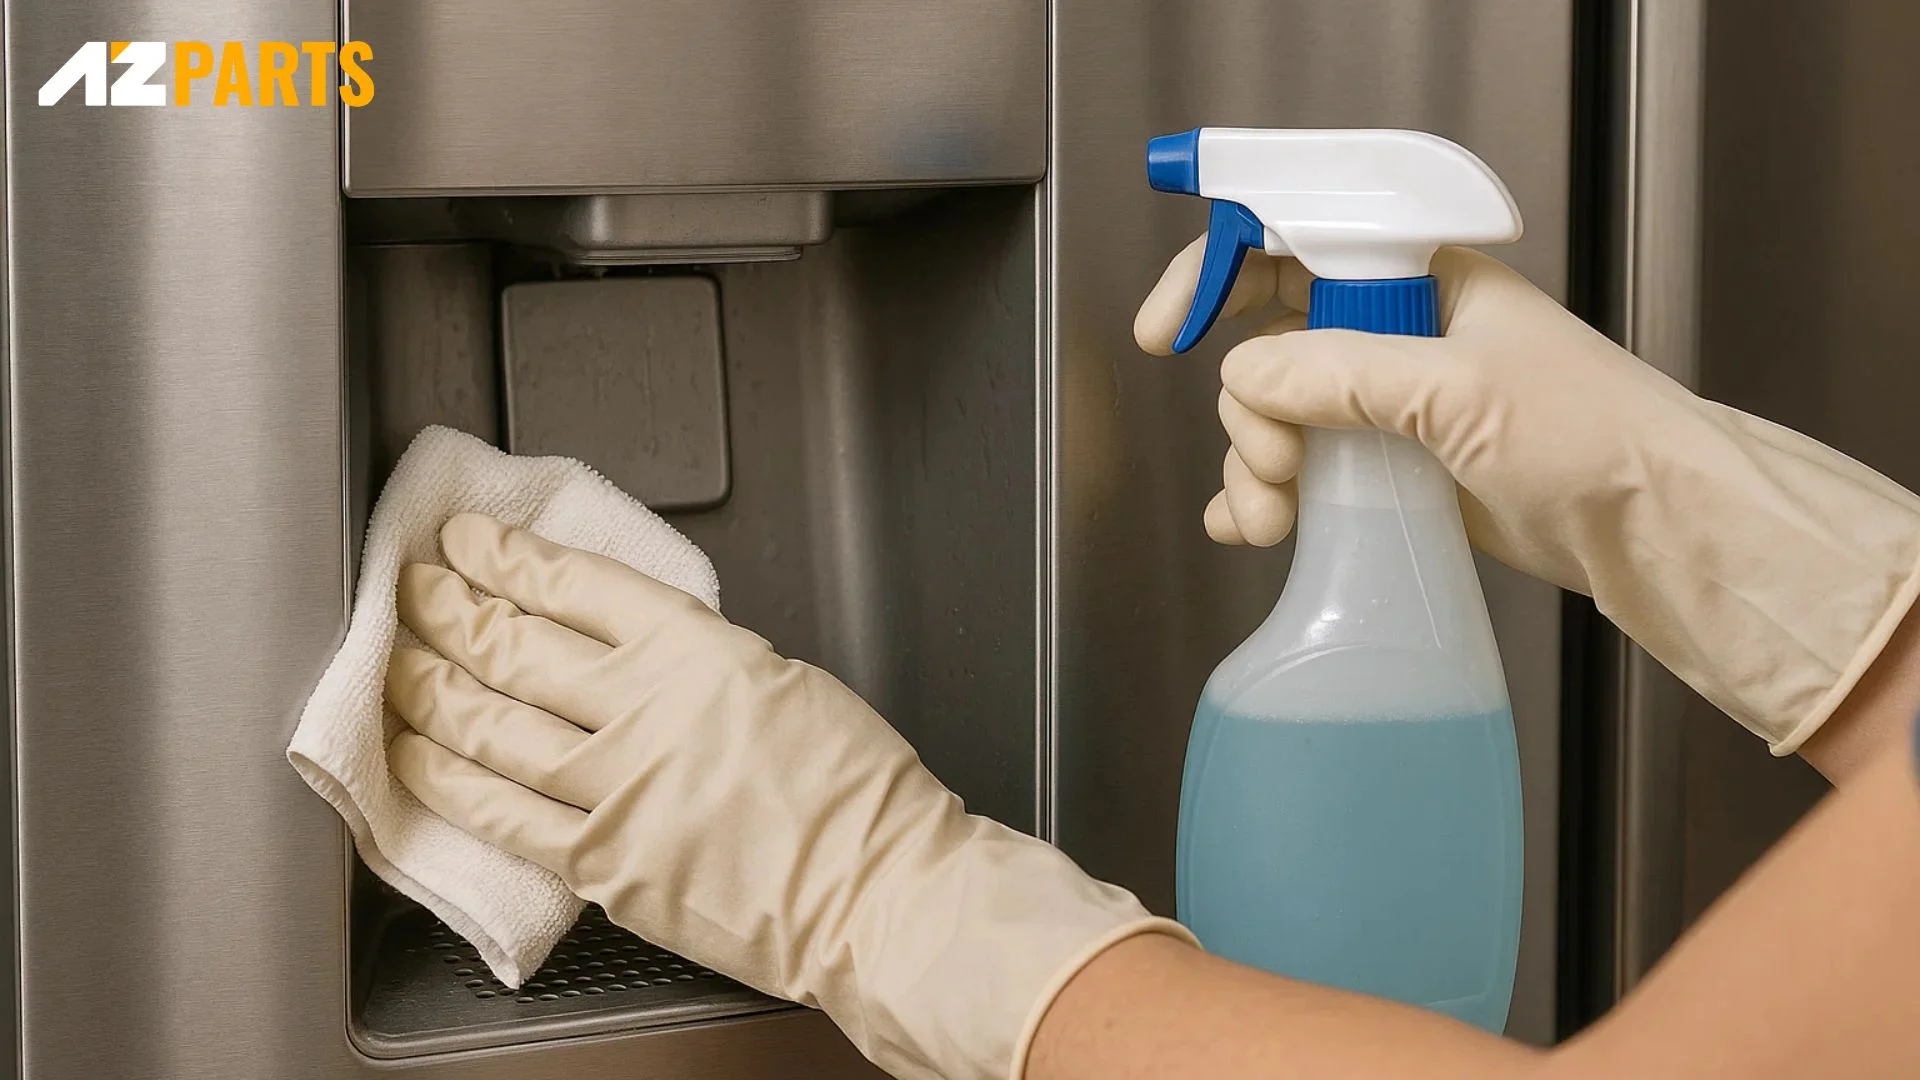
4.2. Clean the Water Dispenser
Water dispensers require regular cleaning to prevent bacterial growth and ensure clean, safe drinking water. Begin by disconnecting the water supply if possible, then clean the external dispenser area with a mild soap solution.
For internal cleaning, follow manufacturer guidelines for your specific model. Some dispensers have removable parts that can be soaked and cleaned separately. Others require flushing with cleaning solutions specifically designed for water systems.
Replace water filters according to manufacturer recommendations, typically every 6-12 months. Fresh filters ensure clean water and prevent system strain that could require expensive repairs.
Clean the Water Dispenser (Source: AZParts)
Proper refrigerator cleaning maintains food safety, prevents costly repairs, and extends your appliance's lifespan. Following these six steps ensures thorough cleaning while protecting your investment. Regular maintenance prevents major issues and keeps your refrigerator running efficiently for years to come.
When replacement parts are needed, choose genuine components that ensure proper fit and optimal performance. Quality parts prevent future problems and maintain your refrigerator's efficiency and safety standards. Visit AZParts today for genuine refrigerator replacement parts and expert advice. Our comprehensive selection ensures you'll find exactly what you need to keep your appliance running smoothly.
Learn more about other refrigerator's mantaining tips:
Contact Info
Address: 8 The Green, Ste A, Dover, Delaware 19901-3618, United States
Email: support@azparts.com
Refrigerator
Further Reading
Further Reading

Repair help
August 1, 2025
If your LG fridge is not cooling, it can quickly become a frustrating and costly issue, especially when your food is at risk of spoiling. From blocked vents and faulty fans to broken thermostats and control boards, there are several potential reasons behind the cooling failure. Fortunately, many of these problems are fixable with the right approach. In this guide, AZParts will walk you through the most common causes and how to fix them efficiently.

Repair help
July 30, 2025
Is your refrigerator not making ice when you need it most? It’s a common frustration for many households, especially during hot days or busy weeks. From blocked water lines to faulty components, several issues can prevent your ice maker from working properly. In this guide, AZParts’ll walk you through the 7 most common reasons why your refrigerator might stop making ice, along with clear, step-by-step solutions to help you fix the problem efficiently.

Repair help
July 30, 2025
The compressor is a vital component of the refrigerator cooling system, responsible for maintaining a stable temperature to preserve food. During use, many users notice that the compressor becomes unusually hot without understanding the reason. This could be a warning sign of potential problems that may affect the cooling performance and lifespan of the appliance. The article below will help you understand why the refrigerator compressor gets hot, common causes of this issue, and effective solutions including replacing faulty parts with suitable components from AZParts.

Review
July 3, 2025
Your refrigerator is one of the most essential appliances in your home, quietly working day and night to keep your food fresh. But when it suddenly stops cooling, starts leaking, or makes unusual noises, it can quickly disrupt your daily routine. Instead of panicking or rushing to call a repair service, you might be able to solve the problem yourself if you know where to look. In this article, AZParts provides helpful, easy-to-understand information to help you identify the most common refrigerator issues and what you can do about them.

Repair help
June 24, 2025
If your freezer isn't staying as cold as it should, the issue could be caused by dirty condenser coils, faulty fans, worn door gaskets, or a malfunctioning control board. These problems not only affect your freezer but can also impact your refrigerator’s overall performance. At AZParts, we provide reliable replacement parts to help you fix cooling issues quickly and keep your appliance running efficiently.