Repair help
How to Fix Common Craftsman Snowblower Troubleshooting
AZparts Team
Updated on July 23, 2025
16 min read
Is your Craftsman snowblower refusing to start, stalling, or running rough in the middle of winter? You’re not alone. Many homeowners face similar issues when snow piles up and their machine won’t perform. In this comprehensive Craftsman snowblower troubleshooting guide, AZParts will help you discover the most common causes of Craftsman snowblower issues and show you how to fix them safely and effectively, so your machine is ready whenever you need it most.

1. Craftsman Snowblower Won’t Start
If your Craftsman snowblower refuses to start, the problem may be due to common fuel or ignition issues. Cold weather can expose small problems that prevent the engine from turning over. Here are the most likely causes and how you can fix them.
- Old or Stale Gasoline: Old gas loses its combustibility, especially in cold weather, making it harder for the engine to start. You should drain the old fuel completely in a well-ventilated area and refill the tank with fresh gasoline. This quick fix often restores proper engine function.
- Clogged Fuel Filter: A dirty or clogged fuel filter blocks gasoline from reaching the carburetor, causing the engine to stall or fail to start. You can test for this by spraying starter fluid into the spark plug hole and trying to start the engine. If it runs briefly, replace the fuel filter to restore proper fuel flow.
- Cracked or Leaking Fuel Line: A damaged fuel line may allow air into the system, disrupting fuel delivery to the carburetor. You should inspect the line for visible cracks or wear and replace it if needed. This repair ensures a steady fuel supply for combustion.
- Fouled or Worn Spark Plug: A dirty or damaged spark plug prevents the engine from igniting properly. Remove the spark plug, check for carbon buildup or wear, and replace it with a new snowblower spark plug if necessary. Make sure the spark plug gap matches the manufacturer’s specifications for optimal performance.
- Blocked Carburetor: If the fuel filter and spark plug are in good condition but the engine still won’t start, the carburetor may be clogged. In this case, cleaning or rebuilding the snowblower carburetor may be required to restore fuel delivery. You can follow a repair guide or consult a technician for assistance.
- Low Oil Level: Some snowblowers have a low-oil sensor that prevents the engine from starting when oil is too low. You should check the oil level and add the correct type if needed. Always verify the oil level before each use, especially in cold weather.
- Cold Weather Starting Issues: Extremely low temperatures can affect starting performance. You can use fresh fuel with a stabilizer and synthetic oil to improve cold-weather starts. Also, store the snowblower in a sheltered area to keep it slightly warmer.

If the carburetor may be clogged, you can follow a repair guide or consult a technician for assistance (Source: AZparts)
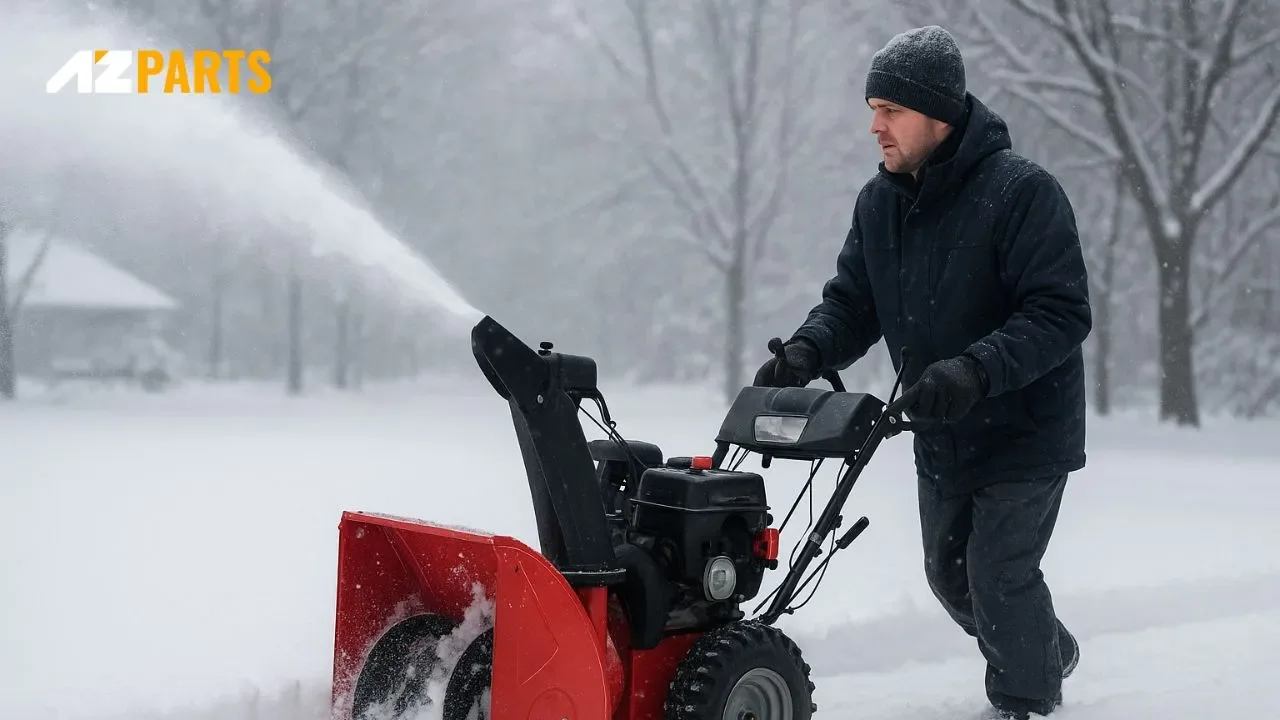
2. Craftsman Snowblower Runs Rough
If your Craftsman snowblower is running rough like: sputtering, misfiring, or lacking power, several mechanical issues may be the cause. Understanding and fixing these problems promptly will help restore smooth engine performance.
- Carburetor Issues: A faulty or clogged carburetor can disrupt fuel delivery, causing the engine to run unevenly. You should inspect the carburetor and either clean, rebuild, or replace it if necessary. This is often the most common solution for rough engine performance.
- Clogged Fuel Filter: A fuel filter that is blocked with debris will restrict fuel flow, causing the engine to sputter or lose power. You should check the condition of the fuel filter and replace it if it appears dirty or clogged. Replacing the snowblower fuel filter ensures consistent fuel delivery to the engine.
- Dirty or Worn Spark Plug: A spark plug covered in carbon buildup may fail to ignite the fuel properly, leading to engine misfires. You should remove the spark plug, inspect it for wear, and replace it if it looks fouled or damaged. A clean, properly gapped spark plug supports smooth combustion.
- Incorrect Valve Lash: If the valve lash is set incorrectly, it can affect engine timing and cause rough operation. You should check the snowblower valve lash according to your engine’s specifications and adjust it if needed. Proper valve adjustment improves engine performance and longevity.
- Leaking Engine Sump Gasket: A damaged sump gasket can lead to low engine compression, which causes poor and uneven running. Inspect the engine sump for any signs of oil leakage or gasket wear. If a leak is found, replace the gasket to restore compression and prevent further issues.
A faulty or clogged carburetor can disrupt fuel delivery, causing the engine to run unevenly (Source: AZparts)
3. Snowblower Starts Then Stalls
If your snowblower starts briefly but stalls after just a few seconds, this usually signals a problem in the fuel delivery system. One of the most common culprits is a clogged carburetor that cannot provide the correct mixture of fuel and air for combustion. This issue tends to arise after long storage periods, especially if old fuel was left in the tank.
The engine may start because pressing the primer bulb allows a small amount of gas to reach the cylinder. However, it stalls soon after because the carburetor is unable to continuously supply a proper fuel-air mixture for combustion.
To fix this issue quickly, you can replace the carburetor with a new one that matches your specific snowblower model. If you are unsure which part to choose, consult a carburetor part chart or contact your manufacturer for assistance in selecting the correct replacement.
As a cost-saving alternative, you can rebuild the existing carburetor using a snowblower kit. This kit includes the necessary gaskets and components to clean and refurbish the carburetor, restoring its ability to function properly.
If your snowblower starts then stalls, this usually signals a problem in the fuel delivery system (Source: AZparts)
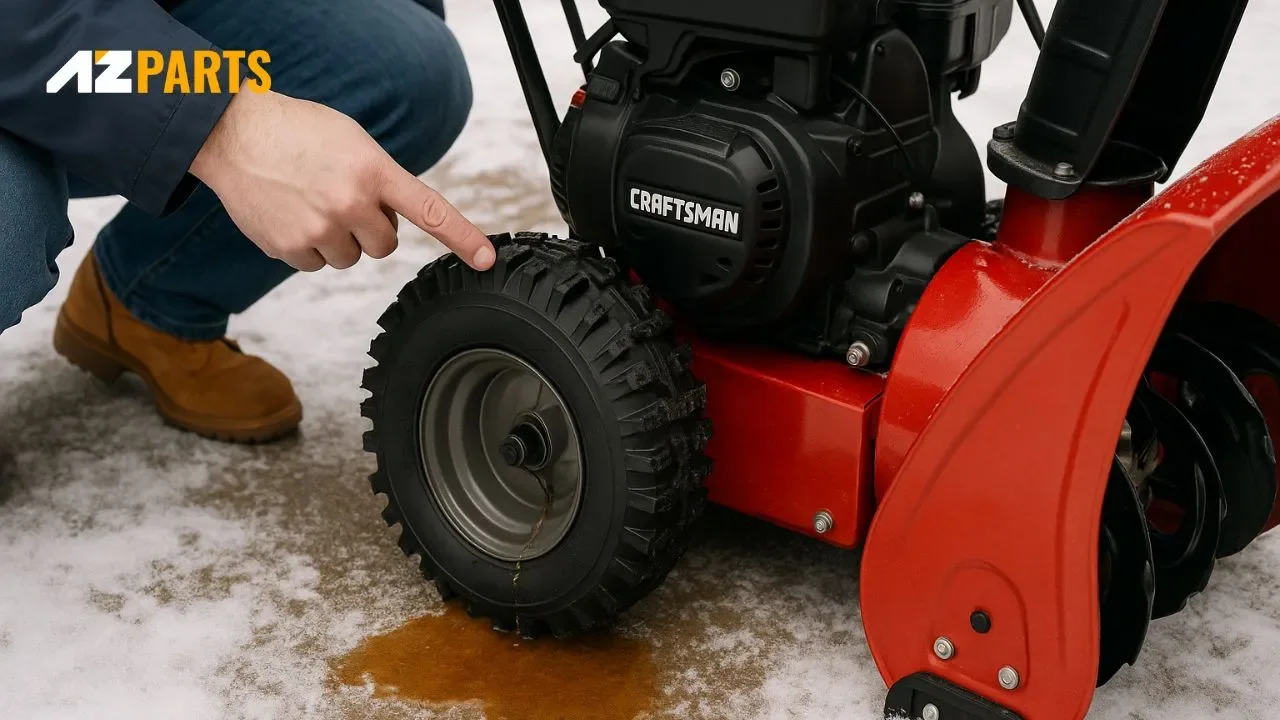
4. Craftsman Snowblower Wheels Not Engaging
If your Craftsman snowblower engine runs but the wheels do not turn, the problem likely lies in the drive system. Several key components must work together to transfer power from the engine to the wheels. When one of these parts is damaged, worn, or misadjusted, your wheels may stop engaging properly. Below are the most common causes and how you can fix them.
- Worn or Broken V-Belt: The V-belt connects the engine to the gearbox and allows power to reach the wheels. If the V-belt is worn, loose, or broken, the wheels will not move. You should inspect the belt for signs of wear or damage. If you notice cracks, fraying, or looseness, replace the belt with a compatible part. Also, make sure the belt is properly tensioned.
- Damaged or Slippery Friction Ring: The friction ring, also known as the friction wheel, has a rubber surface that grips the drive plate. If this rubber is worn down, wet, or greasy, it can slip and fail to turn the plate. First, try cleaning both the ring and the plate thoroughly. If the ring still slips or appears worn, you should replace it to restore traction and wheel movement.
- Faulty Traction Control Cable: The traction control cable engages the drive system when you pull the lever. If this cable is stuck, broken, or out of alignment, it will prevent the wheels from moving. You should check if the cable moves freely. If it feels stuck, apply a small amount of oil to the end of the cable. If the cable still does not respond, replace it with a new one.
- Broken or Misadjusted Clutch Cable: The clutch cable connects the handle lever to the clutch assembly. If this cable breaks or loses proper tension, the wheels will not engage. Inspect the clutch cable for breaks or disconnections. Make sure the cable is firmly attached at both ends. If the cable is intact but too loose, adjust its tension until it responds properly. Replace it with the snowblower clutch cable if it is broken.
- Damaged or Improperly Adjusted Cogged Belt: The cogged belt is another key component that links the engine to the gearbox. A worn or broken cogged belt will interrupt power transmission to the wheels. You should examine the belt closely for signs of wear or cracking. If the belt is damaged or misaligned, replace it with a snowblower cogged belt and ensure it fits snugly for optimal performance.
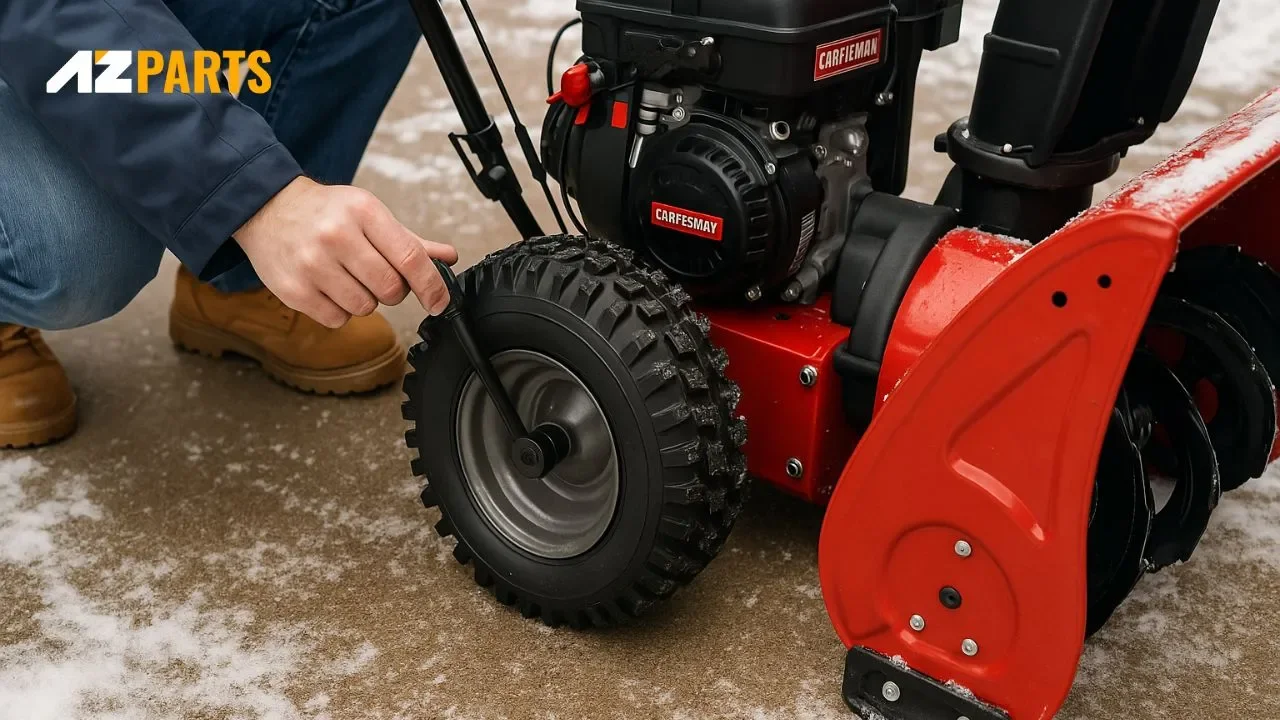
The V-belt connects the engine to the gearbox and allows power to reach the wheels (Source: AZparts)
5. Craftsman Auger Not Turning
If your Craftsman snowblower engine runs but the auger does not spin, several common mechanical issues could be to blame. The auger is responsible for scooping and throwing snow, so when it stops turning, the snowblower becomes ineffective. Identifying and fixing the issue promptly will help restore your snowblower’s performance during heavy snowfalls. Below are the most likely causes and their corresponding solutions:
- Broken Shear Bolts and Nuts: Shear bolts are safety components designed to break if the auger hits a solid object like ice or debris. This protects the gearbox and engine from damage. If your auger has stopped turning, inspect the shear bolts on both sides. If any are missing or broken, replace them with the correct type of shear bolts to restore auger function.
- Worn or Misadjusted V-Belt: The V-belt connects the engine to the gearbox and drives the auger. If this belt becomes worn, stretched, or misaligned, it can slip or fail to transmit power. Carefully inspect the V-belt for cracks, fraying, or looseness. Adjust its tension if needed, or replace it entirely if it shows signs of damage.
- Damaged Cogged Belt: Like the V-belt, the cogged belt also plays a role in transferring power to the auger. Over time, this belt can become brittle, slip out of place, or break altogether. Check the cogged belt for wear or misalignment. If the belt is broken or worn out, install a new one to ensure proper auger rotation.
- Failed Gear Case: The gear case transfers power from the engine to the auger shaft. If internal gears are stripped or broken, the auger will not spin. You should inspect the gear case if all other components are working correctly but the auger still does not turn. In case of damage, replace the snowblower gear case with a compatible unit.
- Broken Shear Pins: Shear pins are designed to break when the auger hits a hard object, protecting the gearbox and engine. If the auger is not turning, you should first check the shear pins. If you find any that are broken or missing, replace them immediately with compatible snowblower shear pins to restore function.
The auger drive cable engages the auger when you activate the controls (Source: AZparts)
6. Only One Auger Turns
If only one side of your snowblower’s auger is turning while the other remains stationary, there is likely an issue with one of the drive components. The auger system depends on shear pins, bolts, and bearings to keep both sides moving evenly. A broken part on one side can easily cause this imbalance. Below are the most common causes and how you can fix them.
- Broken Shear Pin or Shear Bolt: The shear pin or bolt secures the auger to the drive shaft and is designed to break if the auger hits a hard object. If one auger has stopped turning, you should inspect the shear pin or bolt on that side. If it is broken or missing, replace it with a new one that matches your snowblower model.
- Damaged Auger Assembly: If the shear pins are intact but the auger still doesn’t turn, the auger assembly itself may be damaged. You should check the auger blades for signs of bending or wear. If the blades are damaged or the entire auger mechanism is worn out, replace the full auger assembly to restore balance and performance.
- Seized Auger Bearing: The auger bearings allow smooth rotation. If one of the bearings seizes or fails, it can prevent that side of the auger from turning. You should inspect both auger bearings and replace any that are stiff, corroded, or locked up. After replacing the bearing, check the belt for possible wear caused by the added stress.
- Failed Gearbox: The gearbox sits between both sides of the auger and distributes power to each. If the central shaft still receives power but one side of the auger is not spinning, the gearbox may have failed internally. You should inspect the gearbox and replace it if it no longer transfers power equally to both auger shafts.
If one of the bearings seizes or fails, it can prevent that side of the auger from turning (Source: AZparts)
7. Craftsman Snowblower Leaking Gas
If you notice the smell of gasoline or visible fuel under your Craftsman snowblower, it is important to act quickly. A fuel leak can damage engine components, create a fire hazard, and reduce machine performance. Several common components may be the cause of the leak. Below are the main reasons why your snowblower might be leaking gas and how to fix each one effectively.
- Worn Carburetor Bowl Gasket: If gas is leaking from the bottom of the carburetor, the carburetor bowl gasket may be dried out, cracked, or missing. You should inspect this gasket closely. If it is no longer forming a tight seal, replace it with a new one that fits your snowblower model.
- Damaged Carburetor Gasket: Another possible cause of a leak at the bottom of the carburetor is a damaged carburetor gasket. You should check for visible wear or gaps. If the gasket looks brittle or worn, replace it with a new snowblower carburetor gasket immediately to prevent further leakage.
- Cracked Carburetor or Stuck Float: A cracked carburetor or a stuck float can also lead to fuel leaks. You should carefully inspect the carburetor body for cracks and corrosion. If the carburetor is damaged, replace it. If the float is stuck open, clean or rebuild the carburetor using a proper repair kit.
- Leaky Fuel Filter: Cracks in the fuel filter or loose connections can cause fuel to drip from your machine. You should inspect the fuel filter and replace it if any damage or leaks are found. Never try to repair a cracked filter, replacement is the only safe option.
- Faulty Fuel Pump: A fuel pump with cracks or worn fittings can also lead to leaks. Make sure that all fuel lines and the pulse line fit securely into the pump. If you see any cracks or pinholes in the pump, install a new one.
- Cracked Primer Bulb: The rubber primer bulb can harden and crack over time, leading to leaks during priming. If the bulb is leaking, you should replace it right away. Do not attempt to patch or seal the primer bulb.
- Damaged Fuel Line: A cracked or dry fuel line is one of the most common reasons for gas leaks. If you find any signs of wear or brittleness, replace the entire fuel line. Cutting off just the damaged part is not recommended, as the rest of the line may also fail soon.
- Leaky Fuel Shut-Off Solenoid: You should examine the fuel shut-off solenoid for cracks or loose fittings. If you detect any fuel leakage around this area, replace the solenoid immediately. Also inspect the shut-off lines and fittings for small cracks and holes.
- Faulty Fuel Shut-Off Valve: Leaks near the fuel shut-off valve usually mean the valve or its connections are faulty. You should tighten any loose fuel lines connected to the valve. If the valve itself is leaking or the hoses are damaged, replace them completely to stop the leak.
If gas is leaking from the bottom of the carburetor, the carburetor bowl gasket may be dried out (Source: AZparts)
8. Not Throwing Snow Properly
If your snowblower is running but fails to throw snow as it should, there may be several mechanical issues preventing the auger or impeller from functioning properly. Identifying the cause early and performing the correct repair can help restore your machine’s snow-clearing performance and prevent further damage.
- Broken Shear Pin or Shear Bolt: Shear pins and bolts are designed to break if the auger strikes a hard object like a rock or ice chunk. This prevents damage to the engine. When they break, the auger cannot turn, and snow will not be thrown. You should inspect all shear pins and bolts. If any are missing or broken, replace them with parts specific to your snowblower model.
- Damaged Auger Assembly: The auger is responsible for collecting snow and pushing it toward the impeller. If the auger blades are bent, worn, or damaged, they may fail to move the snow effectively. You should inspect the auger blades and replace them if needed. If the entire auger assembly is worn or broken, a full replacement may be required.
- Worn Auger Blades: Over time, the auger blades can become dull or worn, especially after frequent use. Worn blades will reduce the snowblower’s efficiency in collecting and throwing snow. Visually inspect the blades for signs of wear. If they are visibly worn down or chipped, install new blades.
- Faulty Cogged Belt: The cogged belt drives the auger and impeller system. If the belt is stretched out, broken, or misaligned, it may slip or fail to rotate the auger. You should inspect the cogged belt for any signs of wear or damage. Replace it if you see any cracks, fraying, or looseness.
- Worn V-Belt: The V-belt helps transfer power from the engine to the auger and impeller. If the belt is worn out, the machine may not be able to move snow properly. You should check the condition of the V-belt and replace it if it is cracked, frayed, or stretched.
- Broken or Jammed Impeller: The impeller throws the snow out through the discharge chute after the auger pushes it in. If the impeller is jammed or broken, the snow will clog in the chute or remain in the housing. You should examine the impeller for any physical damage or lodged debris. Clear any obstructions and replace the impeller if it is broken.
Over time, the auger blades can become dull or worn, especially after frequent use (Source: AZparts)
Craftsman snowblower problems are frustrating, especially when you need your machine most. But with the right troubleshooting steps and a little maintenance, you can restore its performance and keep your driveway clear all winter long. When snowblower replacement parts are needed, turn to AZParts for fast, reliable delivery and expert support, because your snow-clearing job shouldn’t have to wait.
Contact Info
Address: 8 The Green, Ste A, Dover, Delaware 19901-3618, United States
Email: support@azparts.com
Learn more about other snowblower issues:
Snowblower
Further Reading
Further Reading

Review
December 29, 2025
When winter arrives, clearing snow efficiently becomes essential for safety and convenience. However, many people often wonder about the difference between a snow blower and a snow thrower - two common snow removal tools that are sometimes confused. In this article, AZParts will help you understand how each machine works, its pros and cons, and guide you in choosing the right equipment based on your specific snow-clearing needs.

How-To Guides
December 25, 2025
As winter approaches, snow removal becomes an essential part of daily life, especially in areas with heavy snowfall. Snow blowers are powerful tools that make this task easier and more efficient. However, improper use of a snow blower can pose serious risks to both the operator and those nearby. In this article, AZParts will guide you on how to use a snow blower safely, effectively, and durably, while also sharing important tips to help you work with confidence in harsh winter conditions.
_1750053523.jpg&w=3840&q=75 "How to Start a Snowblower in 13 Steps (with Images)")
How-To Guides
December 22, 2025
When winter hits and snow starts piling up, starting your snow blower efficiently becomes essential. But after months of sitting idle, many machines can be tricky to get going. In this guide, AZParts walks you through the proper steps to start your snow blower with ease, along with maintenance tips and trusted replacement parts to keep it running smoothly all winter long.
%2520Cropped_1747039495.jpg&w=3840&q=75 "Your Snowblower Won’t Blow Snow? Check These Things")
Repair help
December 4, 2025
It’s one of the most frustrating winter problems when you fire up your machine, the engine roars to life, but nothing comes out of the chute. If your snowblower won’t blow snow, the problem likely lies somewhere between the auger and the impeller. In this article, AZParts will walk through the most common causes and practical fixes to get your blower working like new again.

Review
November 1, 2025
Winter brings the challenge of snow removal for many homeowners and property managers. Choosing between a single-stage and two-stage snow blower significantly impacts your snow-clearing efficiency and experience. In this comprehensive guide, AZParts explores the key differences between these two types of snow blowers, helping you make an informed decision based on your specific needs.