Repair help
8 Reasons Your Dryer Isn’t Drying And How to Fix It
AZparts Team
Updated on July 2, 2025
14 min read
Few things disrupt your day like discovering your dryer has run a full cycle but your clothes are still damp. Whether it's a clogged lint screen, poor airflow, or a faulty heating element, a dryer that isn’t drying can turn simple chores into a frustrating routine. In this guide, AZParts will help you troubleshoot the problem and get your dryer back to peak performance with quality replacement parts designed for durability and easy installation.

1. 8 Common Reasons Your Dryer Isn’t Drying Clothes
1.1. The Lint Screen Is Clogged
The lint screen, or lint trap, is your dryer’s first line of defense against airflow obstruction. Its job is to catch loose fibers, fuzz, and hair from your clothes during each drying cycle. However, when the lint screen becomes clogged, it significantly reduces the airflow needed to evaporate moisture, making your dryer less efficient, increasing drying time, and even posing a fire hazard if ignored for too long.
How to Check: Locate the lint screen, typically positioned either just inside the dryer door or on the top panel of the dryer. Carefully remove it from its slot and hold it up to a light source. If you’re unable to see clearly through the mesh, that’s a clear sign it needs cleaning. In addition to lint buildup, check for sticky residue caused by dryer sheets or fabric softener, as well as dust or grime accumulating along the frame or mesh edges. Any of these issues can restrict airflow and reduce your dryer’s efficiency.
How to Fix
After Every Load: Gently scrape off the visible lint from the screen using your fingers or a soft brush. Making this a consistent habit after each drying cycle helps maintain optimal airflow and ensures your dryer operates efficiently.
Weekly or Biweekly Deep Cleaning (especially if you use dryer sheets):
- Fill a sink or basin with warm water and mild dish soap.
- Submerge the lint screen and gently scrub both sides using a soft-bristled brush or sponge.
- Rinse thoroughly with clean water to remove soap and loosened debris.
- Shake off excess water and let it air dry completely before reinserting.
When to Replace: If the screen is torn, warped, or no longer fits snugly in its slot, it’s time to replace it. Using a damaged lint dryer filter can reduce efficiency and increase fire risk.
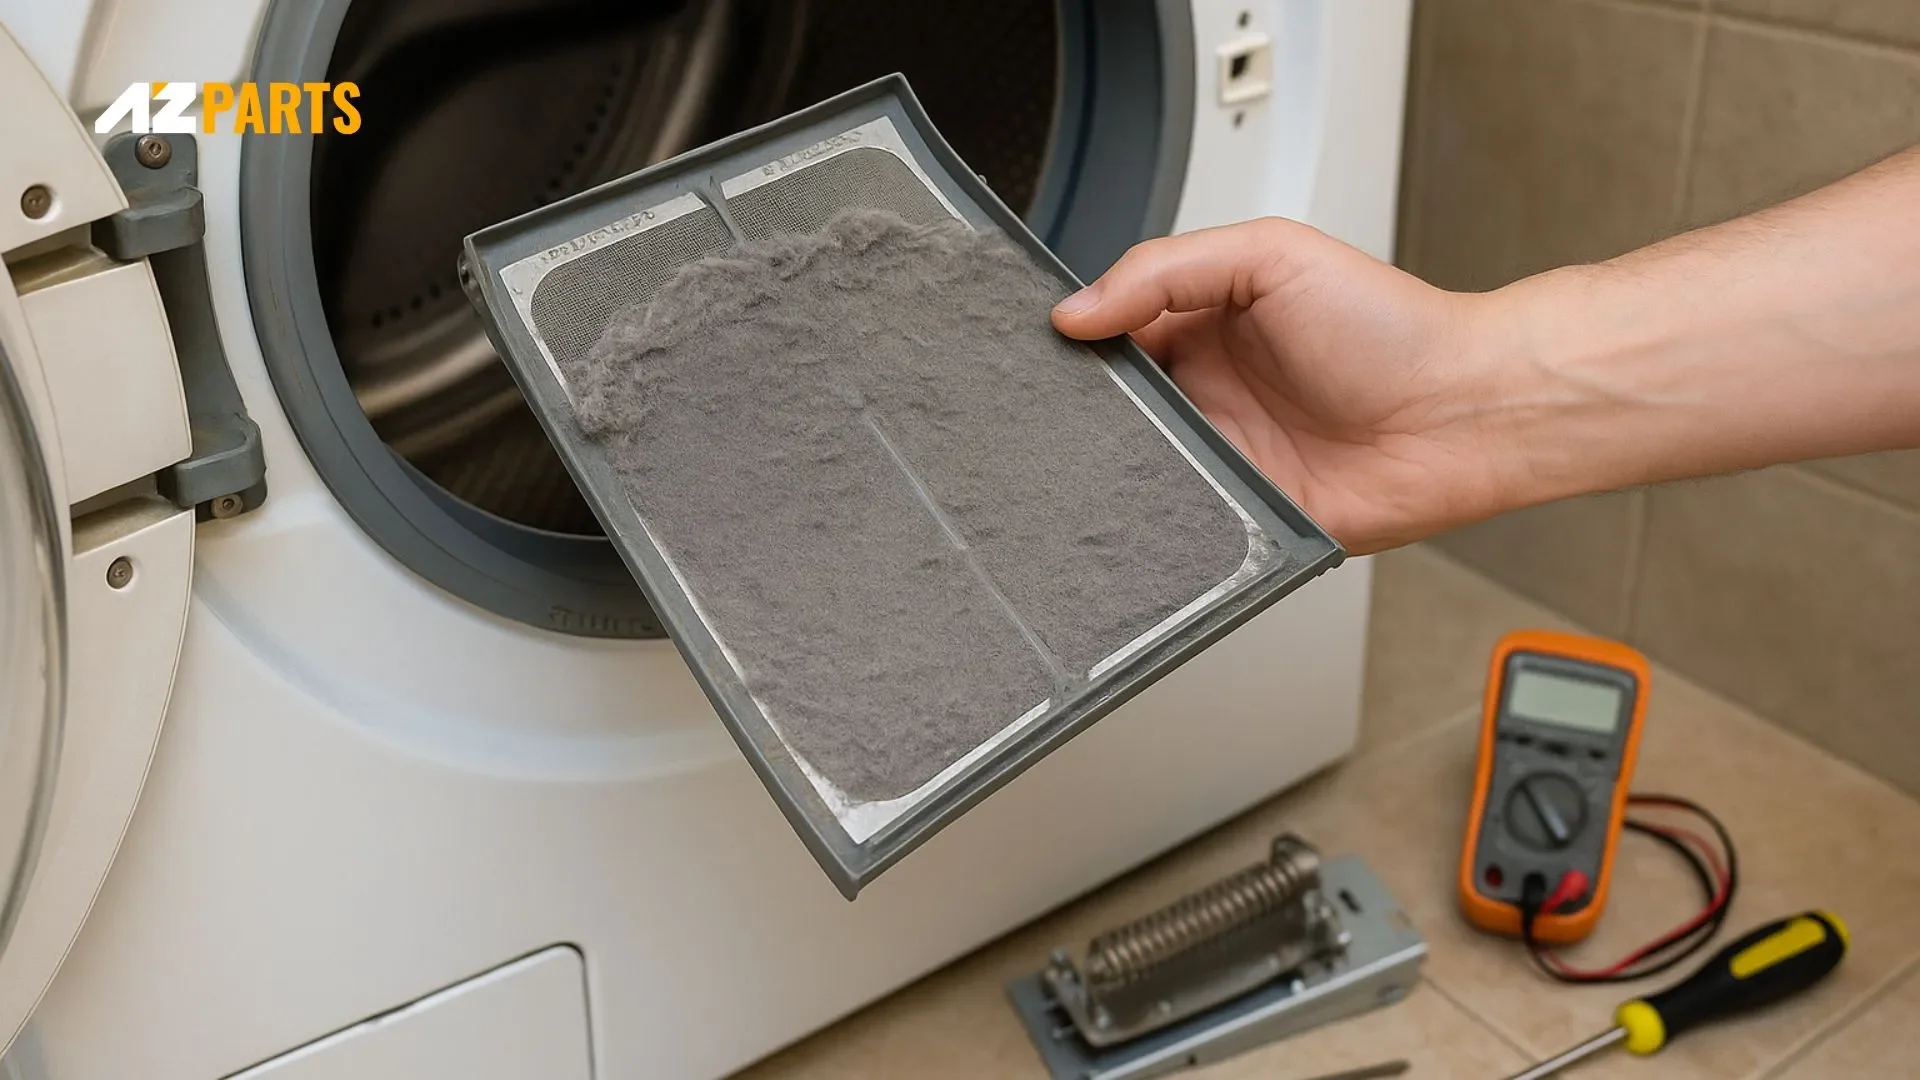
Hand Cleaning Lint Filter of a Clothes Dryer (Source: AZParts)
Pro Tip: Never run your dryer without the lint screen properly in place. And if your dryer starts taking longer to dry, always check the lint screen first. It’s the simplest fix with the biggest impact.
1.2. Dryer Vent or Duct Is Blocked
Even if your lint screen is clean, lint, dust, and debris can still accumulate in the dryer’s vent hose and external duct over time. A partially or fully blocked vent prevents hot, moist air from escaping the dryer, causing clothes to remain damp after a full cycle. Worse yet, a blocked duct significantly increases the risk of dryer fires, which are among the most common causes of household fires.
How to Check
- Observe drying performance: check if clothes are still damp after a full cycle or if it takes more than one cycle to dry a regular load. These are clear signs of reduced airflow or a possible vent issue.
- Feel for airflow: going outside to the vent outlet while the dryer is running. Place your hand near the opening. If the airflow isn’t strong and hot, there may be a blockage in the vent system.
- Look for warning signs that may suggest a blocked vent. These include a musty odor in freshly dried clothes, the dryer feeling hotter than normal on the outside, and visible lint buildup around the vent cover or behind the machine.
How to Fix
Step 1: Disconnect the Dryer: Unplug the dryer. For gas models, also shut off the gas valve. Slide the dryer away from the wall to access the vent hose.
Step 2: Remove the Vent Hose: Use a screwdriver or pliers to detach the vent hose from both the dryer and the wall.
Step 3: Clean the Hose: Shake out loose lint, then use a vacuum or vent brush to remove deeper debris. For stubborn lint, push a long brush through the hose.
Step 4: Clean the Wall Duct: Insert a vacuum hose or brush into the wall duct. For long ducts, use a cleaning kit with extendable rods.
Step 5: Reconnect and Test: Reattach the hose securely to the dryer and wall. Avoid bending or crushing it when moving the dryer back. Plug in the power, and if it’s a gas dryer, reopen the gas valve. Test the machine.
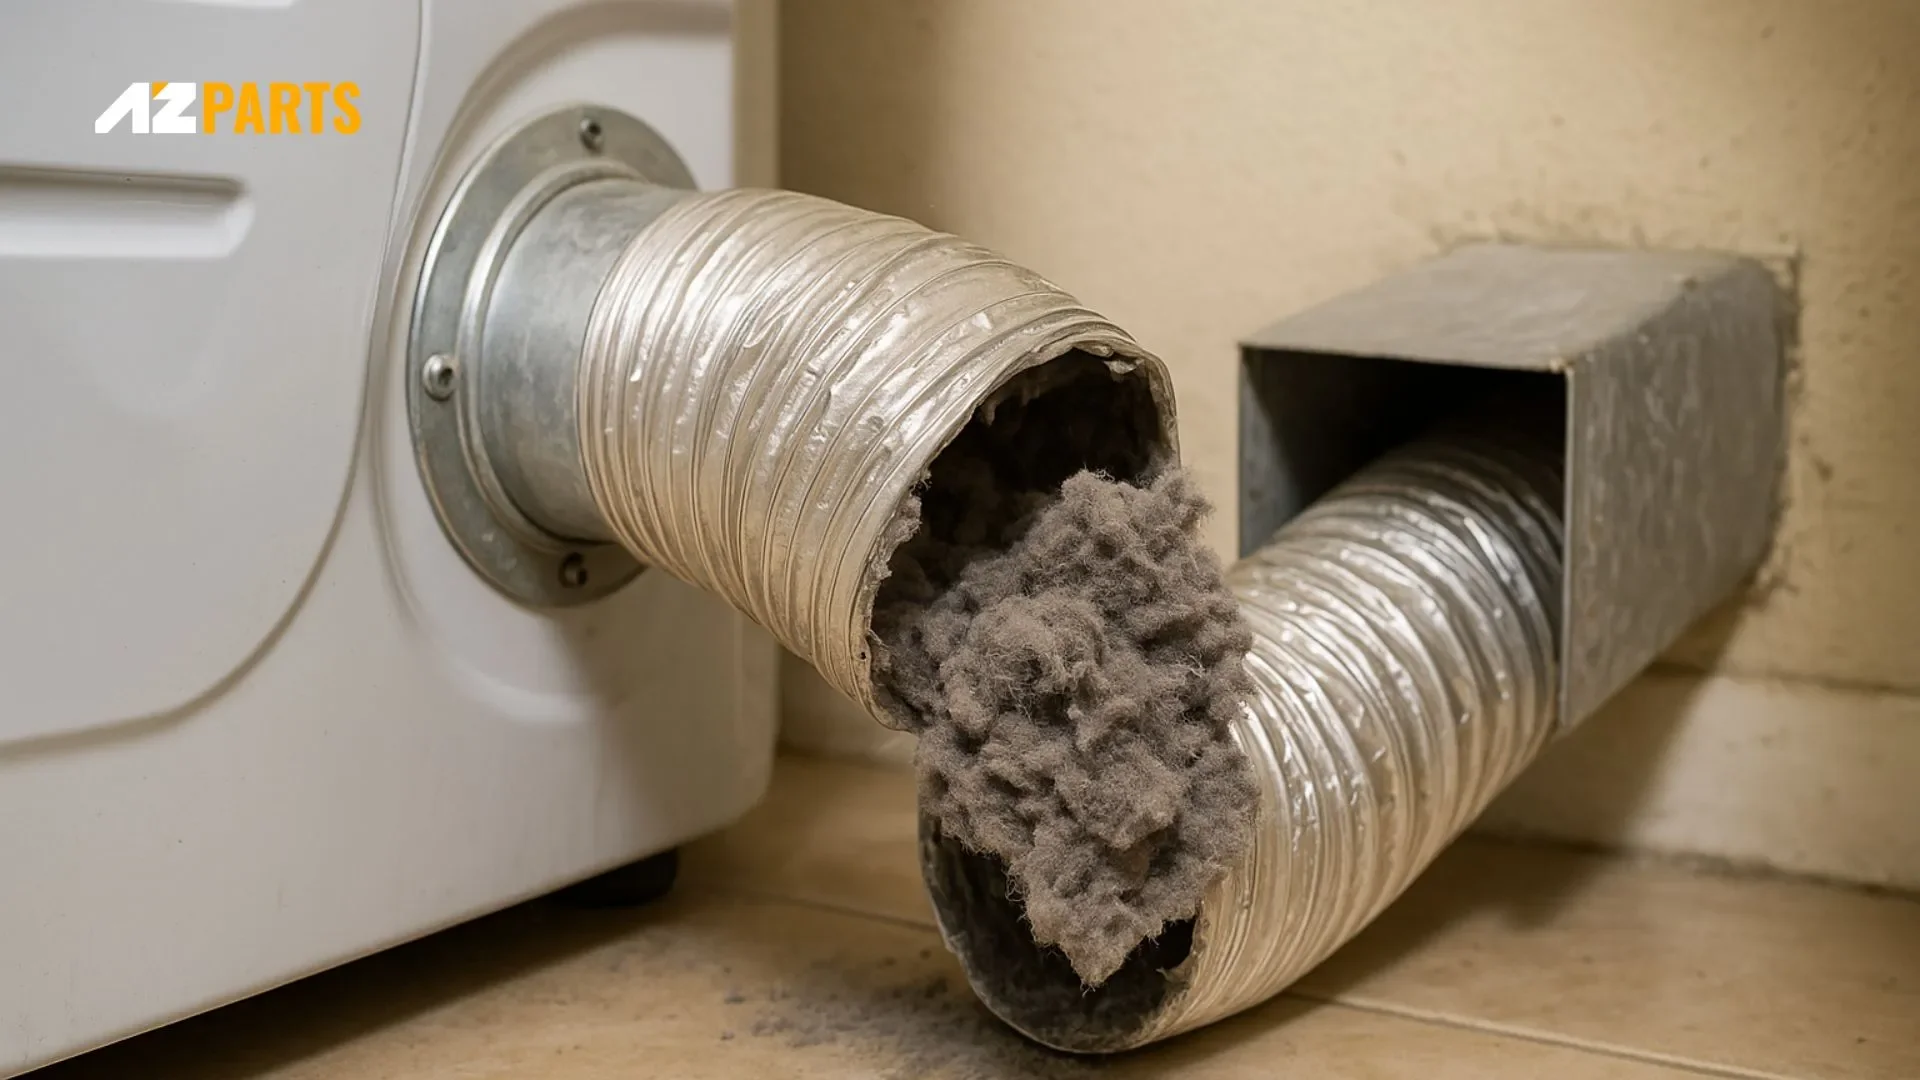
Partially Blocked Dryer Vent Causing Damp Clothes (Source: AZParts)
How Often Should You Clean the Vent?
Usage Type | Recommended Cleaning Frequency |
Light use (1–2 loads per week) | Every 12 months |
Moderate to heavy use (3+ loads per week) | Every 6 months |
Homes with pets or long duct runs | Every 3–4 months |
Safety Tip: Avoid using foil-only or plastic vent hoses, as they’re flammable and prone to collapsing. For safer and more reliable airflow, use a reinforced, multi-layered dryer vent hose.
1.3. Overloaded Dryer
Overloading is a common but preventable issue that restricts airflow, making clothes stay damp, especially those in the middle of the load. It also puts extra stress on the dryer's internal parts, which can lead to overheating, damage to the drum bearings, and a shorter machine lifespan.
How to Check: Pause the cycle and open the dryer door. If clothes are pressed tightly together or barely shifting during tumbling, the machine is overloaded. Another telltale sign is when only the outermost clothes dry while inner items remain wet, which is a classic result of insufficient airflow.
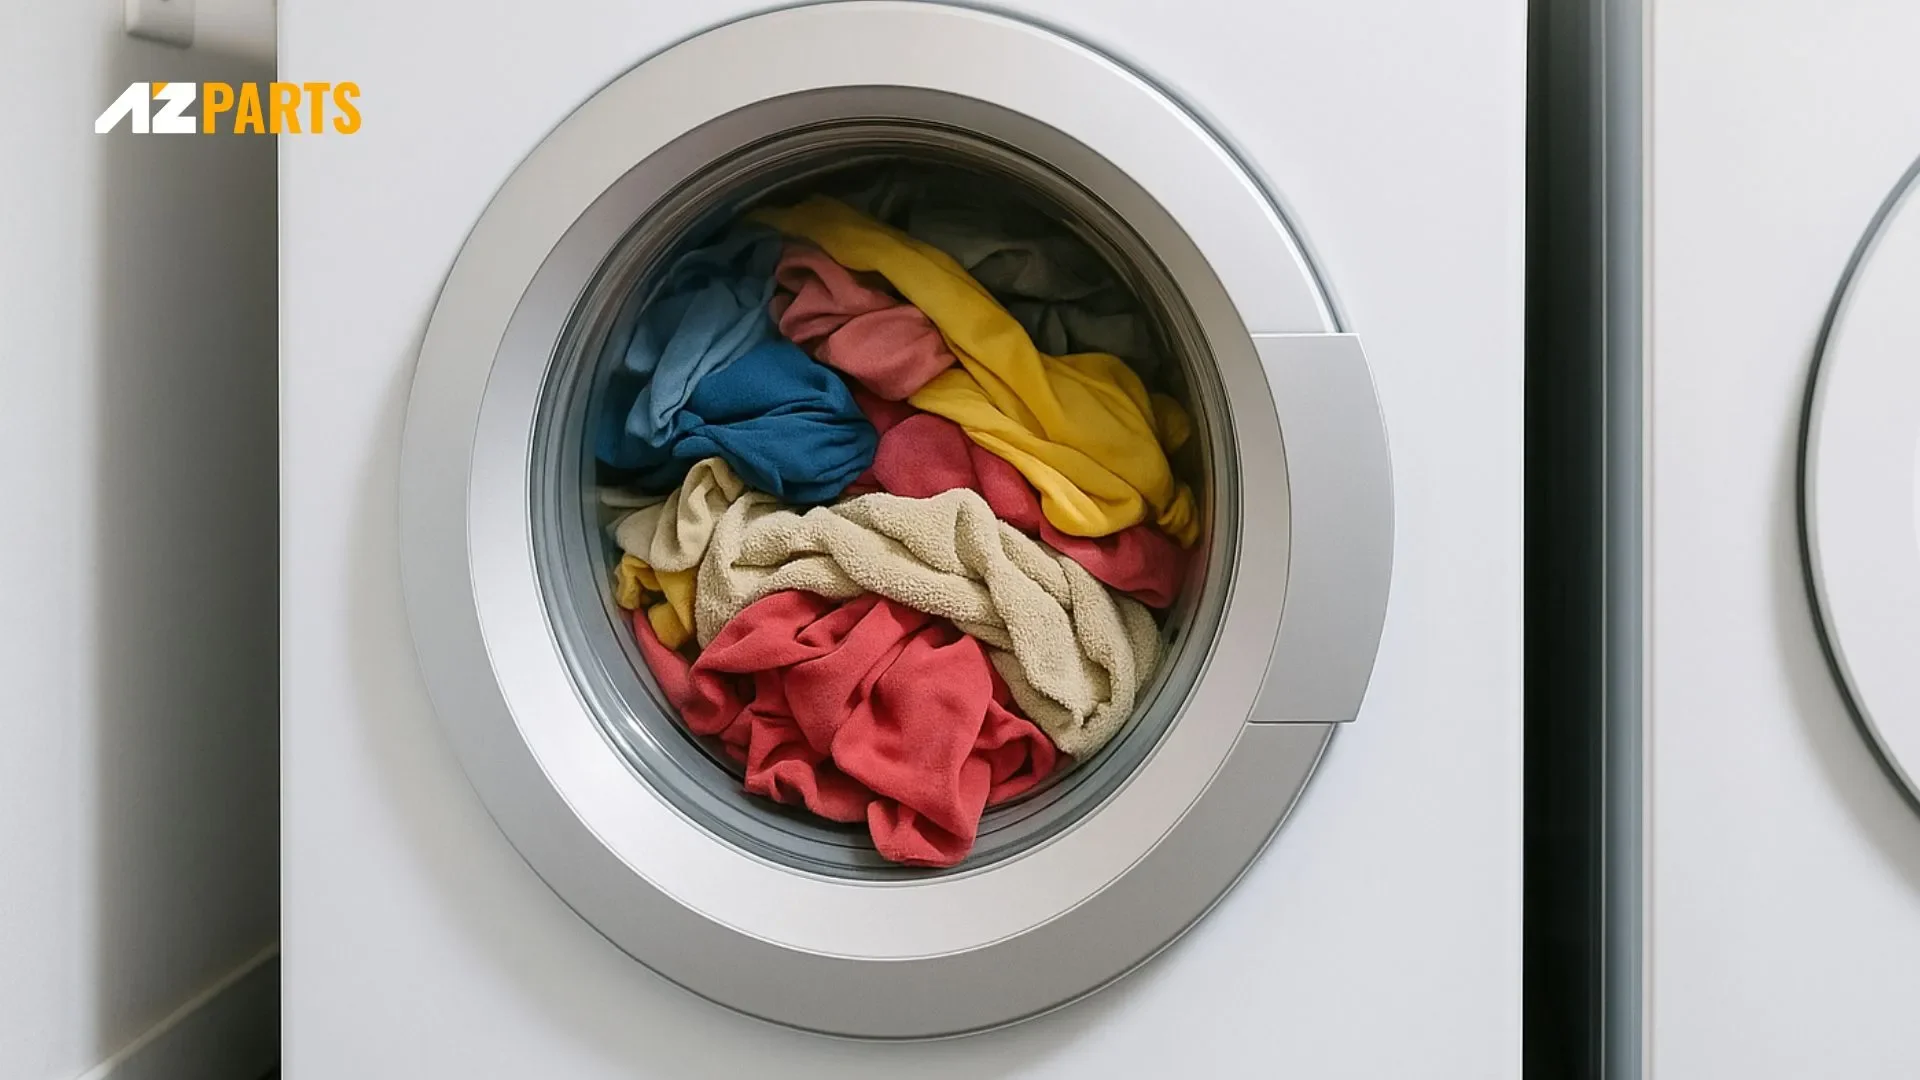
Dryer Drum Jam-Packed with Laundry (Source: AZParts)
How to Fix
- To improve drying efficiency, reduce the load so it fills only about two-thirds of the drum. This gives clothes enough space to tumble freely and allows hot air to circulate evenly.
- Mixing heavy items like jeans or towels with smaller, lightweight garments helps create natural gaps between fabrics, improving airflow and shortening drying time.
- Always refer to the manufacturer's recommendations for load size. Many people are surprised to learn that what they consider a full load is actually too much for optimal drying.
- By keeping your dryer within its capacity, you’ll dry clothes more effectively, conserve energy, and extend the lifespan of the appliance.
1.4. Incorrect Dryer Settings
Using the wrong drying cycle is a common reason why clothes come out damp, especially when drying heavier fabrics like towels or denim. Low-heat modes such as “Air Fluff” or “Delicates” may not provide enough warmth or time for complete drying. Similarly, relying on a timed cycle can cut the cycle short before the laundry is actually dry.
How to Check
Take a moment to look at the settings before starting the dryer. If you’re drying thick items but have selected a gentle cycle like “Air Fluff,” “Delicates,” or “Timed Dry,” the machine may not be generating enough heat to get the job done.
How to Fix
Choose the appropriate setting for each load based on fabric type. Use high heat for towels and thick cotton, medium heat for T-shirts and everyday wear, and low or delicate heat for lighter, synthetic materials. For best results, use Auto Dry or Sensor Dry, which automatically adjusts the cycle based on moisture levels to ensure your clothes come out completely dry without overdrying them.

Using the Wrong Drying Mode for Heavy Fabrics (Source: AZParts)
1.5. Heating Element Failure (Electric Dryers)
In electric dryers, the heating element is what warms the air that flows through the drum. If the heating element becomes damaged, burned out, or covered in debris, the dryer will still spin but won’t produce hot air. This results in clothes remaining damp, even after a full cycle. Over time, wear and tear or power surges can cause the element to fail, making it one of the most common reasons for heat-related dryer issues.
How to Check
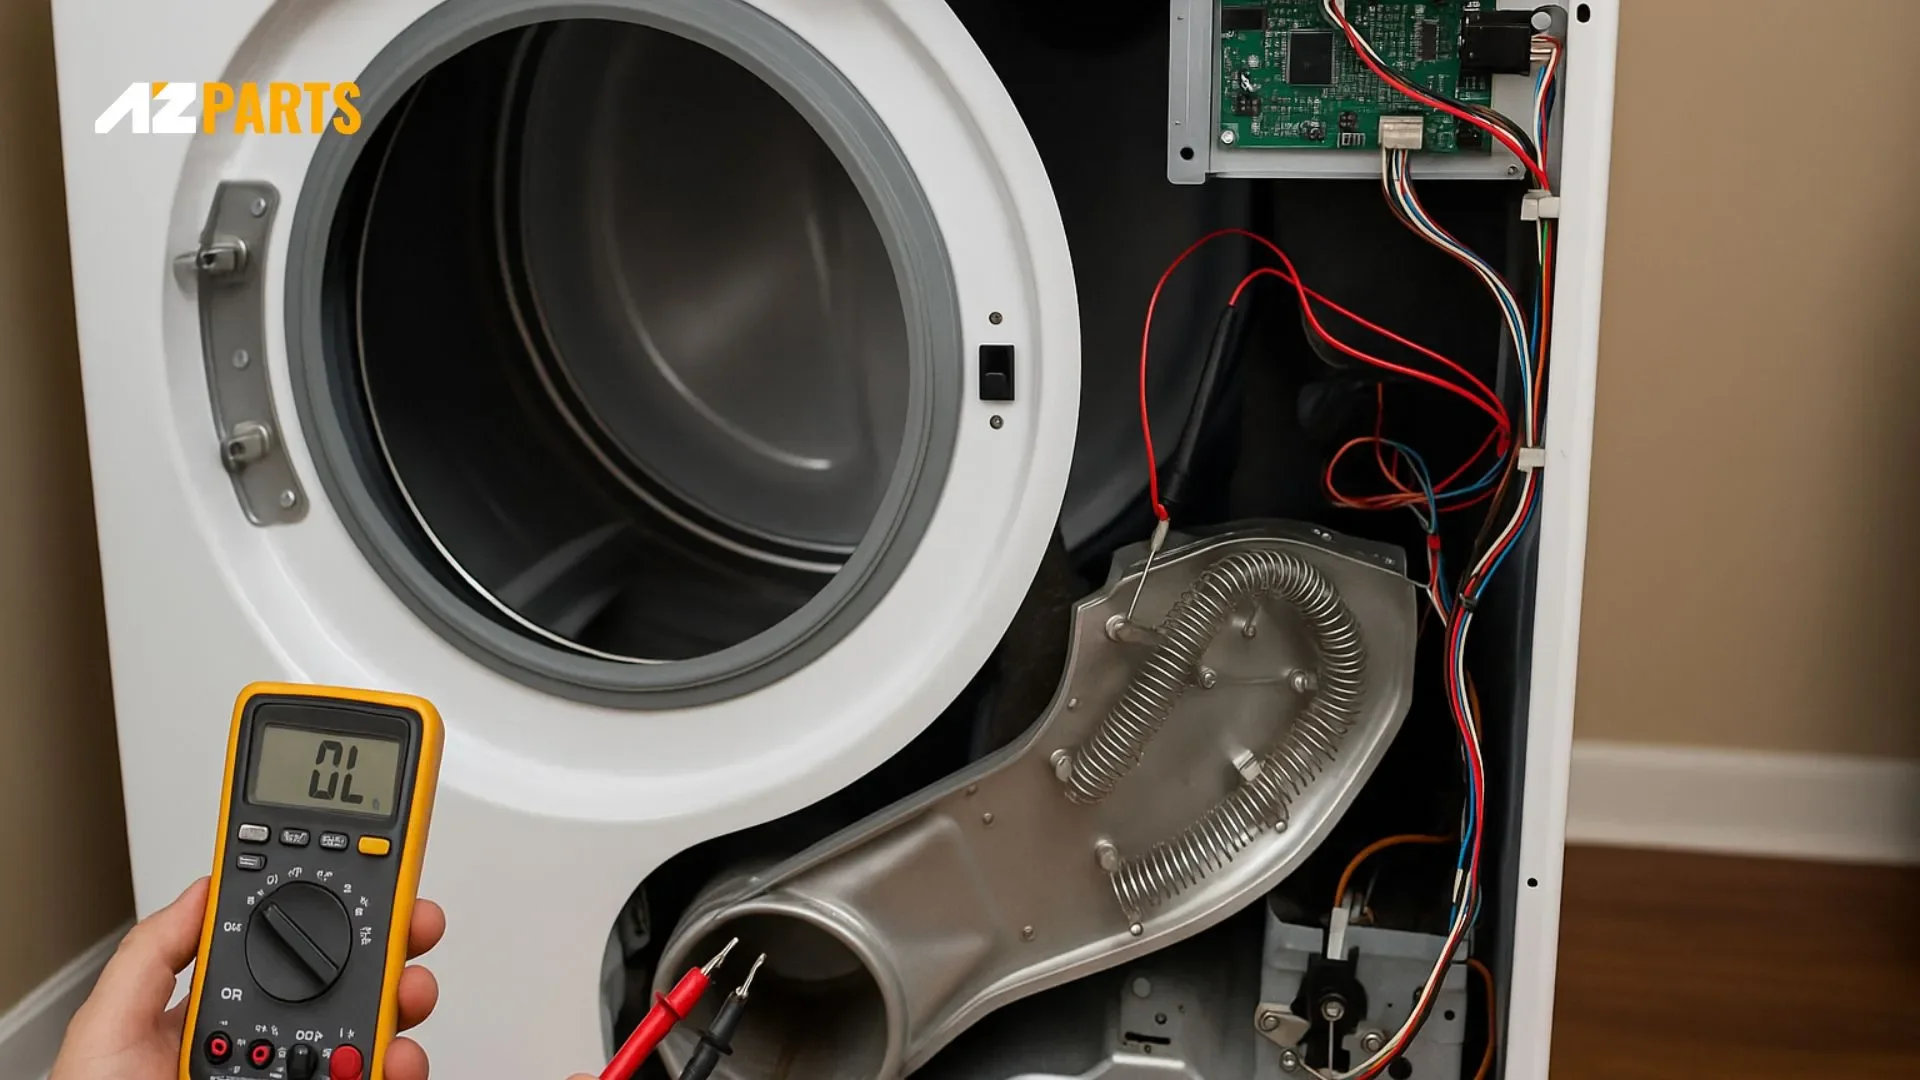
Run a cycle and carefully feel the inside of the drum after a few minutes. If the drum is spinning but no heat is coming out and the clothes stay cold, the heating element may not be functioning. You may also notice the dryer takes much longer than usual to finish a cycle. Visually inspect the back panel area or the heating chamber (if accessible) to ensure there’s no visible debris or damage to the element.
How to Fix
Unplug the dryer and test the heating element with a multimeter. A functioning element should show electrical continuity. If it doesn't, the part is faulty and must be replaced. Make sure to replace it with a model-specific dryer heating element or dryer element coil for your machine to restore heat efficiently. Also ensure the element isn’t touching metal surfaces or blocked by lint, which can cause overheating or short circuits. If you’re unsure how to safely access or replace the part, hiring a qualified technician is recommended.
_1751447394.webp)
Heating Element Failure So Clothes Stay Damp Despite Full Cycle (Source: AZParts)
1.6. Gas Supply Issue (Gas Dryers)
Gas dryers generate heat through a gas burner, which depends on a continuous gas supply and a properly working ignition system. If either the gas flow is interrupted or the ignition components fail, the dryer will still tumble but produce no heat, causing clothes to remain damp even after a full cycle.
How to Check
Listen for a clicking sound when the dryer starts. If it clicks but doesn’t ignite, the ignitor may not be functioning. Also, check if the gas shutoff valve is closed or if there are any loose or disconnected fittings in the gas line. Another sign is the absence of heat entirely, despite the drum spinning normally.
How to Fix
Make sure the gas shutoff valve is fully open and the hose is securely connected. If the ignitor fails to glow or the gas doesn’t ignite, the issue could lie with the dryer flame sensor, dryer coil valve, or dryer solenoid valve, which regulate gas flow to the burner. If you use propane, a faulty or blocked dryer gas converter may also affect performance. These components may need to be tested and replaced with compatible parts. Because gas repairs involve safety risks, it’s highly recommended to have a certified technician handle the diagnosis and installation.
_1751447412.webp)
No Heat Issue in Gas Dryer Despite Running (Source: AZParts)
1.7. Thermostat or Thermal Fuse Problem
The thermostat and thermal fuse play a vital role in regulating the dryer's temperature and preventing it from overheating. When these components detect excessive heat, they interrupt the circuit to avoid further damage or fire hazards. If either part fails or trips, the dryer may stop producing heat even though the drum continues to turn. In some cases, the entire machine may refuse to start.
How to Check
Pay attention to signs like the dryer powering on but not generating heat, or shutting off abruptly within a few minutes of running. These behaviors often point to a blown thermal fuse or malfunctioning thermostat.
How to Fix
To begin the repair, unplug the dryer and remove the back access panel. Locate both the thermal fuse and the thermostat, typically found near the heating element or blower housing. Use a multimeter to check for continuity. If either part shows no electrical signal, it needs to be replaced. Make sure to choose a compatible dryer thermal fuse, dryer thermistor, or dryer thermal limiter based on your dryer's make and model. Replacing these components with quality parts ensures safe temperature regulation and restores normal drying function. If you’re unsure which part to buy or how to install it properly, hiring a professional technician is the safest approach.
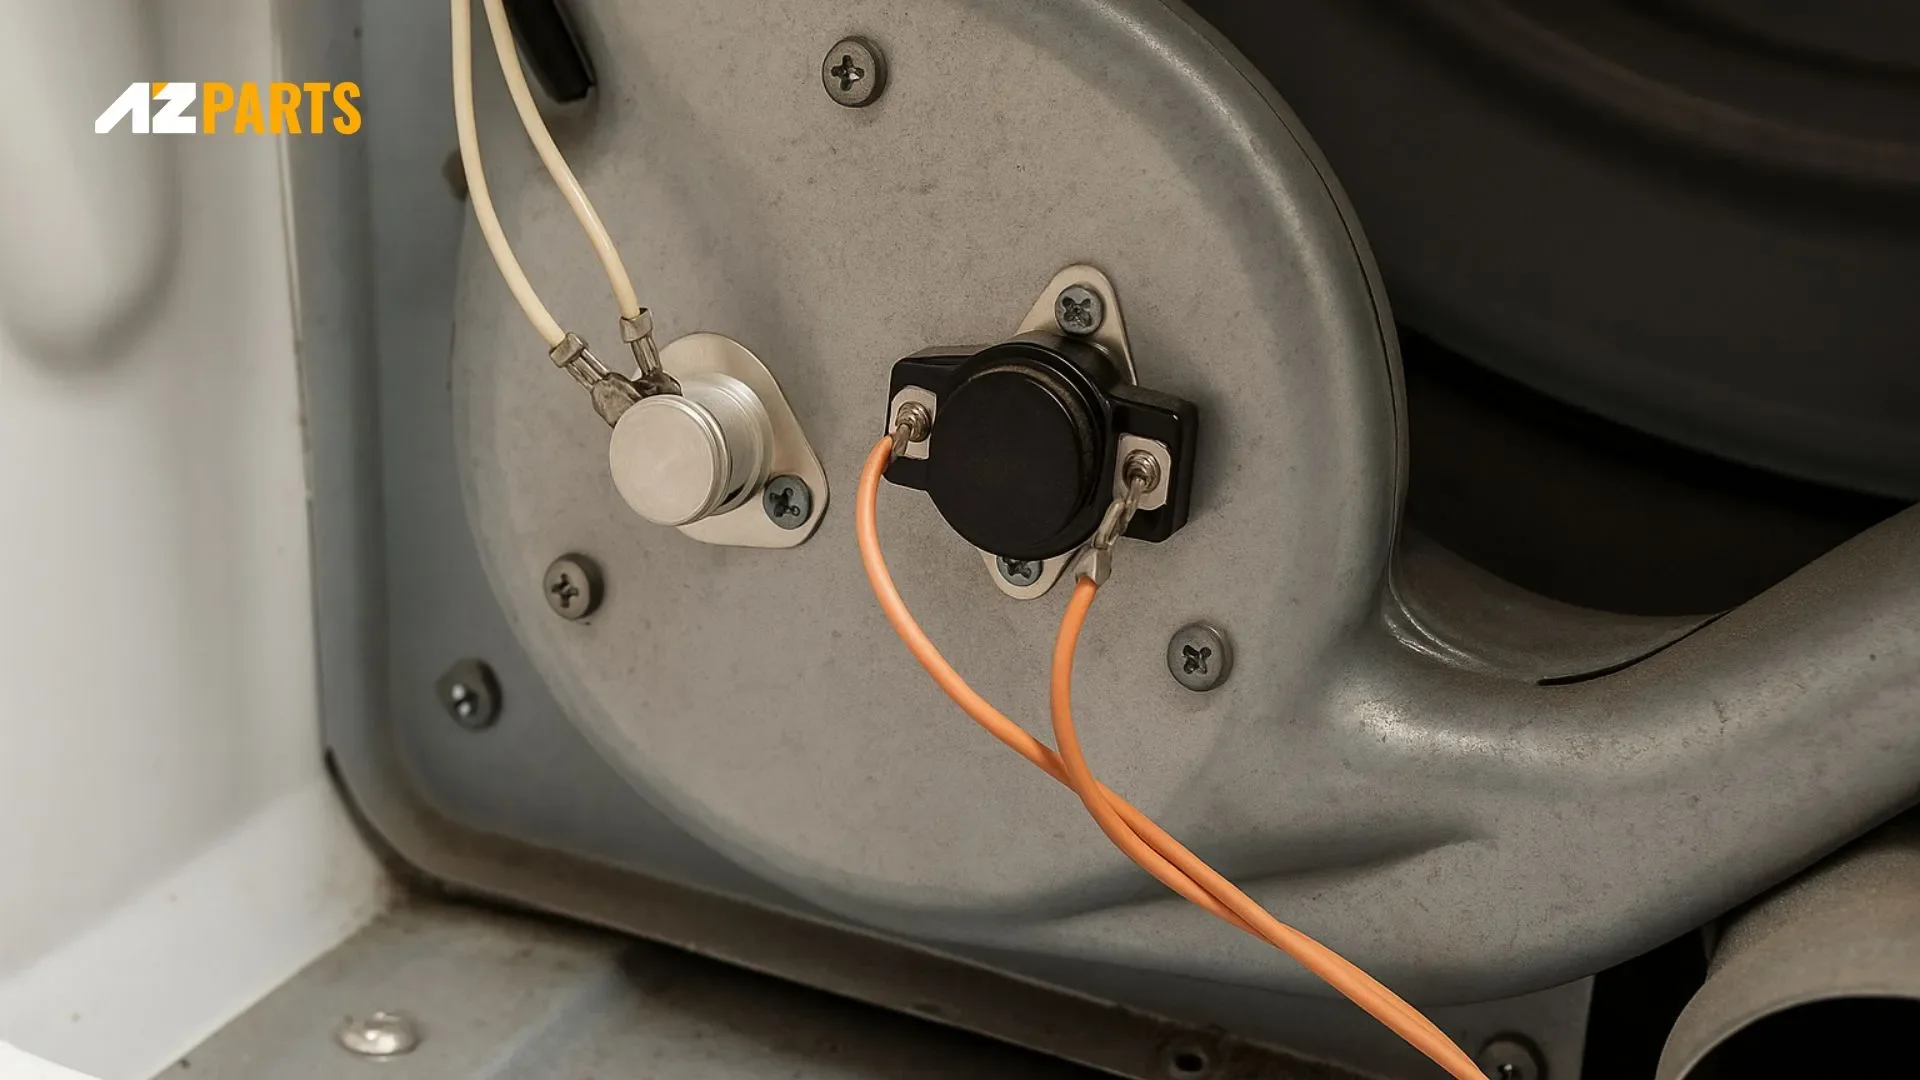
Dryer Not Heating Due to Thermostat or Fuse Issue (Source: AZParts)
1.8. Moisture Sensor Malfunction
Modern dryers are equipped with moisture sensors that detect when clothes are dry and automatically end the cycle to save energy and prevent overdrying. However, if the sensor becomes dirty or malfunctions, it may incorrectly signal that the load is dry, causing the dryer to shut off too early and leave your clothes damp.
How to Check
If your dryer consistently stops too soon and your clothes are still moist, the moisture sensor could be the issue. These sensors are usually located near the lint trap or along the inner drum wall, often near the drum paddles. Visually inspect the sensor area for any buildup of lint, detergent residue, or fabric softener film.
How to Fix
Start by cleaning the sensor strips with a soft cloth and either white vinegar or rubbing alcohol to remove any buildup that could interfere with accuracy. Avoid using abrasive materials that might scratch the sensor surface. If cleaning doesn’t solve the problem, the sensor may need further testing or professional replacement, especially if your dryer is older or heavily used.
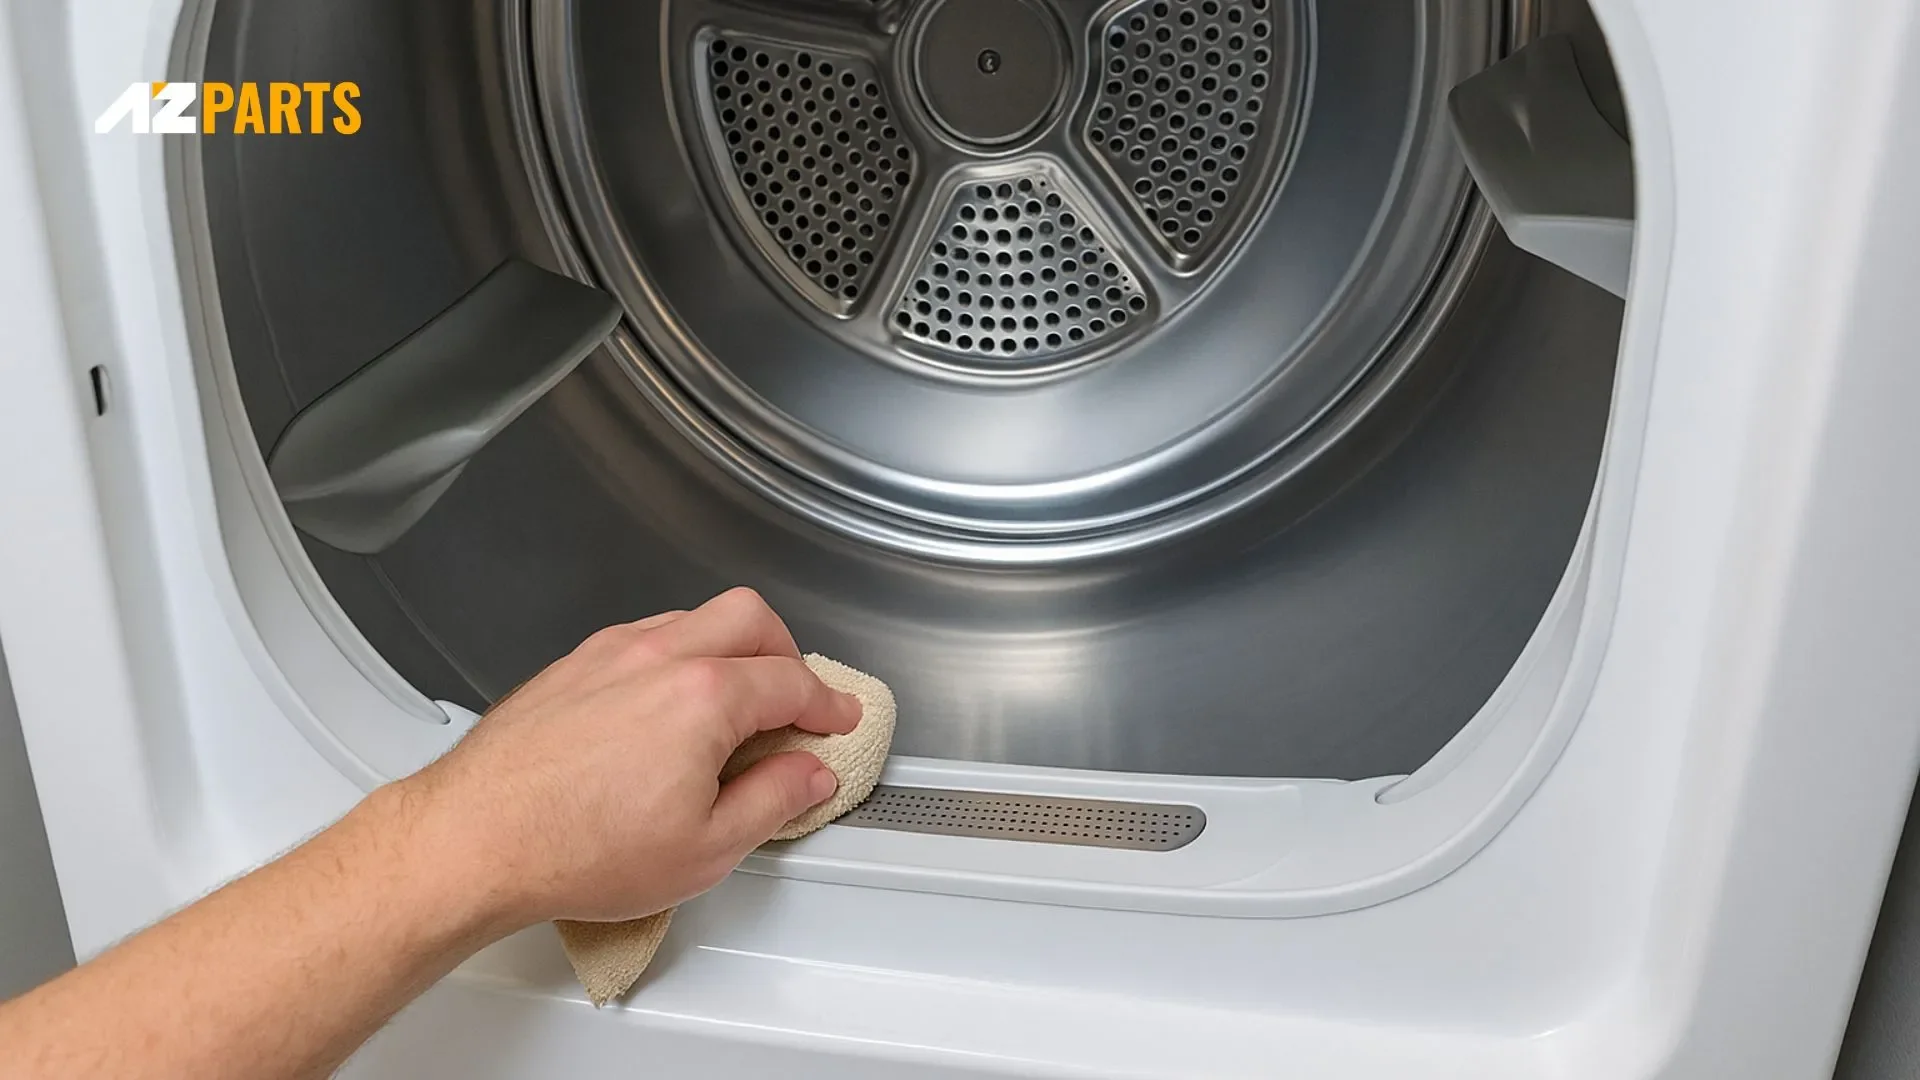
Cleaning the Moisture Sensor to Prevent Damp Loads (Source: AZParts)
Bonus Tip
For consistent performance, always clean the lint screen after every load. In addition, schedule a full dryer vent cleaning every six to twelve months to prevent airflow issues and ensure your dryer operates at peak efficiency.
2. Warning Signs Your Dryer May Need Replacement
Repeated Heating Failures
When the dryer tumbles but fails to produce heat, even after replacing the heating element or thermal fuse, it’s likely more than just a minor issue. Start by checking the heating element and fuse with a multimeter to confirm they still have continuity. If these components work but heat is still absent, the root cause may involve faulty internal wiring or a damaged control board. Ongoing heating problems often signal deeper electrical failures. In many cases, replacing the entire unit becomes a smarter, more cost-effective solution. Relevant parts to consider include the heating element, element coil, thermal fuse, and thermal limiter.
Checking Dryer Heating Element and Fuse with Multimeter (Source: AZParts)
Clothes Always Come Out Damp
If you find yourself rerunning loads because clothes consistently emerge damp, even after cleaning the lint screen and checking for vent blockages, your dryer may no longer be circulating heat efficiently. This issue often points to a failing moisture sensor, malfunctioning dryer thermostat, or aging heating system. When performance continues to decline despite part replacements, it may be time to invest in a new, energy-efficient unit.
Burnt Smell or Tripped Breakers
A noticeable burnt odor coming from the dryer or frequent circuit breaker trips are serious red flags. These symptoms may indicate overheating, electrical shorts, or internal component failures. Immediate inspection is necessary, especially if the issue persists after cleaning or part replacement. Continued operation under these conditions poses safety risks and increases the chance of fire hazards.
Excessive Noise or Vibration
Unusual banging, grinding, or excessive shaking during operation suggests internal wear. Common causes include worn-out drum rollers, a loose motor pulley, or a damaged rear bearing. While some of these parts can be replaced individually, constant noise and vibration may reflect widespread mechanical fatigue. If multiple components show signs of wear, replacing the entire unit may be the most practical route.
Quick Summary Table
Warning Sign | Possible Fixes | When to Replace |
No heat, even after repairs | Heating element, Fuse | The issue persists after multiple part replacements |
Runs, but clothes stay wet | Moisture sensor, Belt | The airflow/motor system may be failing |
Burnt smell or breaker trips | Motor, Start switch | Recurring electrical risk = time to replace |
Loud noise or violent vibration | Rollers, Bearings | The frame or support structure may be deteriorating |
Pro Tip: If your dryer is over 10 years old and shows two or more of these signs, it’s usually more economical and safer to invest in a new appliance rather than continue costly repairs.
3. FAQs About Dryer Not Drying
3.1. Why Are My Clothes Still Damp After Drying?
Clothes often remain damp due to restricted airflow, incorrect settings, or overloading. A clogged lint screen or a blocked vent prevents moisture from escaping efficiently. Additionally, using low-heat cycles like “Air Fluff” for thick fabrics may not provide enough heat to fully dry them. Always ensure the load size is appropriate, clean the lint trap after each use, and select the right drying cycle based on your fabric type.
3.2. Why Is My Dryer Wet After Drying?
If you notice moisture inside the drum after a drying cycle, it likely indicates poor ventilation. When hot, humid air can't escape due to a blocked vent hose or exterior duct, condensation builds up inside the drum. This can leave both the appliance and your laundry feeling damp. Cleaning the entire vent system and ensuring proper airflow will usually resolve the issue.
3.3. How to Fix a Dryer That’s Not Heating?
Start by checking whether your dryer is receiving the proper power supply, especially for electric models, which typically require 240 V. Next, inspect the lint screen, vent hose, and drum for any blockages. If airflow is unobstructed but there's still no heat, test the heating element, thermal fuse, thermistor, and start switch using a multimeter. Any component showing no continuity likely needs replacement. For gas dryers, also examine the solenoid valve, ignitor, and flame sensor to ensure the burner is functioning correctly.
If you're dealing with the issue of the dryer not drying, the solution often lies in simple checks like cleaning the lint screen, clearing the vent, or adjusting the settings. By checking each area carefully and performing regular maintenance, you can restore your machine’s efficiency and extend its lifespan. If any parts need replacing, AZParts offers durable, easy-to-install components compatible with many dryer brands that help you get back to smooth, efficient laundry days without the stress.
Contact Information:
8 The Green, Ste A, Dover, Delaware 19901-3618, United States
Dryer
Further Reading
Further Reading

Repair help
April 1, 2026
If your dryer has suddenly stopped working, won’t start, or fails to complete a cycle, the problem might be easier to fix than you think. In many cases, replacing a faulty component can get your dryer running again without the need for expensive repairs. In this guide, we’ll walk you through the 7 most common reasons your dryer isn’t working and what you can do to fix them. We’ll also point you to the specific dryer parts available at AZParts that can help you resolve each issue.

Repair help
December 28, 2025
When your dryer won’t spin, even the smallest load becomes a hassle. In this guide, AZParts walks you through the most common causes, from power and startup issues to mechanical breakdowns and motor failures. You’ll also find practical advice on handling safety and sensor dryer problems, along with a step-by-step diagnostic guide to help you identify the problem and get your dryer working again.

Repair help
November 28, 2025
Does your dryer smell like mildew every time you open the door? That musty odor is a common sign of moisture buildup and poor ventilation, often caused by clogged lint traps, dirty vents, or worn-out parts. While regular cleaning is essential, truly eliminating the dryer issue may require replacing faulty components such as lint screens, door seals, or vent hoses. In this article, AZParts explore the common causes behind why your dryer smells like mildew and provide practical tips to eliminate those unpleasant odors.

How-To Guides
November 20, 2025
Dryer running cold? The heating element is probably broken. Learn how to fix the heating element in the dryer yourself, it's easier than you think and saves repair costs. This comprehensive guide will walk you through identifying, removing, and installing a new heating element in your dryer, with expert tips from AZParts to ensure your clothes are drying efficiently again in no time.

Review
November 19, 2025
Choosing the right dryer vent hose is more important than you think. Each dryer vent hose type affects your dryer's efficiency and safety differently. In this article, AZParts will introduce the most common types of dryer vent hose, compare their pros and cons, and help you pick the best fit.