How-To Guides
How to Replace a Washing Machine Belt at Home Easily
AZparts Team
Updated on June 24, 2025
8 min read
Is your washing machine making strange noises or failing to spin properly? A worn-out or broken drive belt could be the reason behind these issues. Instead of spending money on professional repair services, you can easily replace the washing machine belt yourself with the right guidance and parts. In this comprehensive guide, AZParts will walk you through the entire process of replacing a washing machine belt, helping you save money while extending your appliance's lifespan.

1. Step-by-Step Guide to Replacing a Washing Machine Belt
Replacing a washing machine drive belt might seem intimidating at first, but with the proper instructions, you can complete this task in under an hour. Let's break down the process into manageable steps.
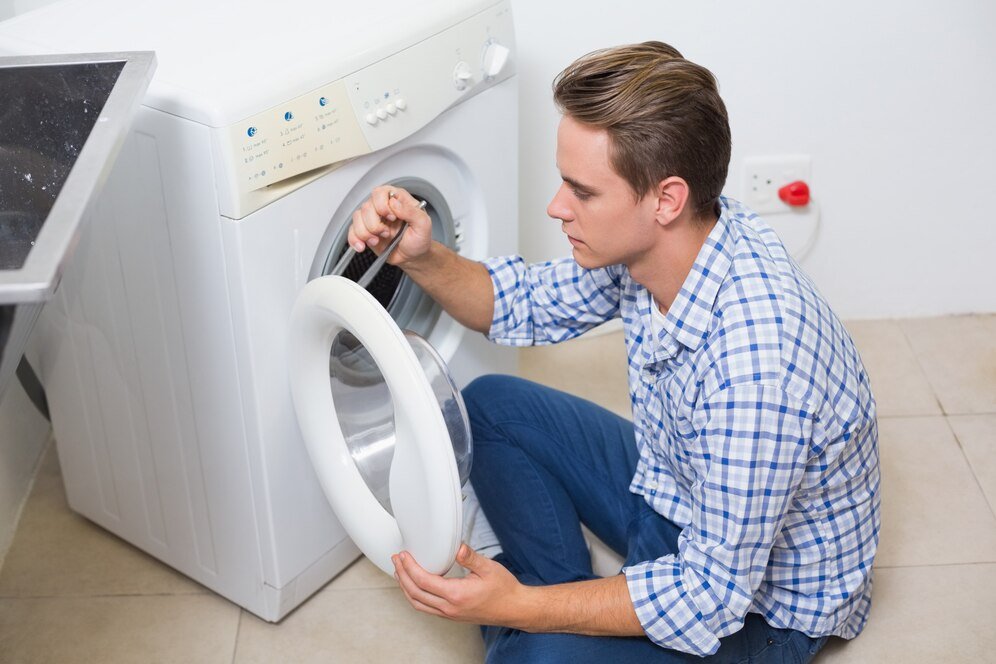
Step 1: Access the Belt
Prioritize safety measures: Before beginning any repair work, completely disconnect your washing machine from both electrical power and water sources.
Prepare your workspace: Clear the area around your machine to ensure comfortable access. Having good lighting and keeping your tools organized will make the process smoother.
Locate and remove the access panel:
- Find the access panel on either the back or front of your washing machine, depending on your model
- Using an appropriate screwdriver, carefully remove all screws securing the panel
- Place these screws in a small container or bag to prevent loss during the repair
- Gently remove the panel to reveal the internal components
Identify the belt system:
- Once inside, locate the drive belt system – it typically wraps around both the motor pulley and drum pulley in a figure-eight or circular configuration
- If your machine features an additional protective cover specifically for the belt mechanism, you'll need to remove this first
- Take clear mental notes or photos of how the original belt is positioned to assist with installation later
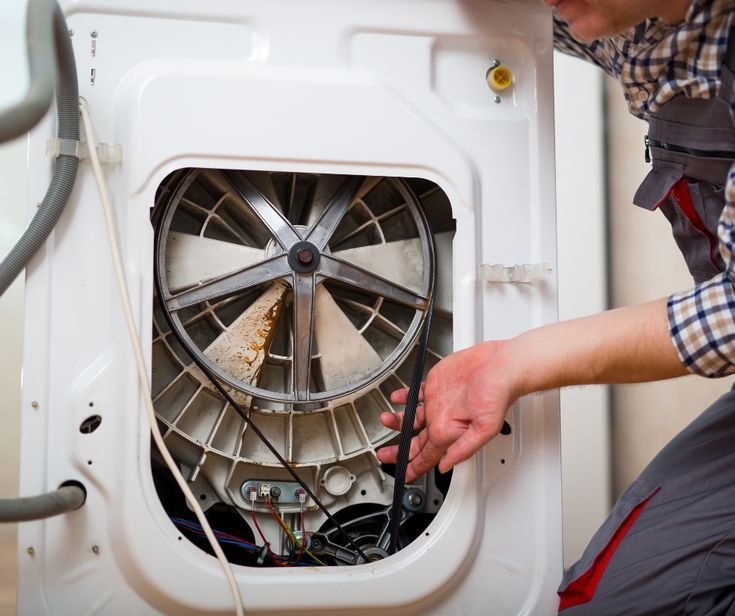
Identify the belt system (Source: Freepik)
Remove the damaged belt:
- If the belt is already broken, simply extract the pieces
- For intact belts showing signs of wear, you must first release tension on the system
- This often involves pushing a tensioner pulley or lever to create slack
- Carefully slip the old belt off both pulleys while avoiding pinching your fingers between the belt and mechanical components
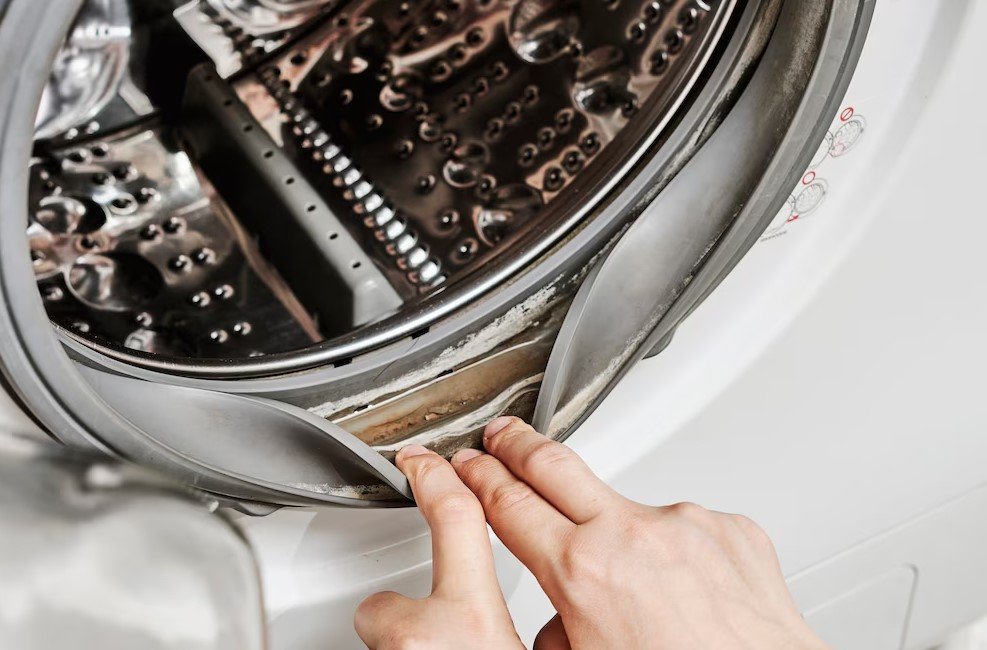
Removed revealing the belt system inside a typical washing machine (Source: Freepik)
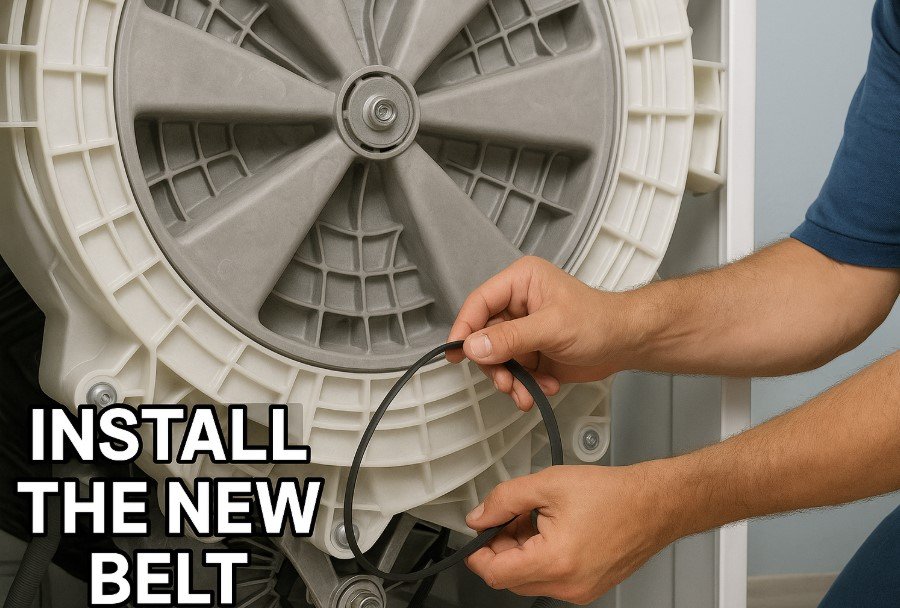
Step 2: Install the New Belt
Select the proper replacement part:
- Verify you have the correct replacement belt by comparing specifications with your machine's requirements
- The belt should match in length, width, and groove pattern for optimal performance
Begin installation process:
- Start by positioning the new belt around the larger drum pulley
- Ensure the ribbed (grooved) side makes contact with the pulley surface while the flat side faces outward
- For easier installation, consider using a temporary zip tie to hold the belt in place
- Next, carefully work the belt around the smaller motor pulley, applying appropriate tension
- The belt should be snug enough to prevent slippage during operation but not excessively tight
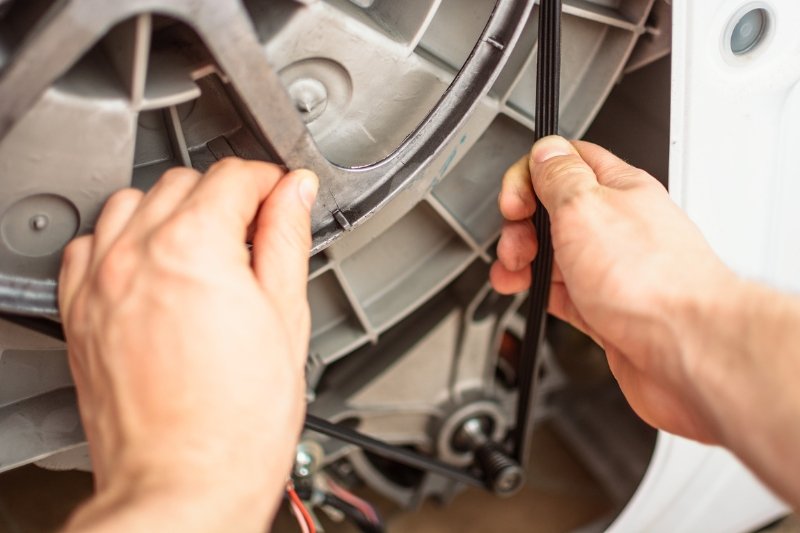
Installing a new belt around the washing machine drum pulley (Source: Pinterest)
Verify proper alignment:
- Slowly rotate the drum by hand through several complete revolutions
- This helps the belt settle into its proper position and ensures it tracks correctly on both pulleys
- Check that the belt maintains consistent alignment without twisting or riding up on either pulley
- Once satisfied with positioning, remove any temporary securing devices
- Perform one final inspection to confirm proper tension and alignment before proceeding
Verify proper alignment (Source: AZParts)
Step 3: Reassemble and Test the Machine
Complete reassembly:
- Replace the belt protective cover if your model features one
- Carefully position the main access panel, ensuring all alignment tabs engage properly
- Secure all mounting screws evenly without overtightening, which could crack the panel
- Double-check that no tools or loose parts remain inside the machine
Prepare for testing:
- Reconnect both water supply lines, confirming they are tight and secure
- Plug the machine back into the electrical outlet
- Position the machine in its normal operating location
Washing machine with access panel reattached, ready for testing after belt replacement (Source: Freepik)
Conduct performance testing:
- Run a short test cycle, preferably without laundry initially
- Observe the machine through different cycle phases, particularly during transitions
- Listen carefully for any unusual sounds such as grinding, squealing, or thumping
- Verify that the drum rotates smoothly in both directions at various speeds
- Watch for consistent belt tracking throughout the entire cycle
Final validation: If your washing machine completes the test cycle without abnormal noises or movements, congratulations! You've successfully replaced the drive belt and significantly extended your appliance's useful life while saving on costly repair services.
2. FAQs About Replacing a Washing Machine Belt
2.1 Do All Washing Machines Have a Belt?
No, not all washing machines have belts. Front-loading washing machines typically use a drive belt to transfer power from the motor to the drum. However, many modern top-loading machines and some newer front-loaders use direct drive systems that eliminate the need for a belt. Check your appliance's manual or look up the specifications for your specific model to determine if it uses a belt system.
2.2 Do I Need to Lay the Washing Machine on Its Side?
For most washing machines, you won't need to lay the appliance on its side to replace the belt. Access to the belt is typically available through the back or front panel. However, some models might require tilting the machine slightly to gain better access. Always consult your washing machine's manual for specific instructions related to your model.
2.3 Can Over-Tightening the Belt Damage the Washer?
Yes, over-tightening the belt can cause damage to your washing machine. An excessively tight belt creates unnecessary strain on the motor and bearings, potentially leading to premature failure of these components. Most replacement belts are designed with the correct tension in mind, so simply installing them according to the manufacturer's instructions should provide optimal tension without adjustments.
2.4 What Should I Do If the Belt Keeps Coming Off?
If your washing machine belt keeps slipping off, check that you've installed the correct size for your model. Examine pulley alignment carefully, as even minor misalignment causes slippage. Inspect pulleys for wear or damage that might affect belt stability. Excessive vibration from unbalanced loads can also knock belts out of position. If problems continue after these checks, you may need to replace worn components.
2.5 How Do I Replace the Belt on a Logik Washing Machine?
Replacing the belt on a Logik washing machine follows the same general principles described in our guide. However, the access point may differ slightly. For most Logik models, you'll need to remove the back panel by unscrewing the fasteners around the perimeter. The belt is typically looped around the motor pulley and drum pulley. Always refer to your specific Logik model's manual for detailed instructions.
2.6 What If My New Belt Doesn't Fit My Proaction Washing Machine?
If your replacement belt doesn't fit your Proaction washing machine, verify that you've purchased the correct part number for your specific model. Different models require belts of varying lengths and widths. You can find the correct replacement parts for your Proaction washing machine by checking the model number in your owner's manual or by contacting the experts at AZParts for assistance in identifying the right component.
2.7 Why Does the Belt Keep Slipping Off During the Spin Cycle?
When your washing machine belt repeatedly slips during spin cycles, several issues could be responsible: either the belt is too loose or stretched, the pulleys are worn or damaged, the drum bearings are failing, or the motor lacks sufficient power. If a newly installed belt still slips, carefully inspect the pulleys for wear or damage, and check if the drum rotates freely by hand. Resistance or grinding noises during manual rotation typically indicate worn bearings that need replacement, which could be contributing to your belt slippage problem.
2.8 Is a Special Belt Replacement Tool Necessary?
No special tools are required for most washing machine belt replacements. Standard household tools like screwdrivers (both Phillips and flathead), pliers, and potentially a socket set are usually sufficient. The zip tie trick mentioned in our guide is an optional but helpful technique that makes installation easier. For some models with limited access, a flashlight may also be useful to better see the belt routing.
Replacing a washing machine belt is a straightforward DIY repair that can save you significant money on service calls. With the proper replacement part and by following the steps outlined in this guide, you can extend your washing machine's lifespan and restore its performance. For high-quality replacement belts and other washing machine parts, visit AZParts where we offer genuine components for all major appliance brands.
Additionally, consider checking for problem with washing machine to see if your appliance is experiencing any other problems.
Contact Information:
8 The Green, Ste A, Dover, Delaware 19901-3618, United States
Washer
- 1. Step-by-Step Guide to Replacing a Washing Machine Belt
- 2. FAQs About Replacing a Washing Machine Belt
- 2.1 Do All Washing Machines Have a Belt?
- 2.2 Do I Need to Lay the Washing Machine on Its Side?
- 2.3 Can Over-Tightening the Belt Damage the Washer?
- 2.4 What Should I Do If the Belt Keeps Coming Off?
- 2.5 How Do I Replace the Belt on a Logik Washing Machine?
- 2.6 What If My New Belt Doesn't Fit My Proaction Washing Machine?
- 2.7 Why Does the Belt Keep Slipping Off During the Spin Cycle?
- 2.8 Is a Special Belt Replacement Tool Necessary?
Further Reading
Further Reading

Repair help
July 17, 2025
A washer that makes loud noise can be both annoying and concerning. Whether it's grinding, banging, or rattling sounds, these noises often signal underlying issues that need immediate attention. Understanding different noise types helps you address problems quickly and avoid costly repairs. At AZParts, we provide quality replacement parts and expert guidance to resolve your washing machine noise issues effectively.

Repair help
July 11, 2025
When your washer lid won't lock, this problem prevents your appliance from starting its cycle, leaving you with wet clothes and a non-functional machine. Understanding the root causes and knowing how to troubleshoot effectively can save you time, money, and unnecessary stress. This guide from AZParts will walk you through the most common causes of lid locking problems and provide step-by-step solutions to get your washing machine back to working order.

How-To Guides
July 11, 2025
A washer that won’t spin is a fairly common issue, often causing inconvenience in daily life when clothes remain soaking wet after a wash cycle. This problem can stem from various causes, from user errors such as overloading or unbalanced laundry, to internal component failures like a faulty lid switch, broken drive belt, or clogged drain pump filter. In this article, AZParts will help you identify the exact cause and guide you through effective solutions so you can get your washer back up and running without needing to call a technician right away.

Repair help
June 24, 2025
Kenmore washers are built to last and widely trusted for their reliability and efficiency. However, like any appliance used frequently, they can develop issues over time. From a washer that refuses to start to one that leaks or makes unusual noises, understanding the root causes is essential to fixing the problem quickly and effectively.
This guide offers a detailed look at Kenmore washers troubleshooting, covering the five most common issues, likely causes, and step-by-step instructions on how to diagnose and repair them. Whether you’re a DIY enthusiast or simply want to understand what’s wrong before calling a technician, this resource will help you get your Kenmore washer back in working order.
_1748341252.jpg&w=3840&q=75 "Where to Find the Model and Serial Number on a Washer")
How-To Guides
May 27, 2025
Whether you need to schedule a repair, register your appliance, or order a replacement part, knowing where to find the serial number for washing machine models is essential. This unique identifier helps technicians match the right components and ensures your warranty is valid. However, each brand places its label in different locations, which can make the search confusing. In this article, AZParts will show you exactly where to find the model and serial number on washers from leading brands so you can take the next step with confidence.