How-To Guides
How to Sharpen a Chainsaw with 5 Steps
AZparts Team
Updated on July 31, 2025
10 min read
A sharp chainsaw not only helps you cut wood faster but also ensures greater safety during use. However, over time, the chain will wear down and become less effective. That’s why learning how to sharpen a chainsaw is a crucial skill that every user should know. In this article, AZParts will guide you through the proper way to sharpen a chainsaw, from preparing the right tools to step-by-step instructions, helping you save time, effort, and extend the life of your machine.

1. Signs Your Chainsaw Needs to Sharpen
No matter how good your chainsaw is, the chain will eventually get dull with use. When that happens, your saw won’t cut as smoothly, and you’ll have to work harder to get the job done. Knowing when your chain needs sharpening can save time, effort, and help keep you safe.
- One of the first things you might notice is the sawdust. A sharp chainsaw produces thick, even wood chips. But when the chain gets dull, it starts to create fine sawdust instead. This means the teeth aren’t cutting cleanly through the wood anymore.
- Another clear sign is smoke. If you see smoke while cutting, even though the chain is oiled and properly tightened, it’s likely because the chain is too dull. The extra friction causes the wood to burn slightly, which leads to smoke.
- You might also notice the chainsaw pulling to one side or not cutting in a straight line. This can happen if the teeth on one side of the chain are more worn down than the other.
- A sharp chainsaw should pull itself gently into the wood. If you find yourself pushing hard just to make a cut, the chain probably needs sharpening.
- Lastly, if the saw feels bumpy or shakes while cutting, that’s another sign the chain is dull. A smooth, sharp chain will glide through the wood without bouncing or skipping.
To keep your chainsaw working at its best, it's a good idea to check the chain regularly and sharpen it before it gets too worn. It’s much easier to maintain a sharp chain than to fix a dull one.
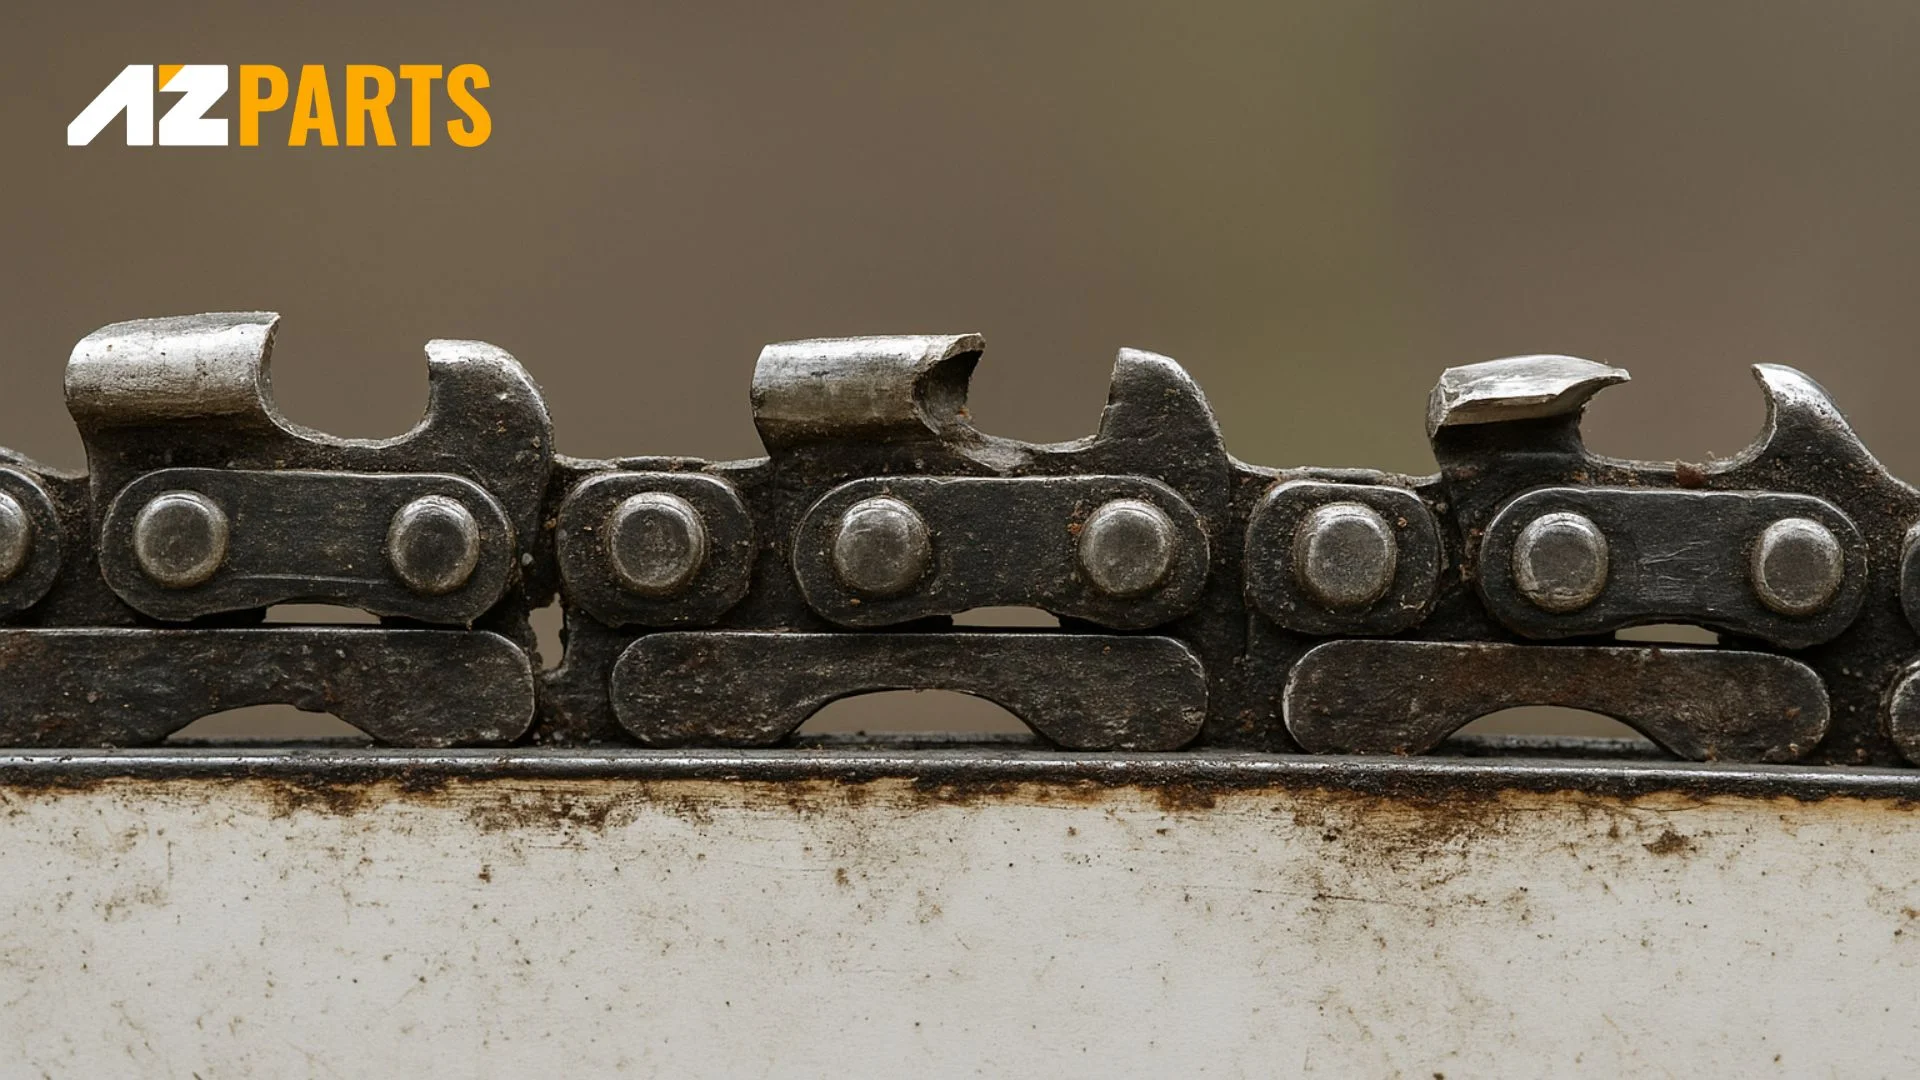
Signs your chainsaw needs sharpening: slow cutting, smoke and uneven sawdust (Source: AZParts)
2. Tools You’ll Need to Sharpen a Chainsaw
- Round file: Used to sharpen the cutting teeth of the chain. Make sure it matches the size recommended for your specific chainsaw model.
- Flat file: Helps you adjust the depth gauges (rakers) on the chain to the correct height.
- Filing guide or file holder: Keeps your file at the proper angle while sharpening, ensuring consistent and even results.
- Depth gauge tool: Used to measure and reset the height of the rakers so your chain cuts smoothly and safely.
- Permanent marker or pen: Mark the first tooth you sharpen to keep track of your progress and avoid sharpening the same section twice.
- Protective gloves: Always wear gloves to protect your hands from sharp teeth and metal filings.
- Bench vise (optional): Clamping the guide bar in a vise keeps the saw stable and makes filing easier.
- 2-in-1 file holder (optional): A convenient tool that lets you sharpen the cutting teeth and adjust the depth gauges at the same time.
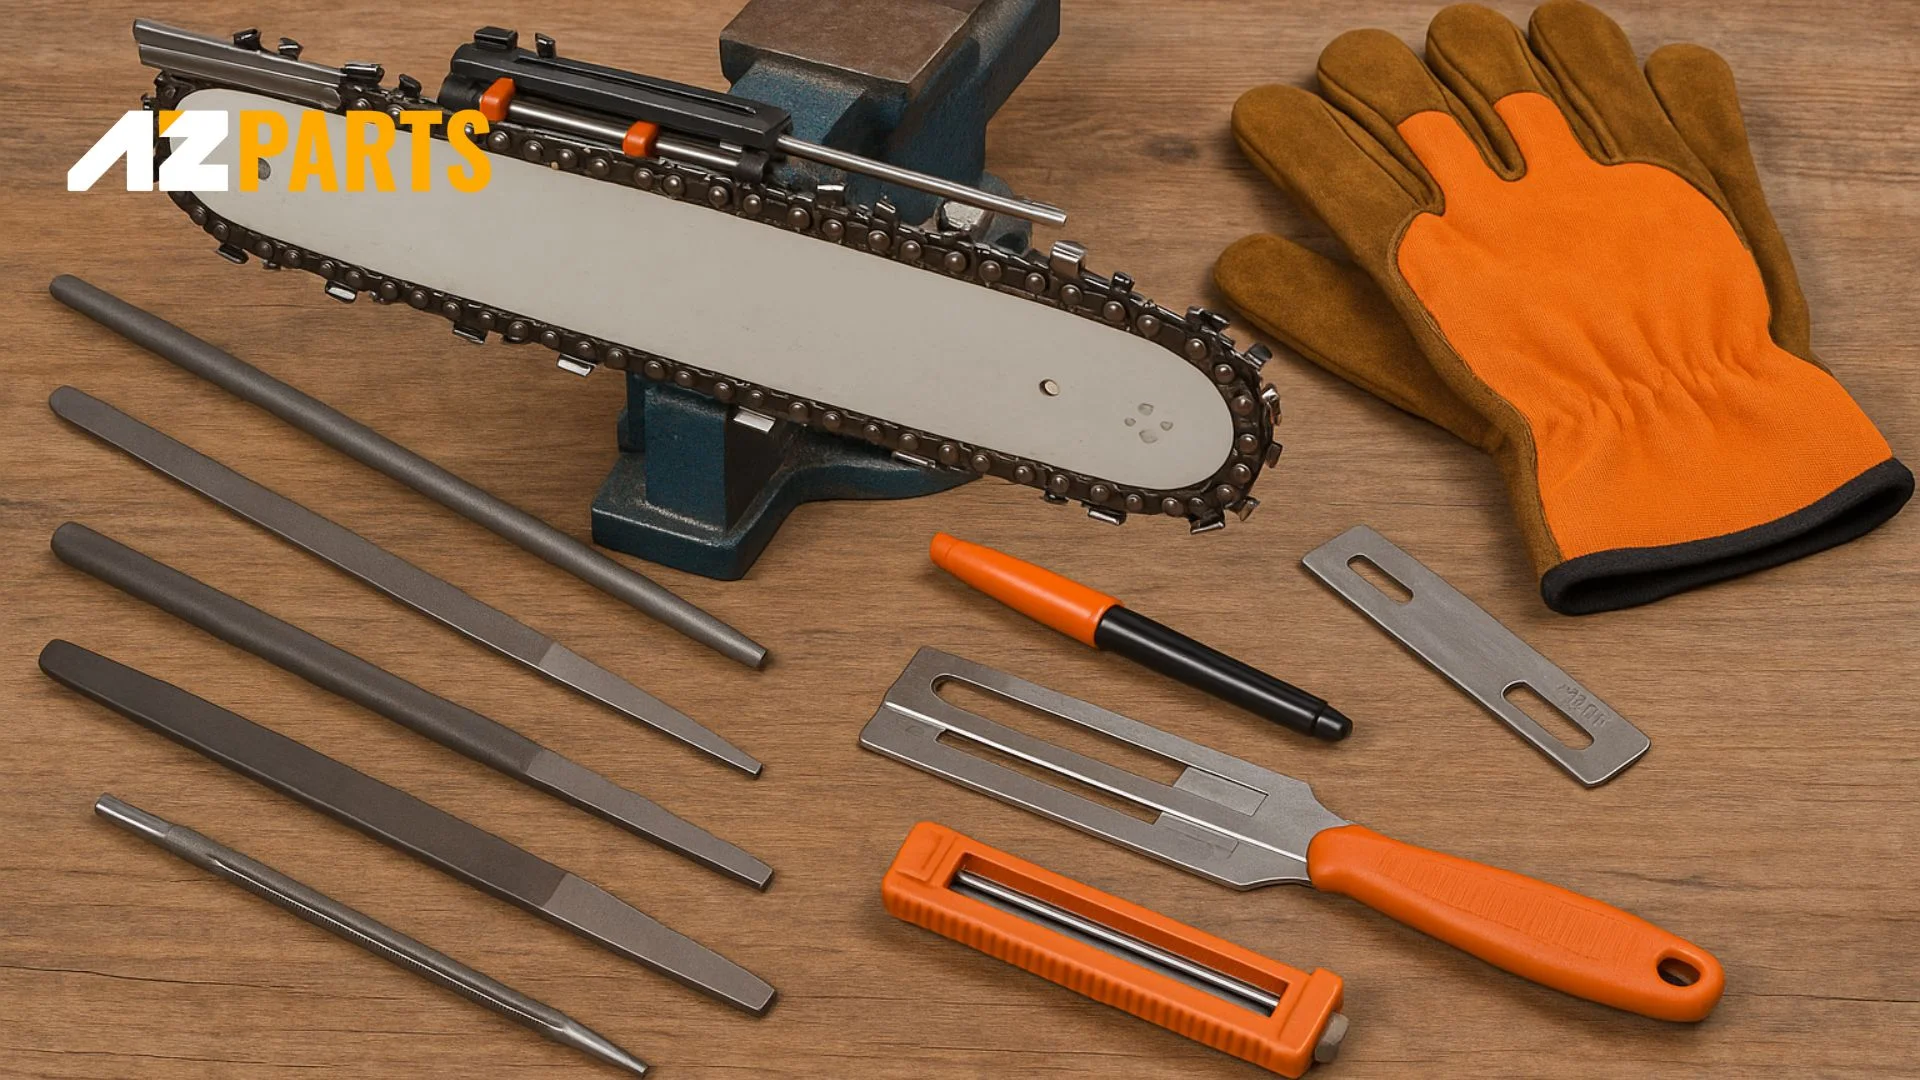
Prepare tool before starting sharpen chainsaw (Source: AZParts)
3. Sharpening Fundamentals You Must Know
3.1 How Filing Works
When you sharpen a chainsaw, you're not just making the teeth look sharper, you're actually reshaping the metal cutting edge. Each cutter on your chain has a small curved surface called a bevel. You use a round file to gently follow that curve, restoring the sharp edge that slices through wood.
The file needs to match the size of the bevel exactly. If it’s too big or too small, it won’t sharpen the cutter correctly. Always check your chainsaw manual to find the right file diameter. If the manual is missing, many brands offer sizing guides, or you can take your saw to a service center for advice.
Keep in mind: every time you file, you’re removing a small amount of metal. Over time, the cutters get shorter, and that changes how they interact with the depth gauge — the small “tooth” in front of each cutter. If the cutter gets too short but the depth gauge stays the same, your saw won’t bite into the wood effectively. That’s why regular depth gauge adjustment is essential.
Sharpening doesn’t just make your saw cut better, it also keeps it cutting safely and evenly.
Sharpening Chainsaw basics must know before implementing (Source: AZParts)
3.2 Understanding Angles
Filing isn’t just about motion; it’s also about precision. The angle at which you file each cutter has a huge impact on how your chainsaw performs.
There are three key angles to be aware of:
- Top plate filing angle (usually 25°–35°): This is the horizontal angle of the file relative to the bar. It controls how aggressively the tooth cuts.
- Side plate angle: This is the vertical angle of the cutting edge. It’s built into the shape of the file and cutter, no need to adjust this manually.
- Filing angle guide (or tilt angle): Some guides also help you maintain the correct up-and-down tilt of your file.
To keep all cutters consistent, many people use a filing guide or a 2-in-1 tool that locks in the correct angles for you. Filing without a guide is possible, but even a small mistake in angle can make your saw cut unevenly or wear out faster.
Pro tip: Stick to the same angle for every tooth, and always start with the dullest one. Count your strokes and try to keep each cutter the same length for a smooth, even cut.
4. Step-by-Step: How to Sharpen a Chainsaw
Step 1: Secure the Chainsaw
Before you start sharpening, make sure the chainsaw is stable and can’t move while you work. If you have a bench vise, clamp the guide bar to your workbench. This will give you more control and help you sharpen safely.
If your chainsaw is electric or battery-powered, unplug it or remove the battery. For gas chainsaws, make sure it’s completely turned off and cannot accidentally start.
Step 2: Clean the Chain
Use a brush, cloth, or compressed air to clean off any dirt, sawdust, or oil from the chain. A clean chain is easier to sharpen and gives more accurate results.
After cleaning, check the chain tension. It should be snug against the bar but still move smoothly when you turn it by hand. If it’s too loose, tighten it before sharpening.
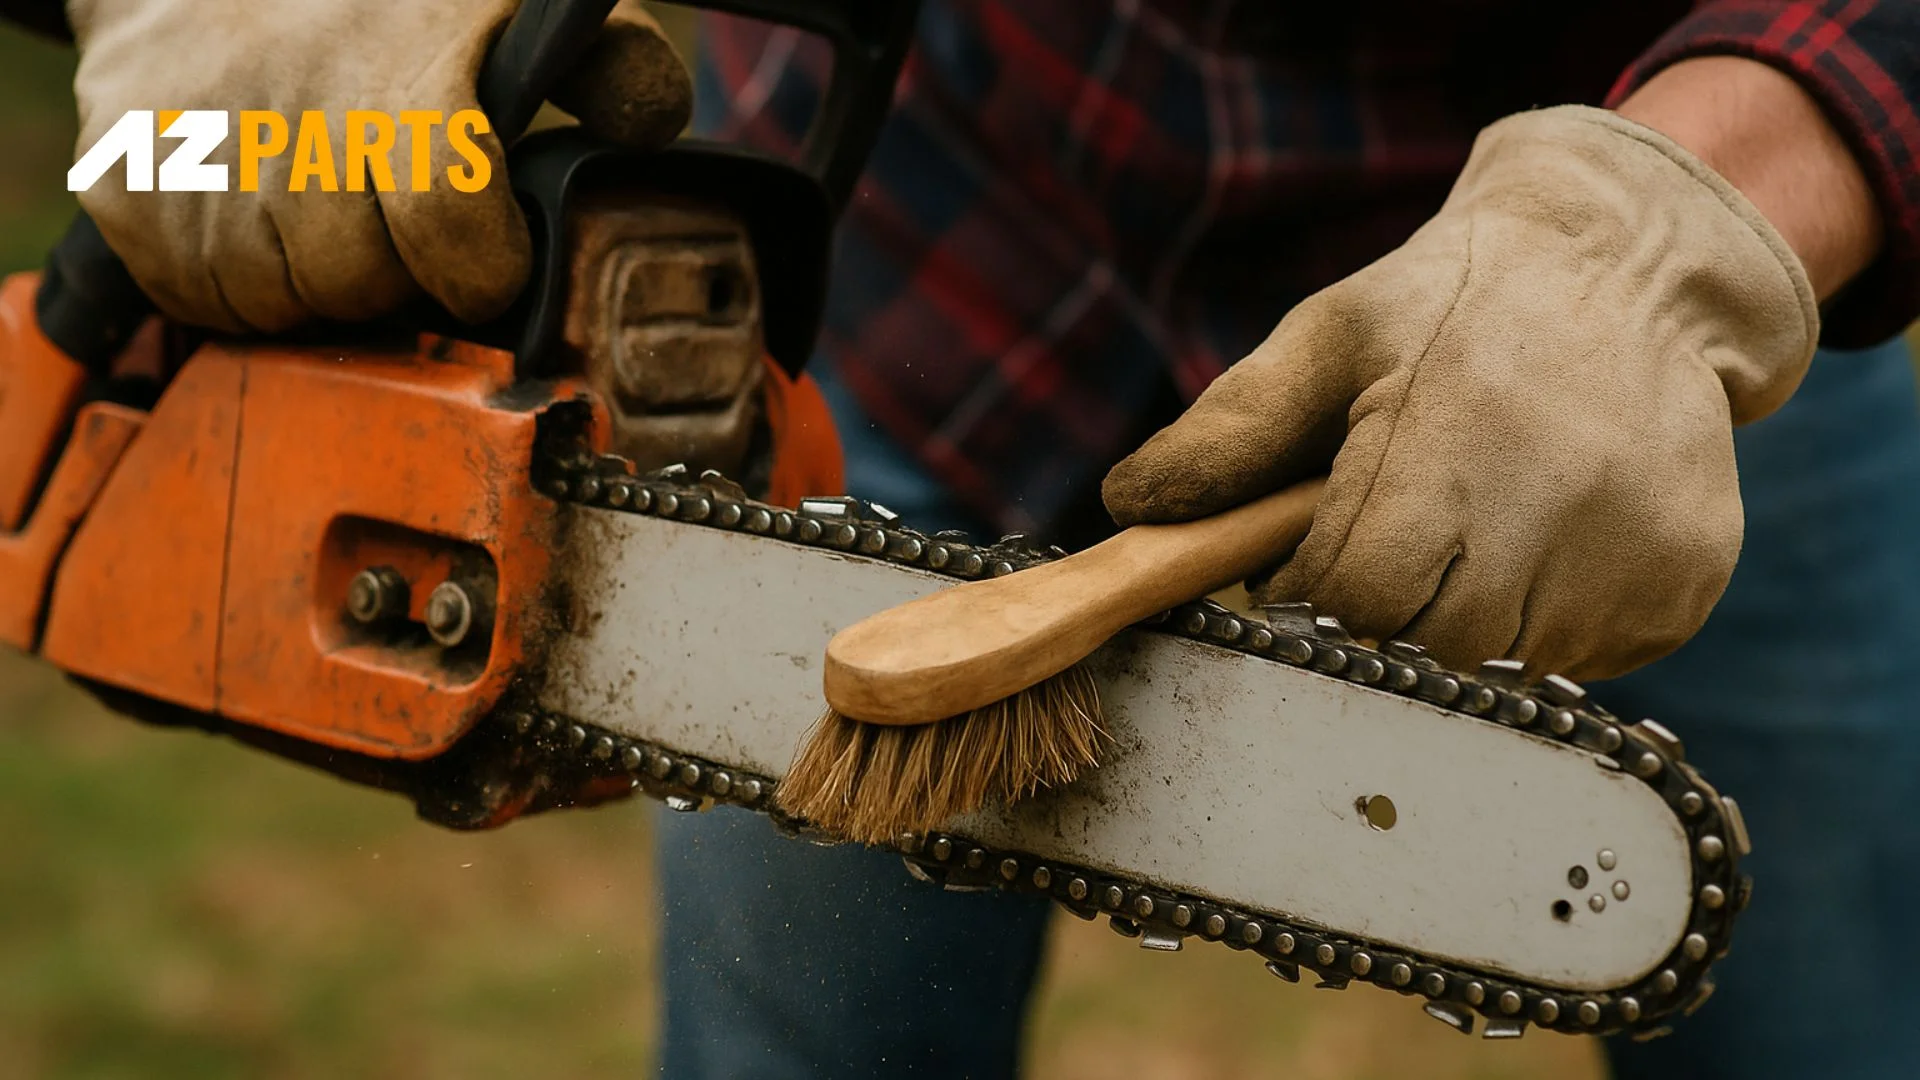
Clean the chain before sharpening is to easier process (Source: AZParts)
Step 3: Find the Shortest Cutter
Look closely at the chain and find the shortest cutting tooth. This will be your “master tooth,” and it sets the standard for all the other teeth. Use a marker to highlight it so you can keep track as you sharpen.
Sharpening all teeth to the same length helps your chainsaw cut smoothly and evenly.
Step 4: File Each Tooth
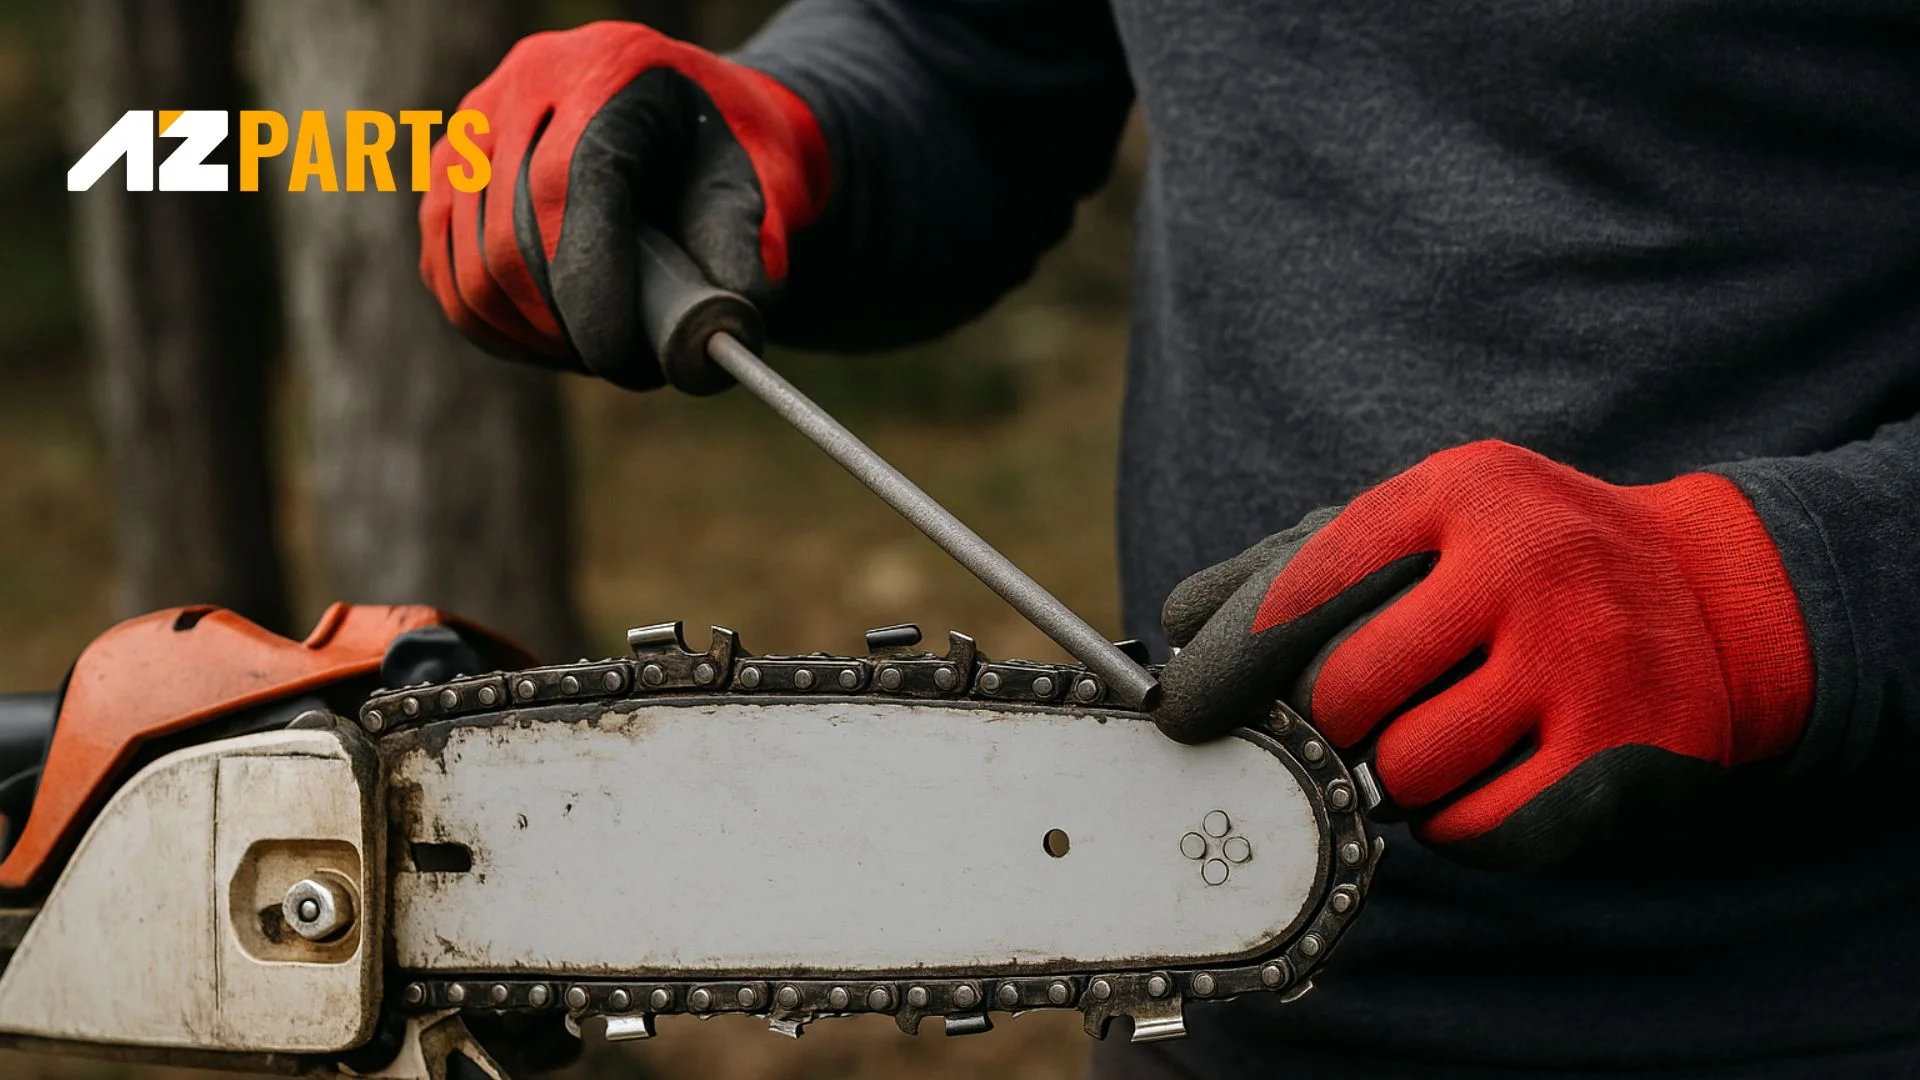
Place the round file into the curved edge of the cutter. Keep the file at the correct angle, usually 30 degrees, and push it forward across the tooth. Don’t file back and forth. Only apply pressure on the forward stroke.
Make about 3 to 6 strokes, or until the tooth is sharp. A sharp tooth will not reflect light from its edge. Continue filing every other tooth on one side of the chain. Once that side is done, rotate the chainsaw and sharpen the remaining teeth on the other side.
If you're using a file guide or 2-in-1 tool, it will help you maintain the correct angle and depth while sharpening.
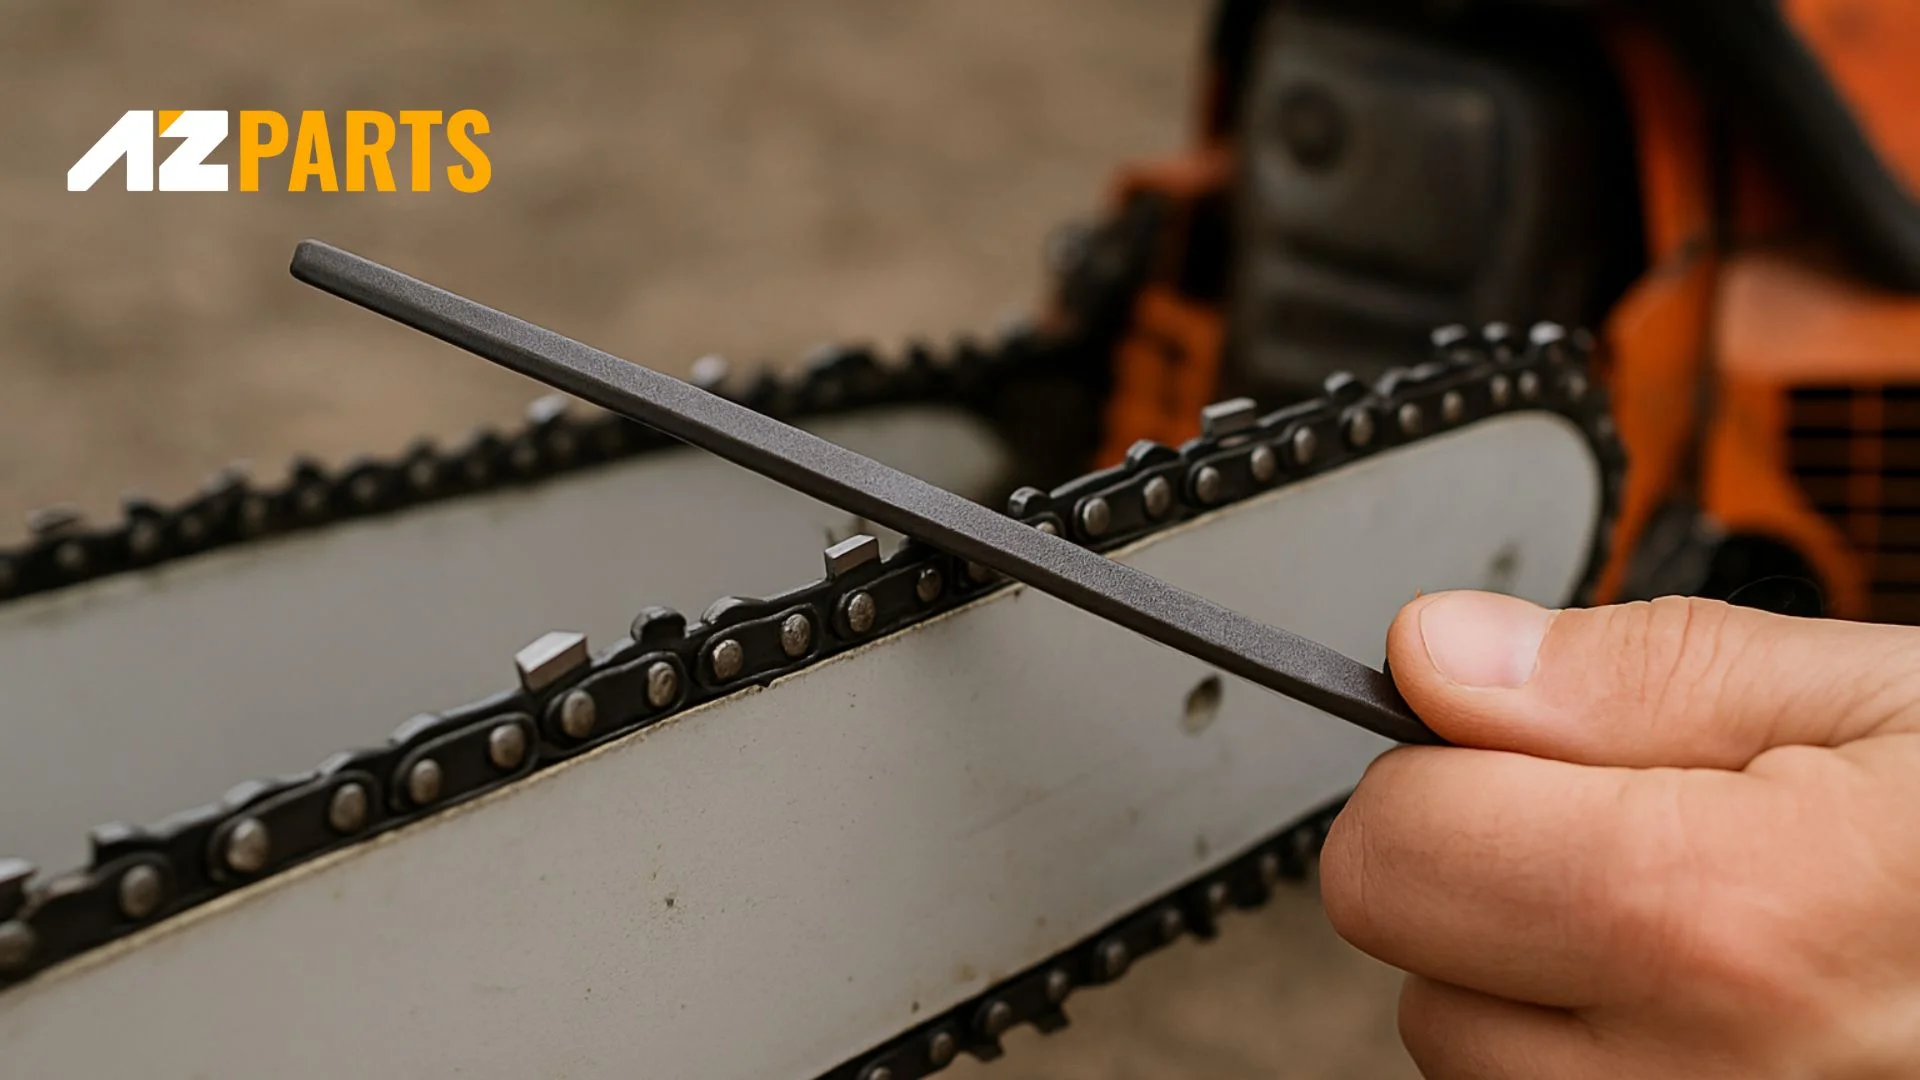
File each tooth is crucial step to sharpen chainsaw (Source: AZParts)
Step 5: Adjust the Depth Gauges
Once all the cutters are sharpened, check the depth gauges. These are the small bumps in front of each cutting tooth. If they’re too high, the cutter won’t take enough wood. If they’re too low, the saw will cut too aggressively and may kick back.
Place a depth gauge tool over the chain. If a gauge sticks up above the tool, file it down with a flat file until it’s level. Then slightly round off the front edge of the gauge at an angle, following the service mark on the chain.
Be careful not to touch the freshly sharpened teeth while adjusting the gauges.
5. Quick Tips for In-the-Field Filing
- Carry the Right Tools: Always bring a round file, flat file, file guide, and a depth gauge tool in your chainsaw kit. A small stump vise is also helpful to hold the bar steady in the field.
- Mark Your Starting Tooth: Use a marker or crayon to mark the first tooth you file. This helps you track progress and avoid sharpening the same tooth twice.
- File in One Direction Only: Push the file forward across the tooth with steady pressure. Lift it off on the return stroke. Never saw back and forth.
- Keep the Angle Consistent: Aim for about a 30-degree angle on most chains. If unsure, use a file guide to help maintain the correct angle throughout.
- Sharpen Evenly: Count your strokes per tooth — usually 3 to 6 — to keep all cutters the same length. This helps your saw cut straight and smoothly.
- Watch the Light: A dull tooth reflects light off its edge. A properly sharpened tooth looks smooth and matte, with no shiny spots.
- Don’t Forget the Depth Gauges: After every few sharpenings, check the depth gauges and file them down if needed using a depth gauge tool and flat file.
- Keep It Clean: Wipe off dirt, sap, and debris before you sharpen. A clean chain files faster and lasts longer.
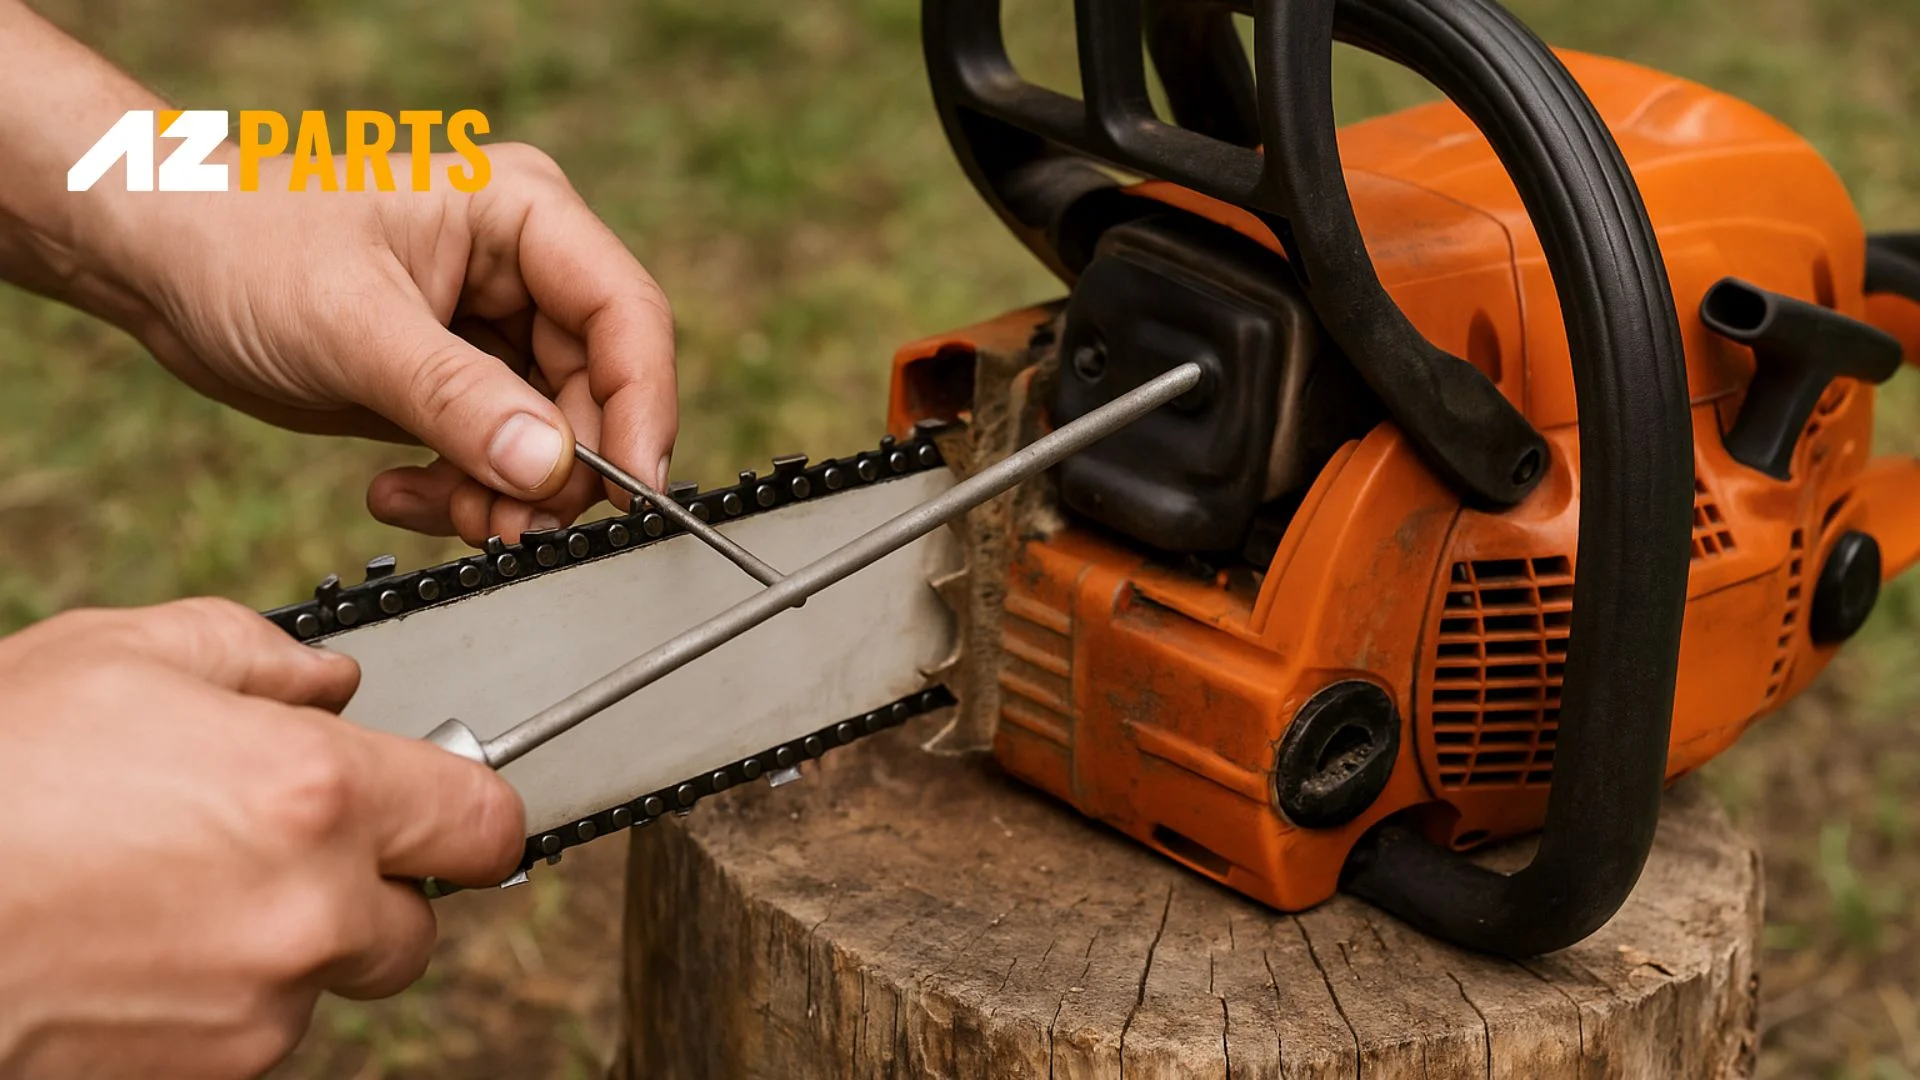
Essential filing tricks while out working (Source: AZParts)
6. When It’s Time to Stop Sharpening and Replace the Chain
Even with good maintenance, a chainsaw chain won't last forever. Here are clear signs that it’s time to stop sharpening and install a new chain:
- Cutters Are Too Short: Each time you sharpen, the cutters get smaller. If they’ve worn down significantly and are much shorter than when new, it’s time to replace the chain.
- Visible Cracks or Bent Links: If you spot cracks, bent parts, or other visible damage on the chain, don’t take risks, and replace it immediately for safety.
- Cutting Becomes Difficult: If the saw struggles to cut, or the chain doesn’t “bite” the wood like it used to even after sharpening, the chain may be worn out or heat-damaged.
- Chipped or Missing Teeth: If any cutters have deep pits, broken edges, or are missing entirely, the chain can’t be sharpened properly and should be replaced.
- Chain is Overstretched: Over time, chains stretch and may no longer tighten properly. If adjusting the tension doesn’t help, the chain has reached the end of its life.
- Sharpened Too Many Times: Every chain has a limit to how many times it can be filed. If you’ve sharpened it repeatedly and the performance keeps dropping, it’s time to start fresh with a new chain.
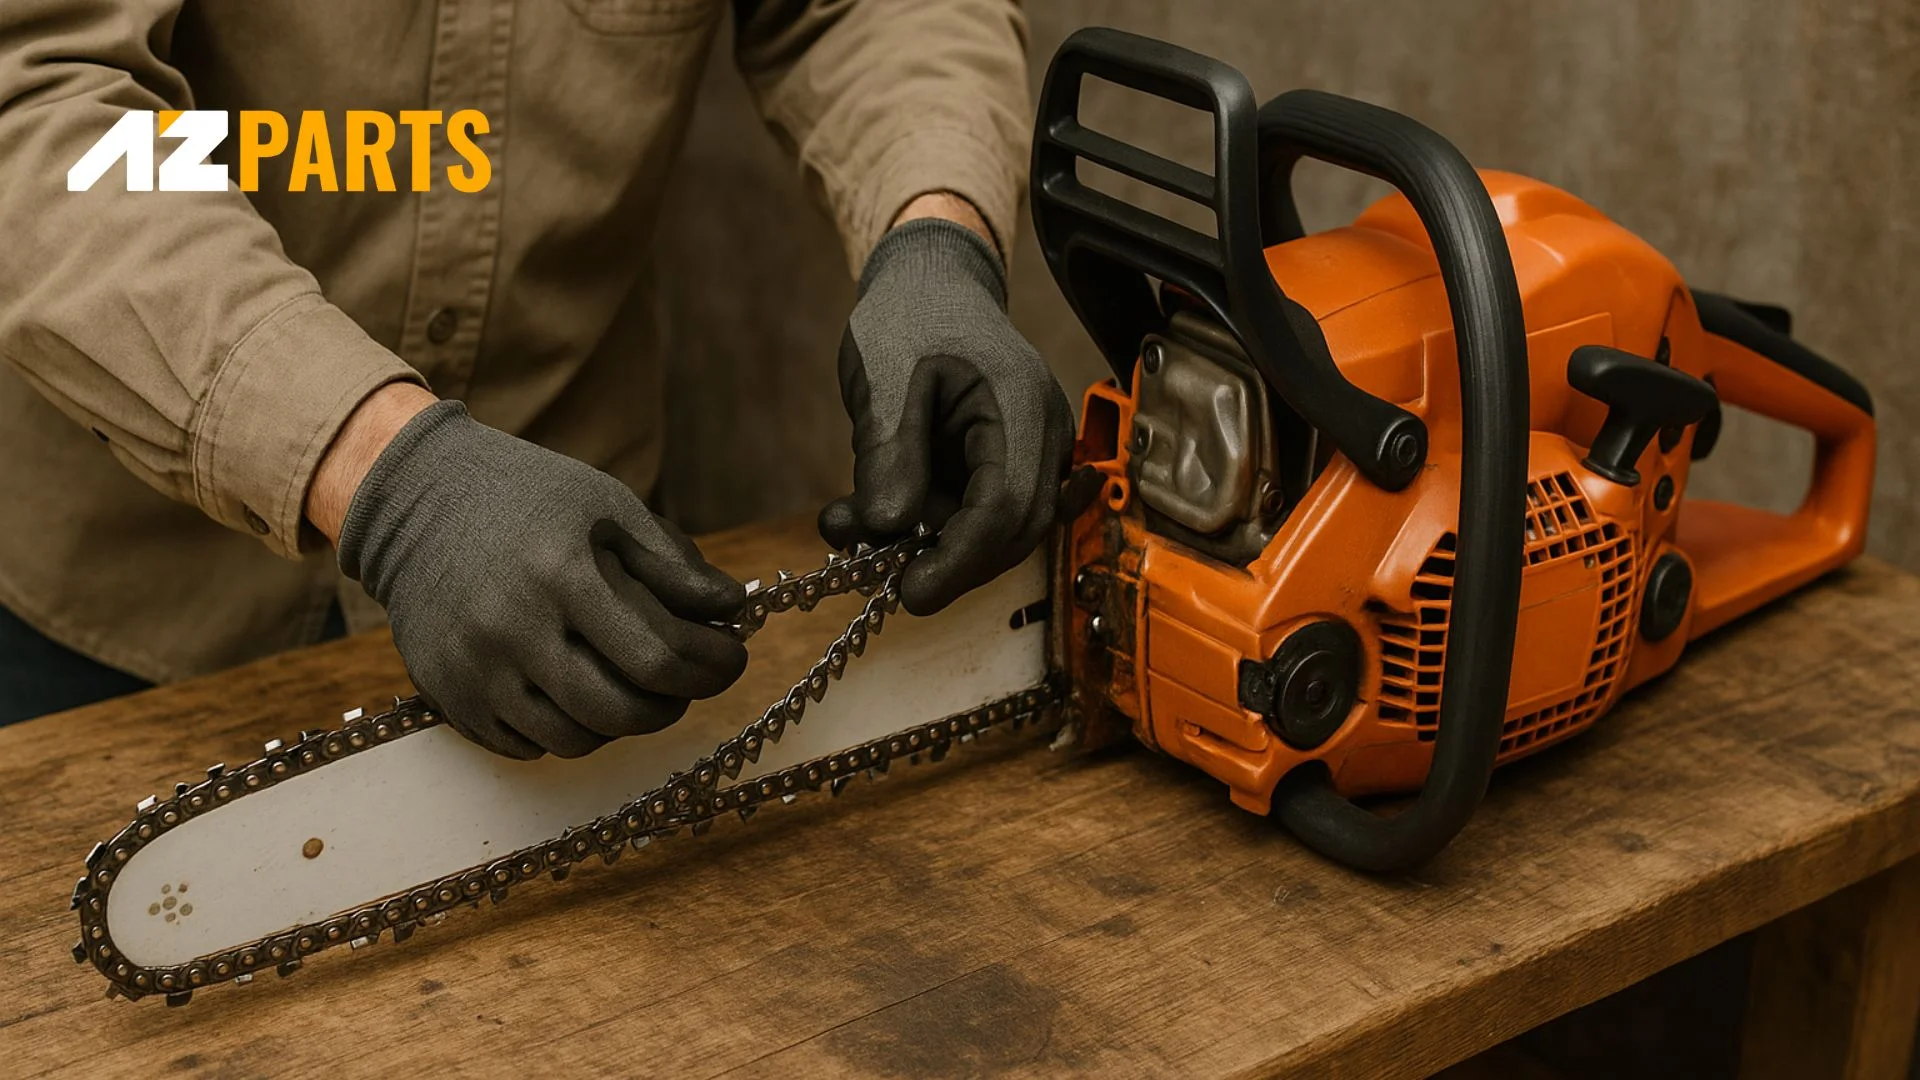
Sign of replacing the chainsaw instead of sharpening (Source: AZParts)
Sharpening your chainsaw chain the right way not only improves cutting efficiency but also extends the life of your equipment and keeps you safe during use. By understanding when and how to sharpen, and when it's time to replace the chain, you’ll always be ready for the job ahead.
If you're looking for quality chainsaw parts, sharpening tools, or a reliable replacement chain, AZParts is here to help. We offer a wide selection of products and expert advice to keep your tools running at their best.
Learn more about other chainsaw's mantaining tips:
Contact Info
Address: 8 The Green, Ste A, Dover, Delaware 19901-3618, United States
Email: support@azparts.com
chainsaw
Further Reading
Further Reading

Repair help
August 1, 2025
A chainsaw not cutting straight is one of the most common issues faced by both professional loggers and weekend warriors alike. This problem not only affects the quality of your work but can also pose safety risks and lead to wasted materials. Through this topic, AZParts will help you understand why your chainsaw veers off course is the first step toward resolving this issue.

How-To Guides
August 1, 2025
A clean chainsaw air filter is essential for optimal engine performance and longevity. Whether you're a professional arborist or weekend warrior, understanding how to clean chainsaw air filters properly can save you money on repairs and ensure your saw runs smoothly for years. AZParts will help you learn how to replace chainsaw air filters when cleaning is no longer effective and ensures uninterrupted operation during critical tasks.

Repair help
July 31, 2025
Chainsaw smoking is more than just an annoyance. It’s a warning sign of deeper mechanical problems that could lead to costly damage if ignored. Whether it’s due to clogged air filters, bad fuel mix, or worn-out components, acting fast is essential. In this guide, AZParts will help you tackle the issue with expert repair guides and top-quality replacement parts, so your chainsaw runs like new again.

Repair help
July 31, 2025
A chainsaw is a powerful and essential tool for tasks ranging from cutting firewood to tree maintenance. However, without proper maintenance, it can quickly wear out, become less efficient, and pose safety risks. Keeping a regular maintenance schedule not only extends the lifespan of your chainsaw but also ensures user safety. In this article, AZParts shares simple yet effective chainsaw maintenance tips that you can easily do at home.

Repair help
July 31, 2025
Chainsaw troubleshooting can be frustrating when your reliable tool suddenly refuses to start or performs poorly during critical tasks. Whether you're dealing with starting issues, cutting problems, or performance concerns, understanding common chainsaw problems and their solutions is essential for any operator. At AZParts, we provide genuine replacement parts to help you maintain your chainsaw's peak performance and extend its operational life.