How-To Guides
How to Change a Dryer Belt Easy and Fast
AZparts Team
Updated on July 9, 2025
7 min read
A clothes dryer is a useful appliance that saves time and effort in your daily laundry routine. However, after a period of use, the drive belt, the part responsible for rotating the drum can become worn, loose, or even break, causing the dryer to operate inefficiently. Instead of calling a repair technician or buying a new machine, you can actually replace the belt yourself at home if you know how. In the guide below, AZParts will walk you through detailed, step-by-step instructions to replace a dryer belt quickly, safely, and easily even if you don’t have much technical experience.

1. When Should You Change the Dryer Belt?
The belt is a crucial component that helps the dryer drum rotate smoothly during operation. Over time, the belt can become worn, stretched, or broken, which affects the drying performance. Below are some common signs that it's time to replace your dryer belt:
The drum doesn’t rotate, but the dryer still runs
If you hear the motor running but the drum isn’t turning, the belt may have snapped or slipped out of place. This is one of the clearest signs that the belt needs to be replaced immediately.
Clothes don’t dry properly after each cycle
When the drum isn’t rotating correctly due to a worn or loose belt, clothes won’t tumble evenly, leading to inefficient drying. This can make the drying cycle longer and consume more electricity than usual.
If the belt is worn or loose, the drum won’t spin properly, causing clothes to dry unevenly (Source: AZParts)
Strange noises while the dryer is running
If you hear squeaking, grinding, or thumping sounds during operation, the belt might be worn, frayed, or rubbing against other components. These noises are a warning that the belt should be inspected and replaced promptly.
Visible cracks or fraying on the belt
You can open the dryer to visually inspect the belt. If you notice cracks, frayed edges, or hardened rubber, it’s best to replace the belt—even if it hasn’t broken yet—to avoid sudden failure during use.
The belt has reached the end of its lifespan
Typically, a dryer belt lasts about 5–8 years, depending on usage. If your dryer has been in use for many years without a belt replacement, consider changing it as part of regular maintenance to ensure smooth and reliable performance.
Note: Replacing the dryer belt isn’t too complicated and can be done at home if you have some basic tools. However, if you’re unfamiliar with appliance repair, it’s best to call a professional technician to ensure safety and proper installation.

The belt is a crucial component that helps the dryer drum rotate smoothly during operation (Source:AZParts)
2. How to Change a Dryer Belt
Replacing a dryer belt is one of the most common repair tasks when the drum no longer spins, even though the motor is still running. Fortunately, this process isn’t too complicated and can be done at home if you follow the steps carefully.
2.1. Step 1: Unplug the dryer and turn off the gas (if applicable)
Before starting any repair, make sure to disconnect the power by unplugging the dryer. If you’re using a gas dryer, be sure to shut off the gas valve to prevent leaks during disassembly.
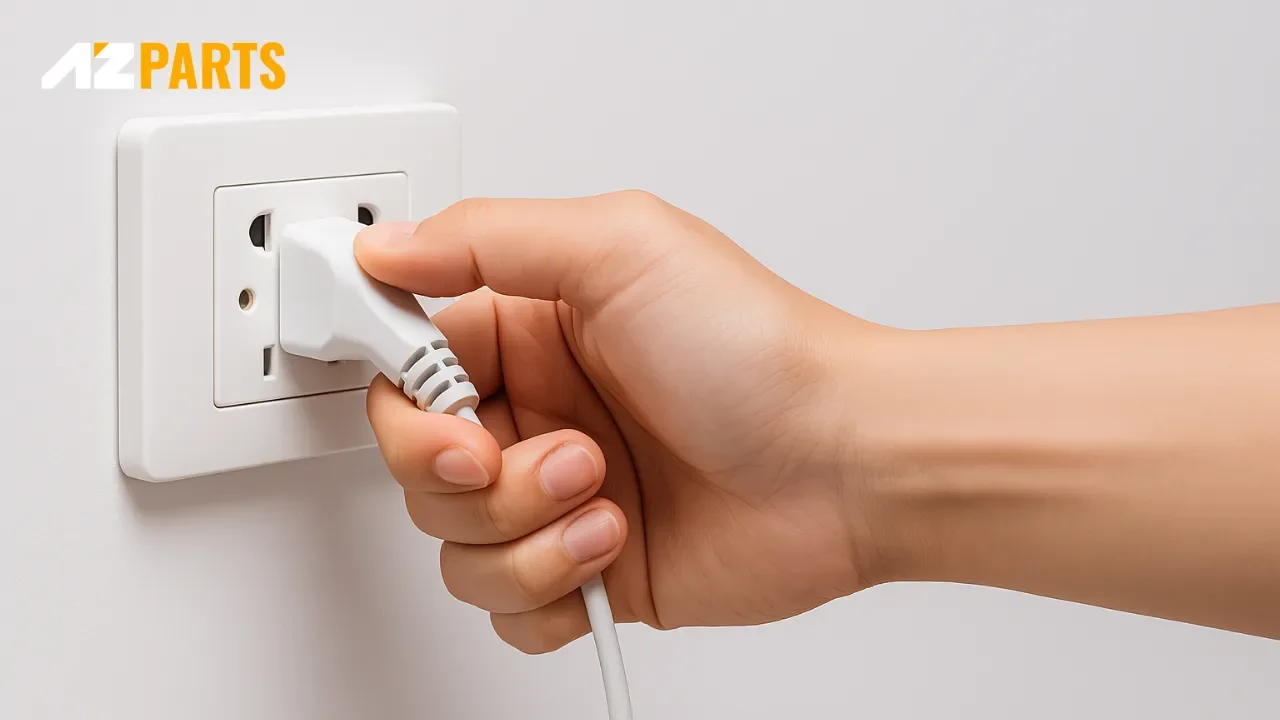
Unplug the dryer and turn off the gas is a crucial safety step (Source:AZParts)
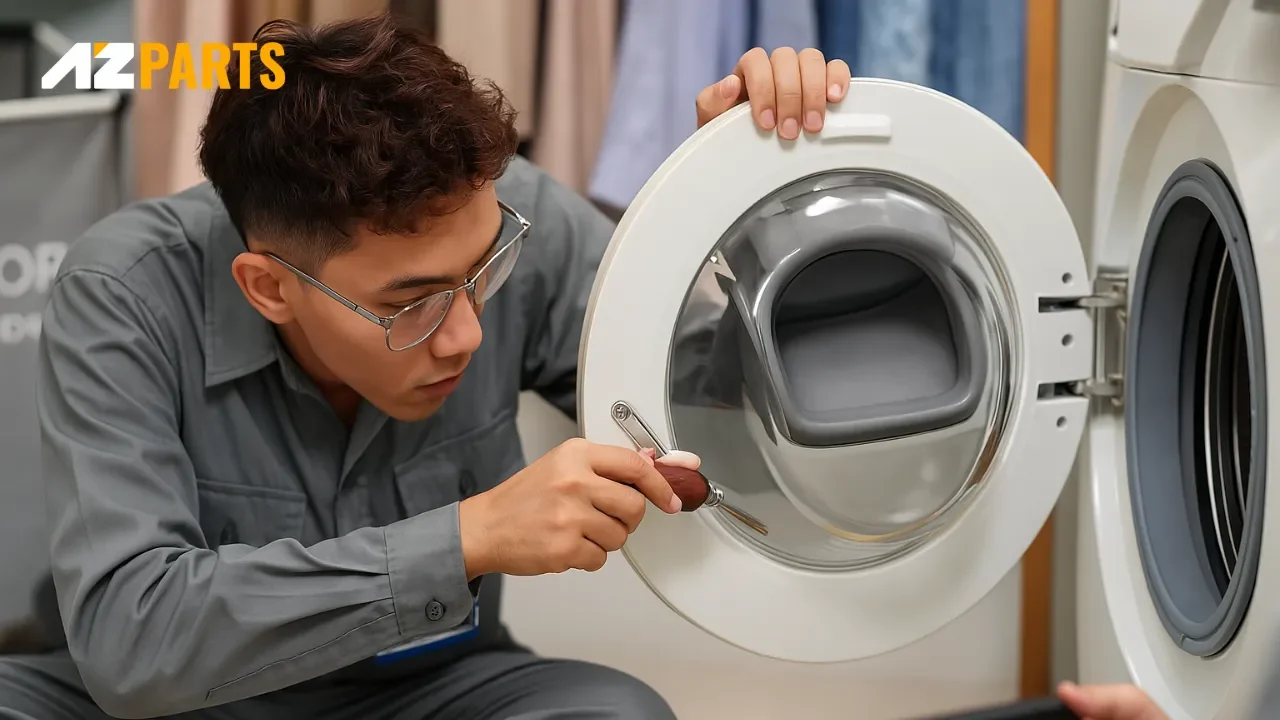
2.2. Step 2: Remove the lint filter and unscrew the housing
Open the lint filter compartment, usually located on the top panel or near the door. Then, remove the screws that secure the filter housing in place, these often hold the top panel or control panel to the dryer frame. Removing this part gives you easier access to the inside of the unit.
2.3. Step 3: Pop the top panel
Use a flathead screwdriver or a plastic pry tool to carefully release the clips securing the top panel. There are usually two clips located near the front edges. Once unclipped, lift the top panel like a car hood and keep it upright or secured in an open position.
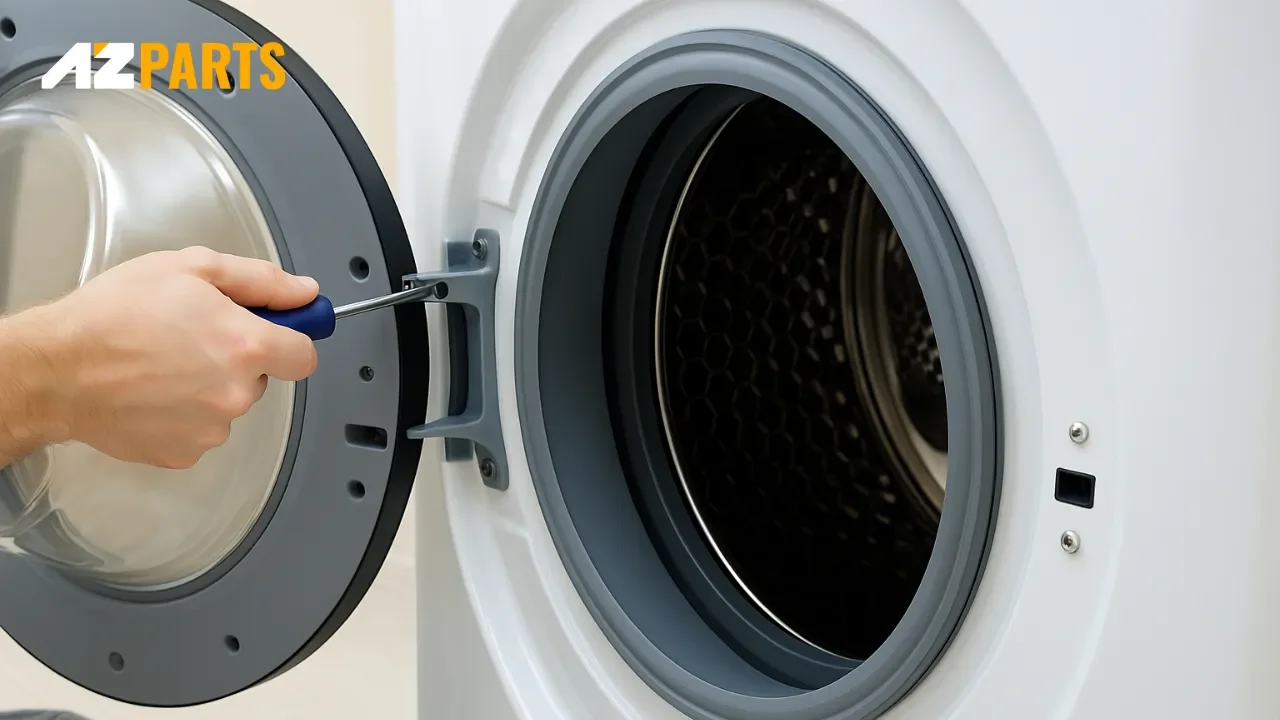
2.4. Step 4: Remove the front panel
Next, unscrew the front panel, which includes the door of the dryer. Carefully lift and pull the panel forward. Be cautious, as the panel may have wires connected to the control board or interior light — disconnect these gently and take note of their positions for reassembly.
Carefully lift and pull the panel forward (Source: AZParts)
2.5. Step 5: Release the old belt from the drum and motor
You should now see the drum and the old belt wrapped around it. If the belt is already broken, simply remove it. If it’s still intact, push the idler pulley to release tension, then slide the belt off the motor shaft and pulley before pulling it off the drum completely.
2.6. Step 6: Install the new belt around the drum
Take the new belt and wrap it around the drum following the original groove, usually located in the middle or near the back of the drum. Make sure the belt is straight, not twisted, and properly aligned within the groove to ensure smooth operation. The dryer belts from AZParts are a reliable replacement option, easy to install and compatible with many popular dryer models.
2.7. Step 7: Loop the belt around the motor and idler pulley
Pull the belt down under the drum and wrap it around the motor pulley, then thread it around the idler pulley. To do this, you’ll need to push the idler pulley to one side (it's spring-loaded), which will give you the slack needed to position the belt. Once in place, release the pulley to tighten the belt. Ensure it’s snug but not overly tight.
2.8. Step 8: Reattach the front panel and reconnect wires
With the new belt installed, reattach the front panel by aligning it and securing it with the screws you removed earlier. If you disconnected any wires during disassembly, be sure to reconnect them correctly and securely.
2.9. Step 9: Snap the top panel back on
Lower the top panel back into place and press down firmly to re-engage the clips. If the panel doesn’t sit properly, double-check for any loose screws or misaligned edges.
2.10. Step 10: Replace lint filter housing screws
Reinstall the lint filter into its compartment, and screw the filter housing back into place. This ensures the top panel and other components are securely held together.
Screw the filter housing and related components back into place (Source
2.11. Step 11: Plug the dryer back in and test
Plug the dryer back into the power outlet, and reopen the gas valve if needed. Run a short drying cycle to check:
- Is the drum spinning smoothly?
- Are there any unusual noises?
- Does the machine stop or show error codes?
If everything runs normally, congratulations — you've successfully replaced your dryer belt!
3. FAQs about changing dryer belt
3.1. Can you replace a dryer belt yourself?
Yes, you can absolutely replace the dryer belt yourself at home if you have some basic tools like a screwdriver, pliers, and a compatible replacement belt. As long as you follow the step-by-step guide carefully, the process is not overly complicated.
3.2. Is it worth replacing a dryer belt?
Definitely, especially if the dryer is still in good working condition and only the belt is worn or broken. Replacing the belt is a much more cost-effective solution than paying for major repairs or buying a new machine.
3.3. How often should I change my dryer belt?
Typically, the belt should be replaced every 5 to 8 years, depending on how often you use the dryer. If the machine is used frequently, it’s a good idea to check the belt regularly and replace it sooner if signs of wear appear.
3.4. How do I tell if my dryer belt is bad?
Common signs include the drum not turning, strange noises like squealing or thumping, or the dryer running without drying clothes properly. Upon inspection, you may notice the belt is loose, cracked, frayed, or completely broken.
Replacing a dryer belt may seem complicated at first, but it’s actually quite simple if you follow the steps carefully and prepare properly. With just a few basic tools and a little time, you can fix the issue yourself at home, saving on repair costs and extending the life of your appliance. Don’t forget to check the belt periodically for signs of wear to ensure your dryer continues to operate smoothly and efficiently.
For the best results, it’s recommended to use high-quality or genuine replacement parts — especially dryer parts from AZParts, which offers a wide range of parts compatible with many popular dryer models like Crosley dryer parts, Frigidaire dryer components, Admiral dryer parts and Amana dryer parts... And if you’re not confident doing it yourself, don’t hesitate to seek help from a professional technician to ensure safety and proper installation.
Contact Information:
8 The Green, Ste A, Dover, Delaware 19901-3618, United States
Learn more about how to repair other dryer parts:
Dryer
- 1. When Should You Change the Dryer Belt?
- 2. How to Change a Dryer Belt
- 2.1. Step 1: Unplug the dryer and turn off the gas (if applicable)
- 2.2. Step 2: Remove the lint filter and unscrew the housing
- 2.3. Step 3: Pop the top panel
- 2.4. Step 4: Remove the front panel
- 2.5. Step 5: Release the old belt from the drum and motor
- 2.6. Step 6: Install the new belt around the drum
- 2.7. Step 7: Loop the belt around the motor and idler pulley
- 2.8. Step 8: Reattach the front panel and reconnect wires
- 2.9. Step 9: Snap the top panel back on
- 2.10. Step 10: Replace lint filter housing screws
- 2.11. Step 11: Plug the dryer back in and test
- 3. FAQs about changing dryer belt
Further Reading
Further Reading

Repair help
April 1, 2026
If your dryer has suddenly stopped working, won’t start, or fails to complete a cycle, the problem might be easier to fix than you think. In many cases, replacing a faulty component can get your dryer running again without the need for expensive repairs. In this guide, we’ll walk you through the 7 most common reasons your dryer isn’t working and what you can do to fix them. We’ll also point you to the specific dryer parts available at AZParts that can help you resolve each issue.

Repair help
December 28, 2025
When your dryer won’t spin, even the smallest load becomes a hassle. In this guide, AZParts walks you through the most common causes, from power and startup issues to mechanical breakdowns and motor failures. You’ll also find practical advice on handling safety and sensor dryer problems, along with a step-by-step diagnostic guide to help you identify the problem and get your dryer working again.

Repair help
November 28, 2025
Does your dryer smell like mildew every time you open the door? That musty odor is a common sign of moisture buildup and poor ventilation, often caused by clogged lint traps, dirty vents, or worn-out parts. While regular cleaning is essential, truly eliminating the dryer issue may require replacing faulty components such as lint screens, door seals, or vent hoses. In this article, AZParts explore the common causes behind why your dryer smells like mildew and provide practical tips to eliminate those unpleasant odors.

How-To Guides
November 20, 2025
Dryer running cold? The heating element is probably broken. Learn how to fix the heating element in the dryer yourself, it's easier than you think and saves repair costs. This comprehensive guide will walk you through identifying, removing, and installing a new heating element in your dryer, with expert tips from AZParts to ensure your clothes are drying efficiently again in no time.

Review
November 19, 2025
Choosing the right dryer vent hose is more important than you think. Each dryer vent hose type affects your dryer's efficiency and safety differently. In this article, AZParts will introduce the most common types of dryer vent hose, compare their pros and cons, and help you pick the best fit.