How-To Guides
How to Replace a Primer Bulb Properly
AZparts Team
Updated on December 22, 2025
8 min read
The primer bulb is a small but essential part that helps draw fuel into the carburetor, making cold starts easier especially on snowblowers. Over time, it can crack, harden, or stop working properly. In this guide, AZParts will walk you through the simple steps to replace your primer bulb quickly and safely, even if you're not a professional mechanic.

1. How to Replace a Primer Bulb Properly
Primer bulb replacement becomes necessary when the bulb is cracked, stiff, or no longer draws fuel into the carburetor, making cold starts difficult or impossible. To avoid these issues, replacing the primer bulb at the first signs of wear is highly recommended. Using a high quality primer bulb helps ensure reliable performance and a secure fit for your specific engine model. AZParts offers a wide selection of primer bulbs designed for various snowblowers, trimmers, and other small engine machines.
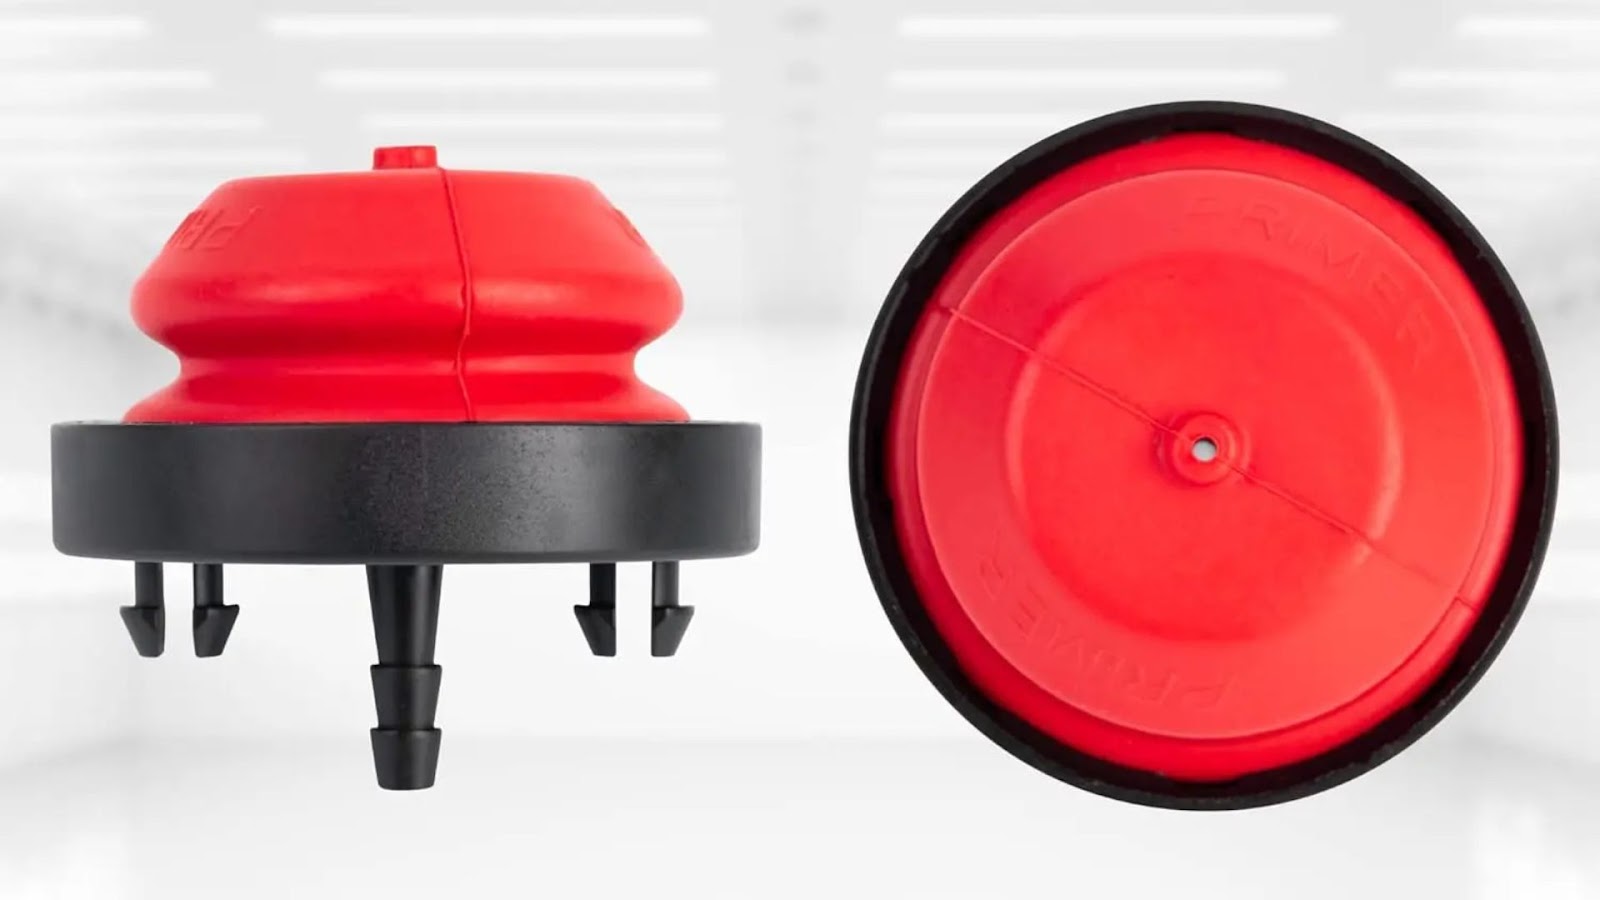
Replace a high-quality Primer Bulb (Source: AZParts)
1.1. Step 1: Locate the carburetor
Before replacing the primer bulb, you need to identify the carburetor on your machine. The carburetor is usually located behind the air filter and plays a key role in mixing air and fuel before it enters the engine. In most models, the primer bulb is either mounted directly on the carburetor or very close to it.
1.2. Step 2: Unscrew the two carburetor mount screws
After locating the carburetor, use a screwdriver to remove the two screws that secure it in place. This will release the carburetor from the engine and allow you to access the primer bulb more easily. Keep the screws in a safe place so you can reinstall them later.
As you remove the carburetor, inspect the area for dirt or fuel residue. Cleaning the surrounding components before reassembly helps prevent future performance issues.
Reattaching the fuel line to the snow blower's carburetor (Source: AZParts)
1.3. Step 3: Remove the old primer bulb
With the carburetor now accessible, locate the primer bulb. It is usually attached with a mounting plate or held in place by small tabs. Remove any screws or gently release the tabs using a screwdriver or needle-nose pliers.
The old primer bulb may be cracked, stiff, or leaking. Carefully remove it without damaging the mount. Cleaning the mounting surface at this stage ensures a tight seal during primer bulb replacement, which is essential for consistent fuel flow and reliable starts.
1.4. Step 4: Clean the carburetor and primer bulb components
Before installing the new primer bulb, take a moment to clean the surrounding components. Use a clean cloth or a soft brush to remove any dirt, old fuel residue, or debris from the carburetor and primer bulb mounting area.
This step is important because even small particles can prevent a proper seal or interfere with fuel flow. If you are performing a seasonal tune-up, it is also a good time to inspect the fuel lines and air filter for signs of wear or clogging. Keeping everything clean helps ensure reliable engine performance.
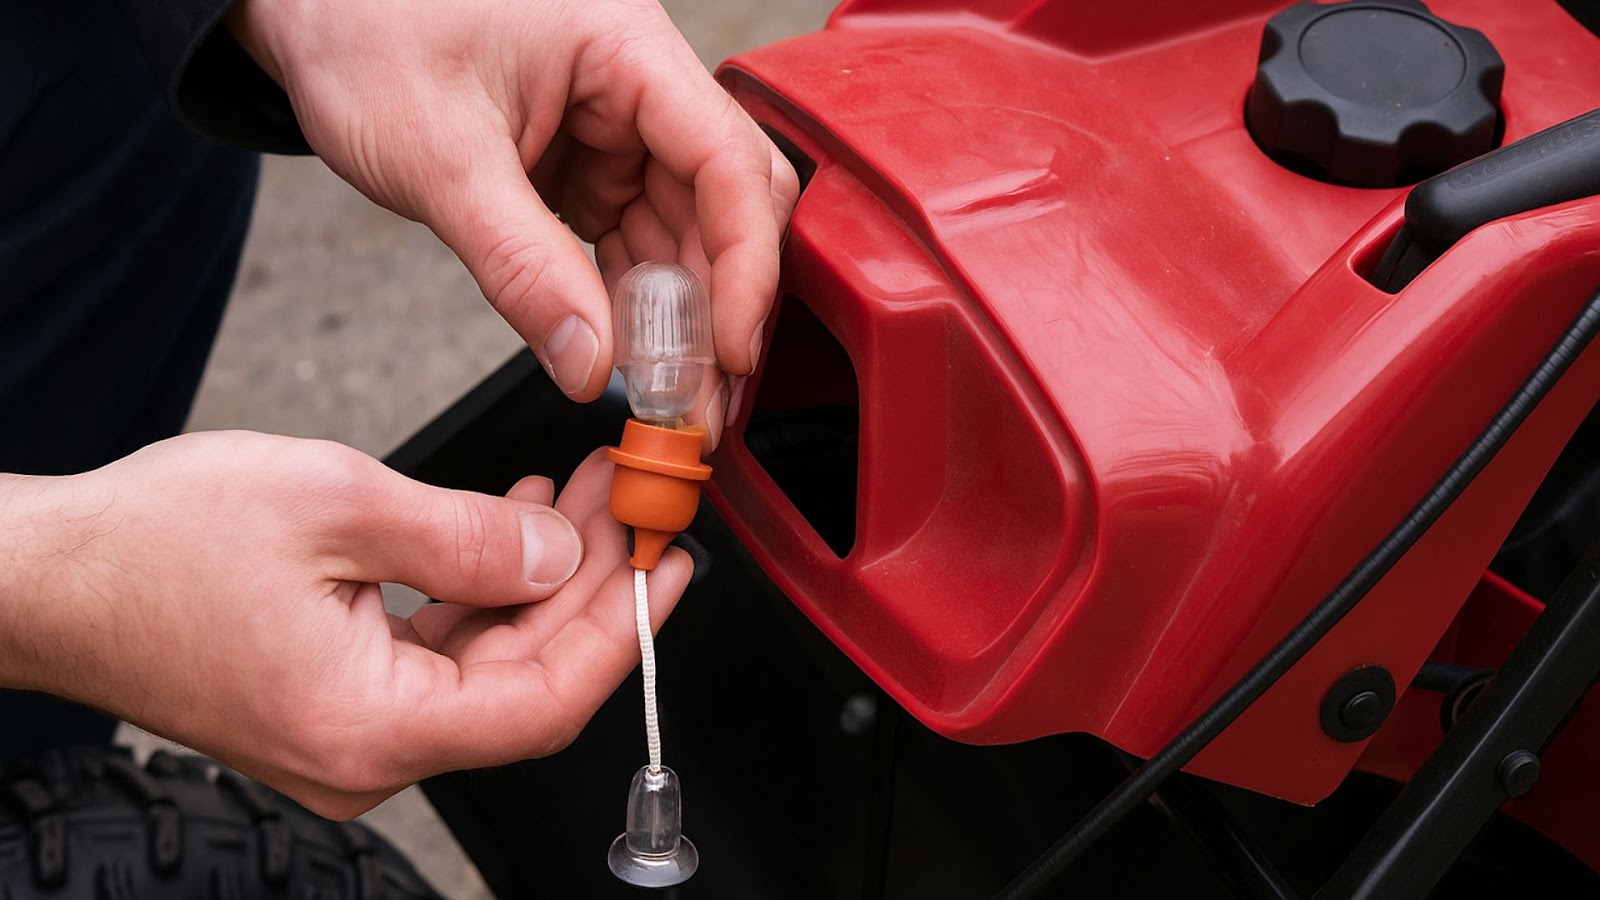
1.5. Step 5: Install the new primer bulb
Now that the area is clean, carefully press the new primer bulb into its mounting plate or housing. If your bulb is secured with screws, align it correctly before tightening them in place. Make sure the bulb sits evenly and is not twisted or pinched. Check that the bulb moves freely when pressed and returns to its original shape without resistance. This indicates proper suction.

Installing the new primer bulb on a snow blower (Source: Freepik)
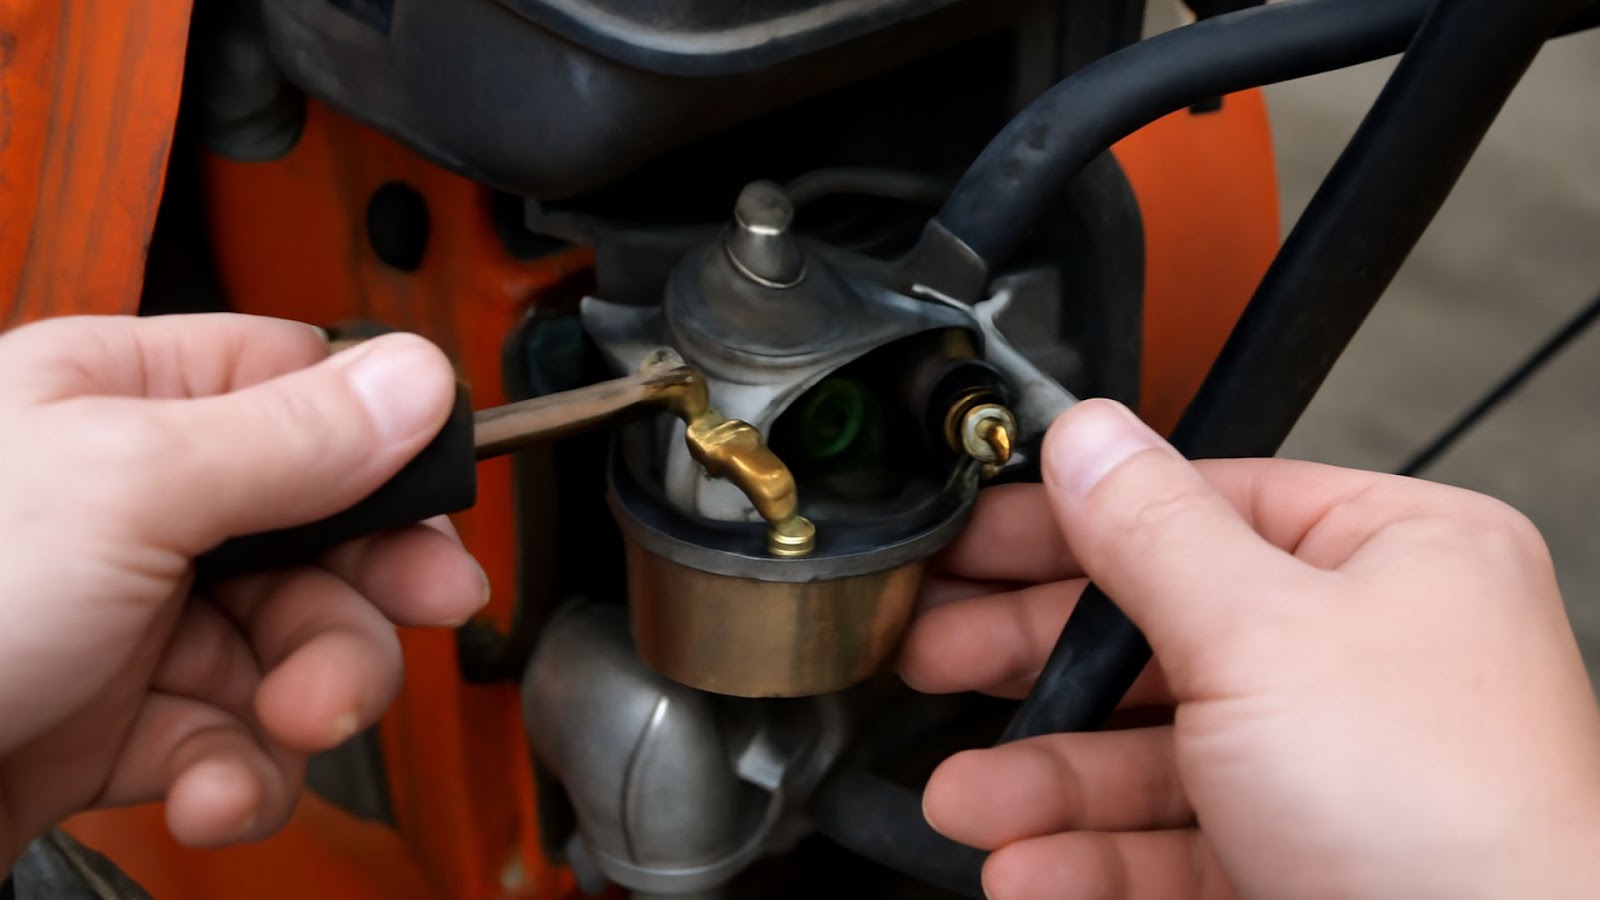
1.6. Step 6: Remount the carburetor
Once the new primer bulb is securely in place, it's time to reinstall the carburetor. Align it carefully with the mounting area, then insert the two screws you removed earlier. Tighten them evenly to ensure a snug and balanced fit.
Double-check the fuel lines and throttle linkage during reassembly to make sure they are properly connected and not pinched. A well-mounted carburetor helps maintain consistent fuel delivery and smooth engine operation.
1.7. Step 7: Replace the air filter and air cleaner cover
The final step is to reinstall the air filter and its cover. Slide the air filter back into place, making sure it fits securely and evenly. Then snap or screw the air cleaner cover back on to protect the engine from dust and debris.
A clean air filter is essential for proper engine function. If yours looks dirty or clogged, it’s a good idea to replace it at this stage. With everything reassembled, your engine is ready for a test run.

Change the air filter and reattach the air cleaner cover (Source: AZParts)
2. How to Repair Remote Primer Bulb on a Snowblower
Many snowblowers use a remote primer bulb system, where the bulb is mounted separately from the carburetor. These bulbs typically connect to the fuel system via small hoses and snap into place with plastic tabs or rings. Replacing a worn or cracked remote primer bulb is a straightforward process that can restore smooth cold starts and improve overall engine reliability.
2.1. Step 1: Secure the return fuel line with a clamp
Before starting the replacement, locate the return fuel line connected to the primer bulb. This line sends fuel back into the tank and may leak if not properly sealed during snowblower maintenance.
Use a fuel line clamp or locking pliers to gently pinch the return line. Make sure the clamp does not damage the hose. Securing the line helps prevent fuel spills and keeps the work area clean and safe. If fuel has been sitting in the system for a long time, consider draining and replacing it for better performance.

Fasten the return fuel line in place using a clamp (Source: AZParts)
2.2. Step 2: Use a screwdriver to disconnect the fuel lines
Once the return line is secured, use a flat-head screwdriver to carefully pry the fuel lines off the primer bulb nozzles. There are usually two hoses: one from the fuel tank and one returning to it.
Work slowly to avoid damaging the rubber fuel lines. If the hoses are brittle or cracked, it's a good idea to replace them along with the bulb. This step ensures the fuel system remains leak-free and functional for the season ahead.
2.3. Step 3: Remove the old bulb by squeezing its mount tabs
Most remote primer bulbs are secured to the snowblower’s housing or fuel system mount with plastic retention tabs. These tabs snap into place and hold the bulb firmly.
To remove the bulb, locate the tabs behind the mounting plate and squeeze them inward while gently pulling the bulb outward. You may need needle-nose pliers for a better grip. Take care not to crack the mounting ring, as it needs to be reused unless you're replacing the entire assembly.
Take out the old bulb by pressing its mounting tabs (Source: AZParts)
2.4. Step 4: Install the new primer bulb
Take your new primer bulb and align its tabs with the slots on the mounting ring. Press it firmly into place until you hear or feel a snap, indicating that the tabs are fully seated.
Some bulbs may fit tightly, so pressing evenly around the edges can help. For stubborn fits, slightly lubricate the tabs with a drop of clean fuel or oil to ease insertion. Ensure the bulb sits flush and compresses easily when pressed.
2.5. Step 5: Reattach the fuel lines
With the new bulb installed, reconnect the fuel lines in the same positions as before typically, the inlet hose connects to the center nozzle and the return line to the outer one.
Press each line firmly onto its fitting to ensure a tight seal. Once connected, remove the clamp from the return fuel line. You can now press the primer bulb a few times to verify proper suction and fuel movement.
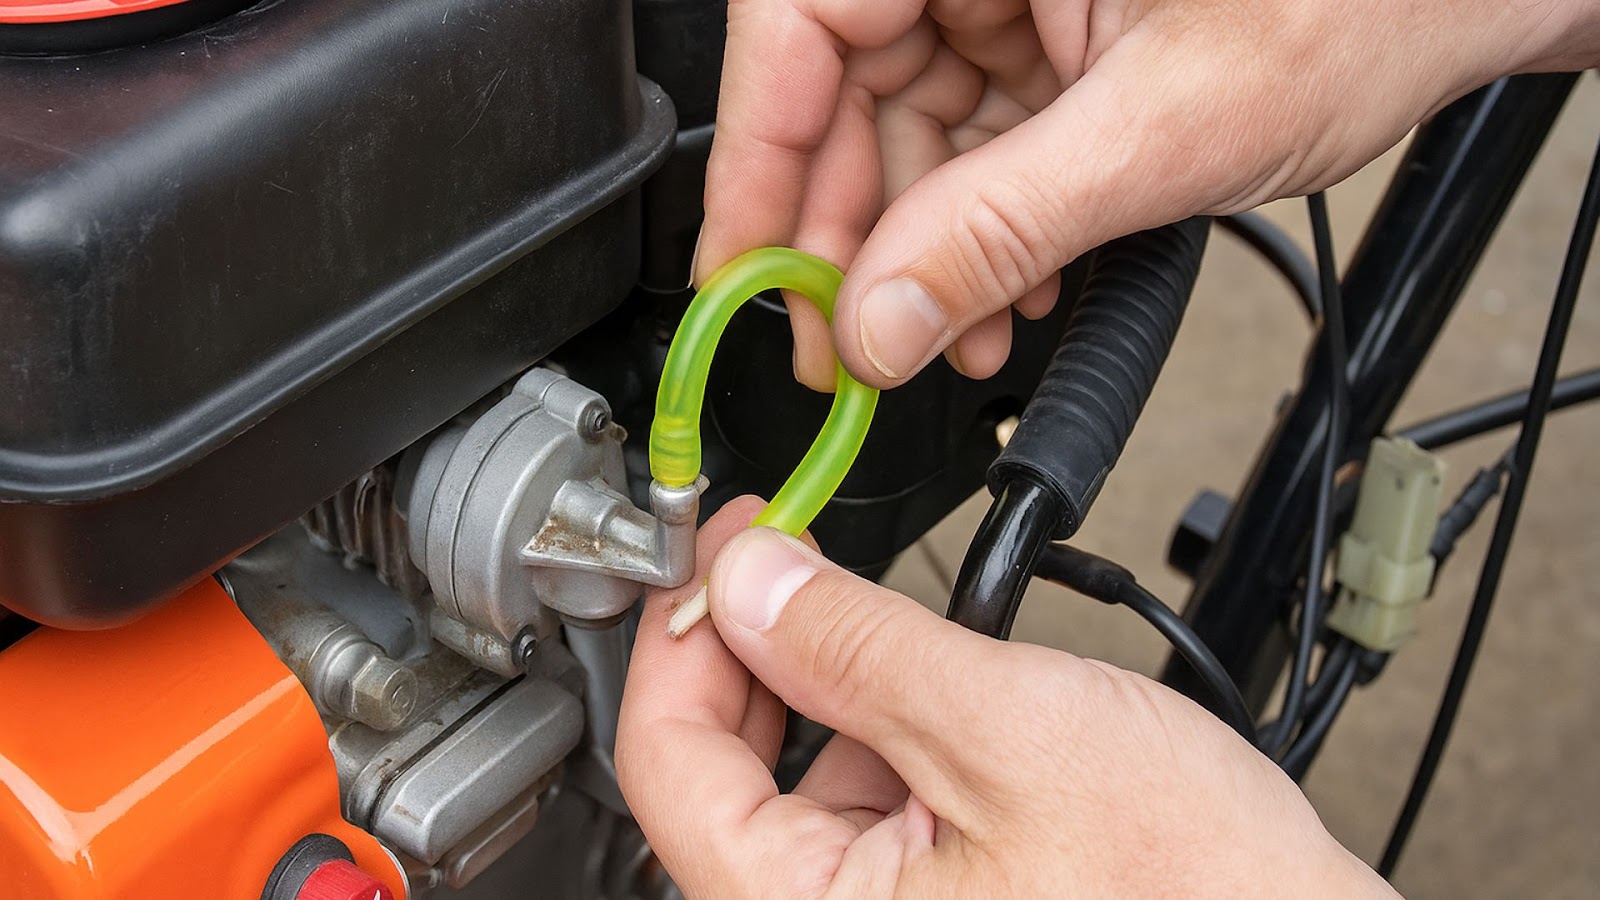
Reconnect the fuel lines (Source: AZParts)
3. FAQs about Primer Bulb Replacement
3.1. How does a primer bulb work?
A primer bulb works by manually drawing fuel from the fuel tank into the carburetor before starting the engine. When you press the bulb, it forces air out of the fuel system. As the bulb is released, it creates suction that pulls fresh fuel through the fuel lines and into the carburetor bowl. This process enriches the fuel mixture, making cold starts easier, especially for small engines like snowblowers, trimmers, and lawn equipment operating in low temperatures.
3.2. What is the primer bulb function on a snowblower?
The primer bulb function on a snowblower is to supply extra fuel to the carburetor during startup. In cold weather, fuel does not vaporize easily, which can make starting difficult. By pressing the primer bulb several times, you ensure that enough fuel reaches the engine for ignition. Without a properly working primer bulb, a snowblower may require excessive pulling to start or may not start at all when cold.
3.3. Why is my primer bulb on snowblower not working?
If your primer bulb on snowblower is not working, it may be due to one of the following snowblower troubleshooting: The primer bulb is cracked, stiff, or leaking, Fuel lines are clogged, loose, or installed incorrectly, The carburetor passages are blocked with dirt or old fuel, The primer bulb is not sealing properly in its mounting plate. In most cases, replacing the primer bulb and inspecting the fuel lines will quickly restore normal operation.
Replacing a primer bulb is a simple yet essential maintenance task that ensures your snowblower starts smoothly and runs reliably, especially in cold weather. Whether your primer bulb is mounted directly on the carburetor or remotely, following the proper steps can help you complete the replacement safely and efficiently even without professional help.
For best results, always choose high-quality snow blower parts from AZParts. Their wide selection of primer bulbs and carburetor components is designed to fit various snowblower models, delivering long-lasting performance and a perfect fit.
Contact Info
Address: 8 The Green, Ste A, Dover, Delaware 19901-3618, United States
Email: support@azparts.com
Read more:
Snowblower
- 1. How to Replace a Primer Bulb Properly
- 1.1. Step 1: Locate the carburetor
- 1.2. Step 2: Unscrew the two carburetor mount screws
- 1.3. Step 3: Remove the old primer bulb
- 1.4. Step 4: Clean the carburetor and primer bulb components
- 1.5. Step 5: Install the new primer bulb
- 1.6. Step 6: Remount the carburetor
- 1.7. Step 7: Replace the air filter and air cleaner cover
- 2. How to Repair Remote Primer Bulb on a Snowblower
- 3. FAQs about Primer Bulb Replacement
Further Reading
Further Reading

Repair help
December 2, 2025
One of the most common and frustrating issues during winter is a snow blower auger not turning, even when the engine is running smoothly. Since the auger plays a critical role in collecting and throwing snow, its failure can severely impact your machine’s performance.
In this article, AZParts will guide you through 5 common reasons why your snow blower auger might stop spinning, along with practical fixes to help you get your equipment back to peak condition quickly and efficiently.
_1747325797.png&w=3840&q=75 "Snow Blower Won’t Start? Why and How to Fix It")
Repair help
November 27, 2025
There’s nothing worse than waking up to fresh snow, only to find your snow blower won’t start. Fortunately, most of these issues are easy to diagnose and fix at home with a little know-how and the right parts. In this guide, AZParts will walk you through the most common causes and quick fixes, so you can get back to clearing snow in no time.
")
How-To Guides
November 19, 2025
Is your snowblower struggling to clear the white stuff, or worse, not working at all? One of the leading culprits is often a worn or broken snowblower drive belt. While replacing snowblower belts might sound complicated, it's actually a completely manageable maintenance task that can get your machine back to peak performance. In this guide, AZParts walk you through how to replace a snowblower belt safely and effectively, ensuring you're always ready to tackle any upcoming snowstorm.

How-To Guides
November 4, 2025
Regular snow blower maintenance is essential to keep your machine safe, reliable, and efficient, especially during harsh winters. At AZParts, we know how proper care and quality parts can extend the life of your snow blower and help it perform at its best. In this article, AZParts will walk you through key safety checks, cleaning routines, and expert maintenance tips for year-round performance.

Review
June 1, 2025
If your snowblower starts but stalls after a few seconds, several factors could be at play. These issues typically involve fuel delivery, air intake, ignition, or mechanical problems. Understanding these potential causes and their solutions can help you get your snowblower back to working condition.