How-To Guides
How to Clean a Front Load Washer Gasket
AZparts Team
Updated on July 25, 2025
7 min read
A clean front load washer gasket is essential for maintaining your washing machine's performance and preventing unpleasant odors. Regular cleaning of your front load washer gasket ensures your appliance operates efficiently and your clothes come out fresh and clean. At AZParts, we understand the importance of proper appliance maintenance and offer quality replacement parts to keep your washer running smoothly.

1. Should I Clean My Front Load Washer Rubber Seal?
Cleaning your front load washer rubber seal is crucial for several important reasons that directly impact your washing machine's performance and your family's health.
1.1. Preventing Mold and Mildew Growth
The rubber gasket in front load washers creates the perfect environment for mold and mildew to thrive. The combination of moisture, warmth, and organic matter from soap residue and fabric fibers creates ideal conditions for fungal growth. When left unchecked, these microorganisms can spread throughout your washing machine, contaminating your clothes and potentially causing health issues for sensitive individuals.
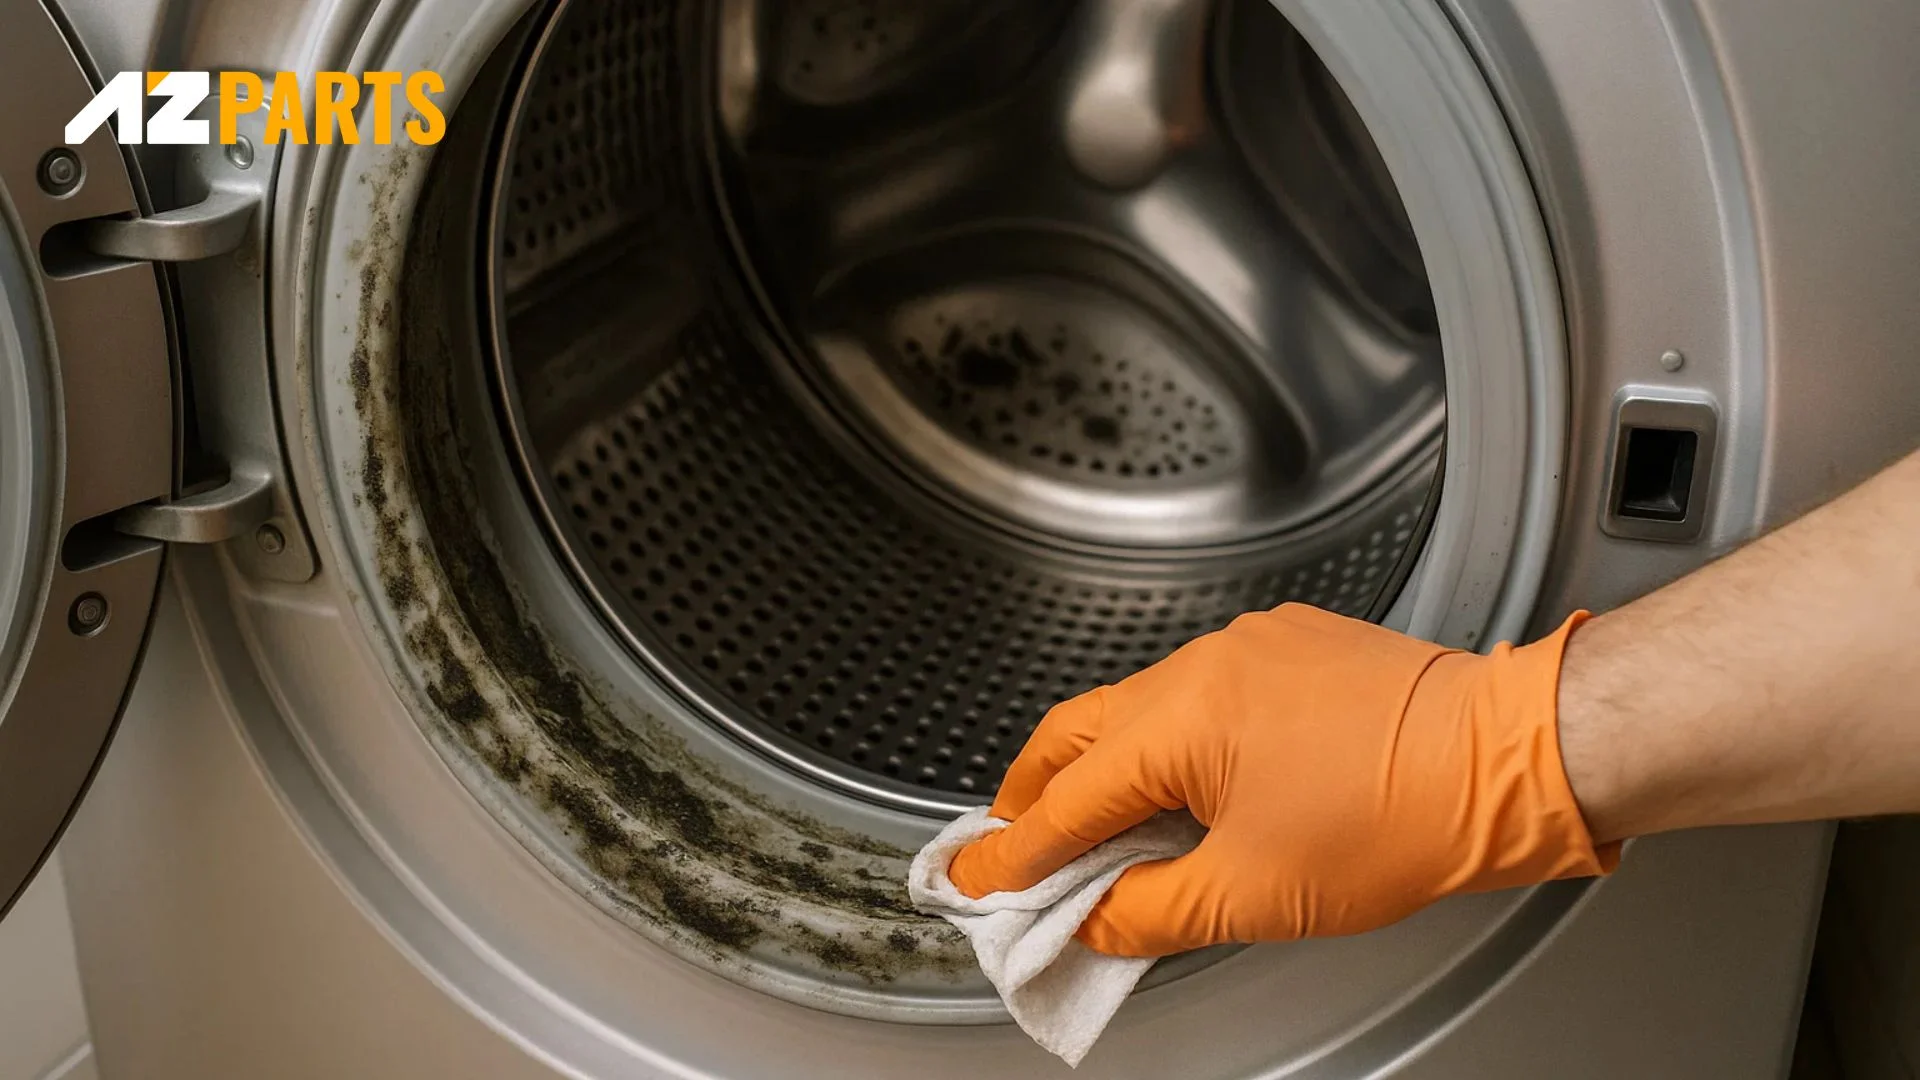
Preventing Mold and Mildew Growth (Source: AZParts)
Mold spores can become airborne during the wash cycle, spreading to other areas of your home. Black mold, in particular, can cause respiratory problems, allergic reactions, and other health complications. Regular cleaning of your front load washer gasket prevents these harmful organisms from establishing colonies in your appliance.
1.2. Eliminating Smells and Odors
A dirty gasket is often the primary source of that musty, unpleasant smell that many front load washer owners experience. The trapped moisture and organic debris create a breeding ground for bacteria that produce foul odors. These smells can transfer to your freshly washed clothes, defeating the purpose of doing laundry.
The rubber material of the gasket can absorb odors over time, making them increasingly difficult to eliminate without proper cleaning. Regular maintenance prevents odor buildup and ensures your washer continues to leave your clothes smelling fresh and clean.
1.3. Maintaining Optimal Performance
A clean gasket ensures proper sealing of your washing machine door, preventing water leaks during operation. Debris and buildup can interfere with the seal's ability to create a watertight barrier, potentially causing water damage to your laundry room floor. Additionally, a compromised seal can affect the machine's ability to maintain proper water levels and pressure during wash cycles.
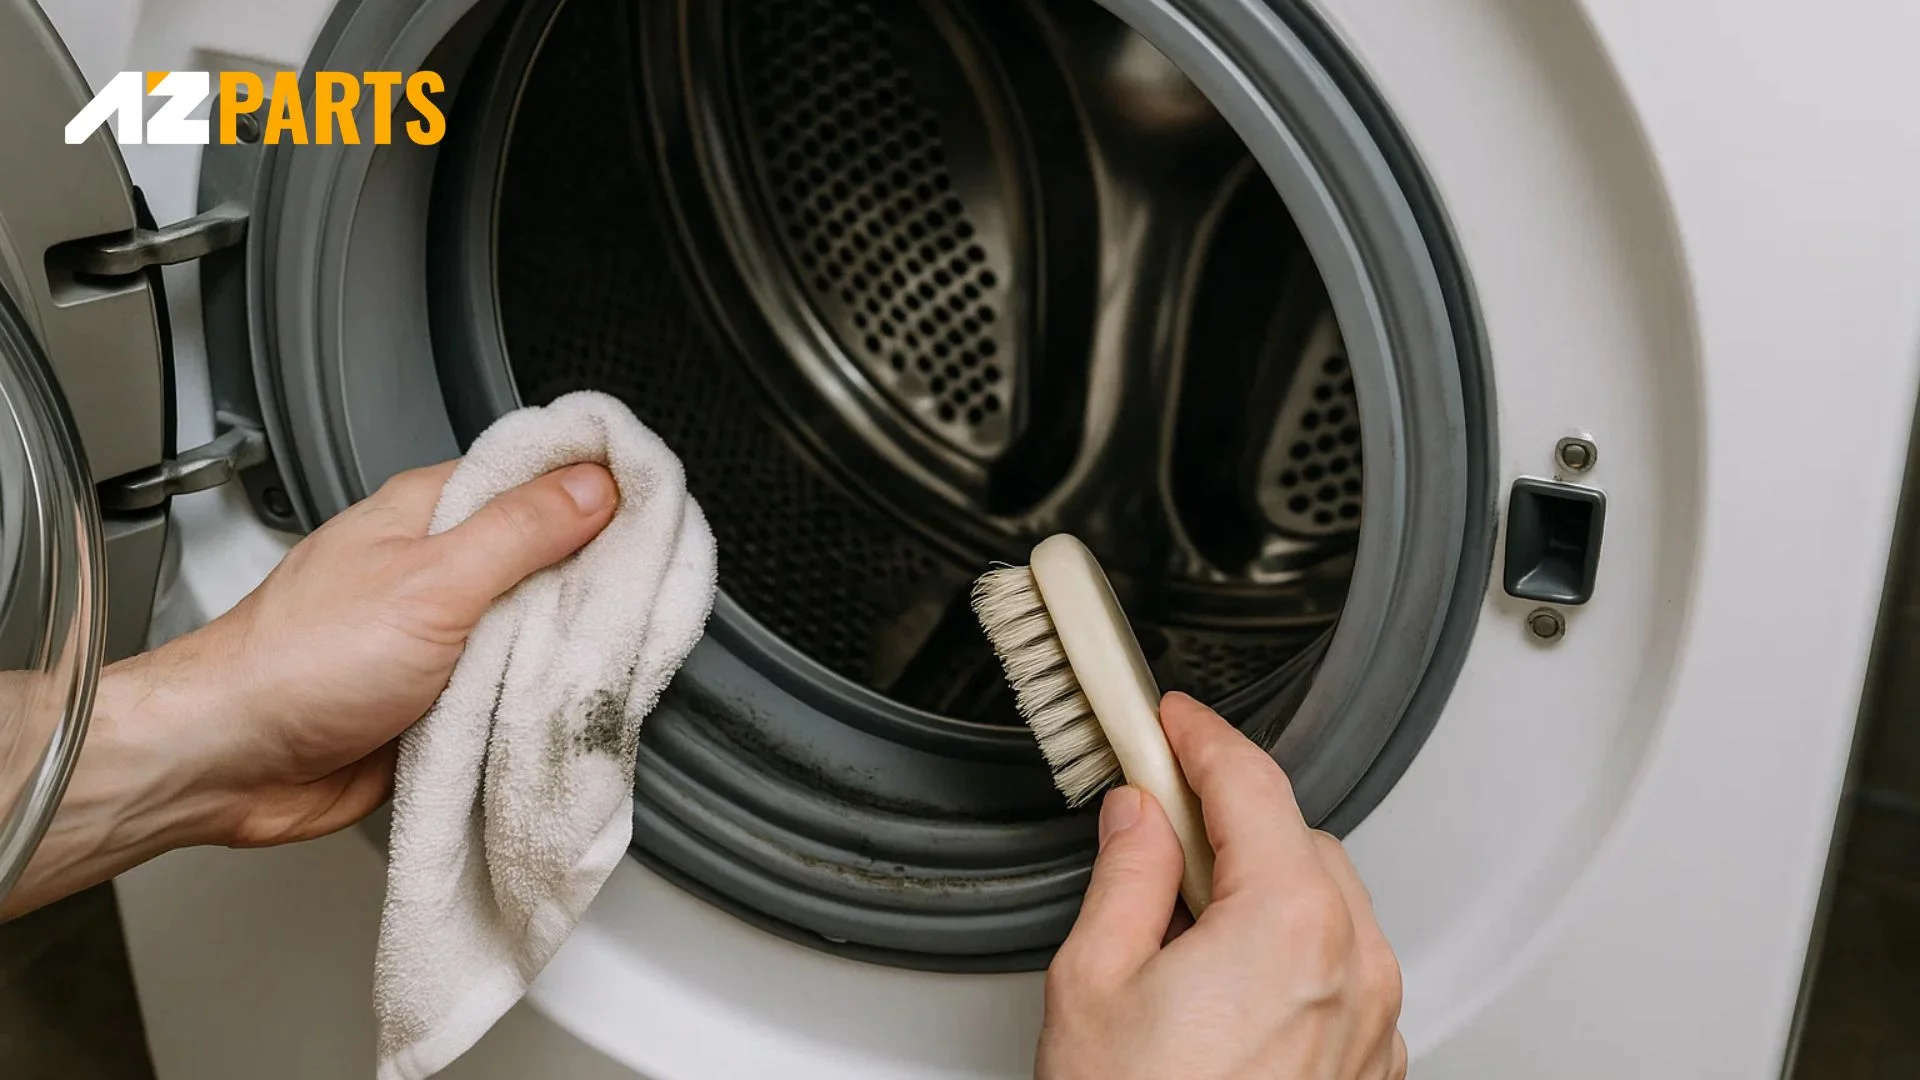
Maintaining Optimal Performance (Source: AZParts)
Regular gasket cleaning also extends the life of this crucial component. Accumulated grime and mold can cause the rubber to deteriorate prematurely, leading to cracks, tears, or complete seal failure. Replacing a damaged gasket can be expensive, making preventive maintenance a cost-effective investment.
2. Step-by-Step Guide to Clean Front Load Washer Gasket
Follow this comprehensive guide to effectively clean your front load washer gasket and restore your appliance to optimal condition.
2.1. Step 1: Required Tools
Before beginning the cleaning process, gather these essential items:
- White vinegar or bleach solution
- Baking soda
- Soft cloth or microfiber towels
- Old toothbrush or soft-bristled brush
- Spray bottle
- Rubber gloves
- Flashlight or phone light
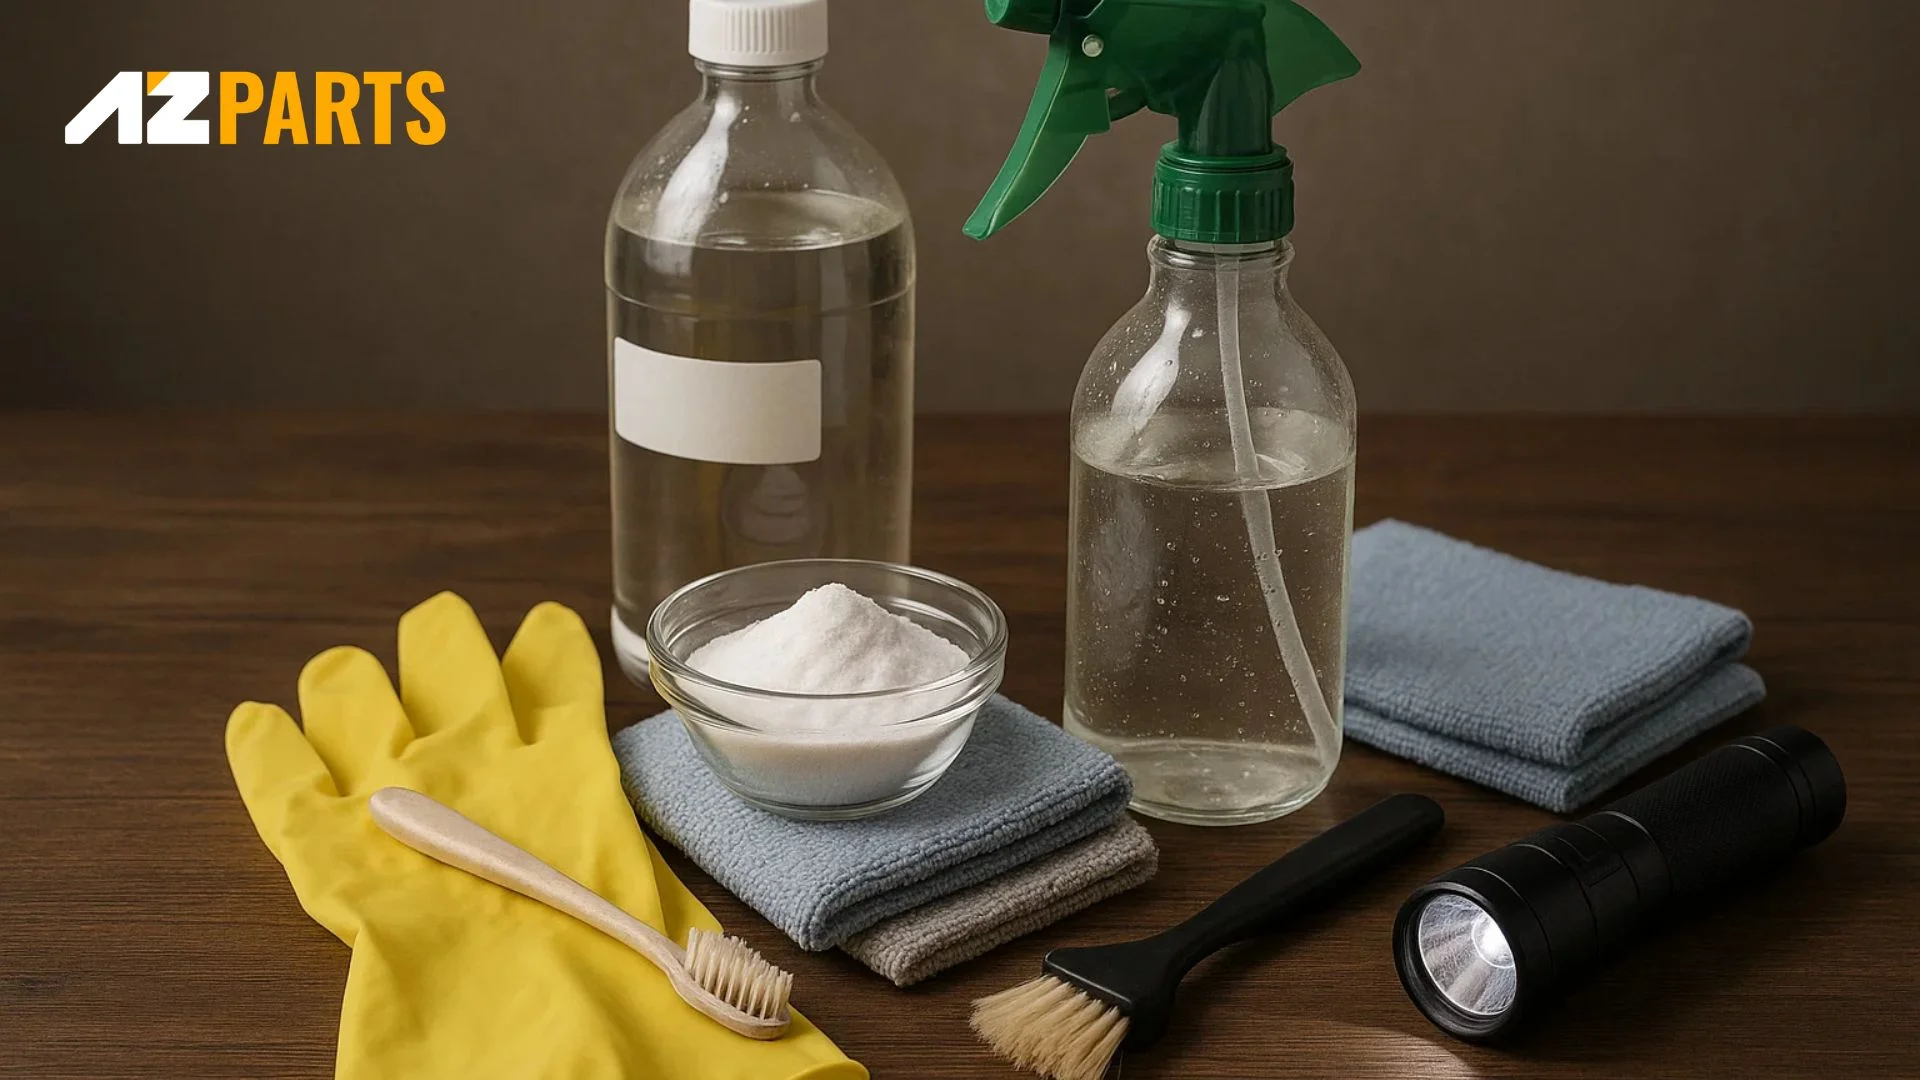
Essential items for the cleaning process (Source: AZParts)
Having the right tools ensures thorough cleaning and protects your hands from harsh chemicals. Choose either vinegar for a natural approach or bleach for more stubborn mold and mildew problems.
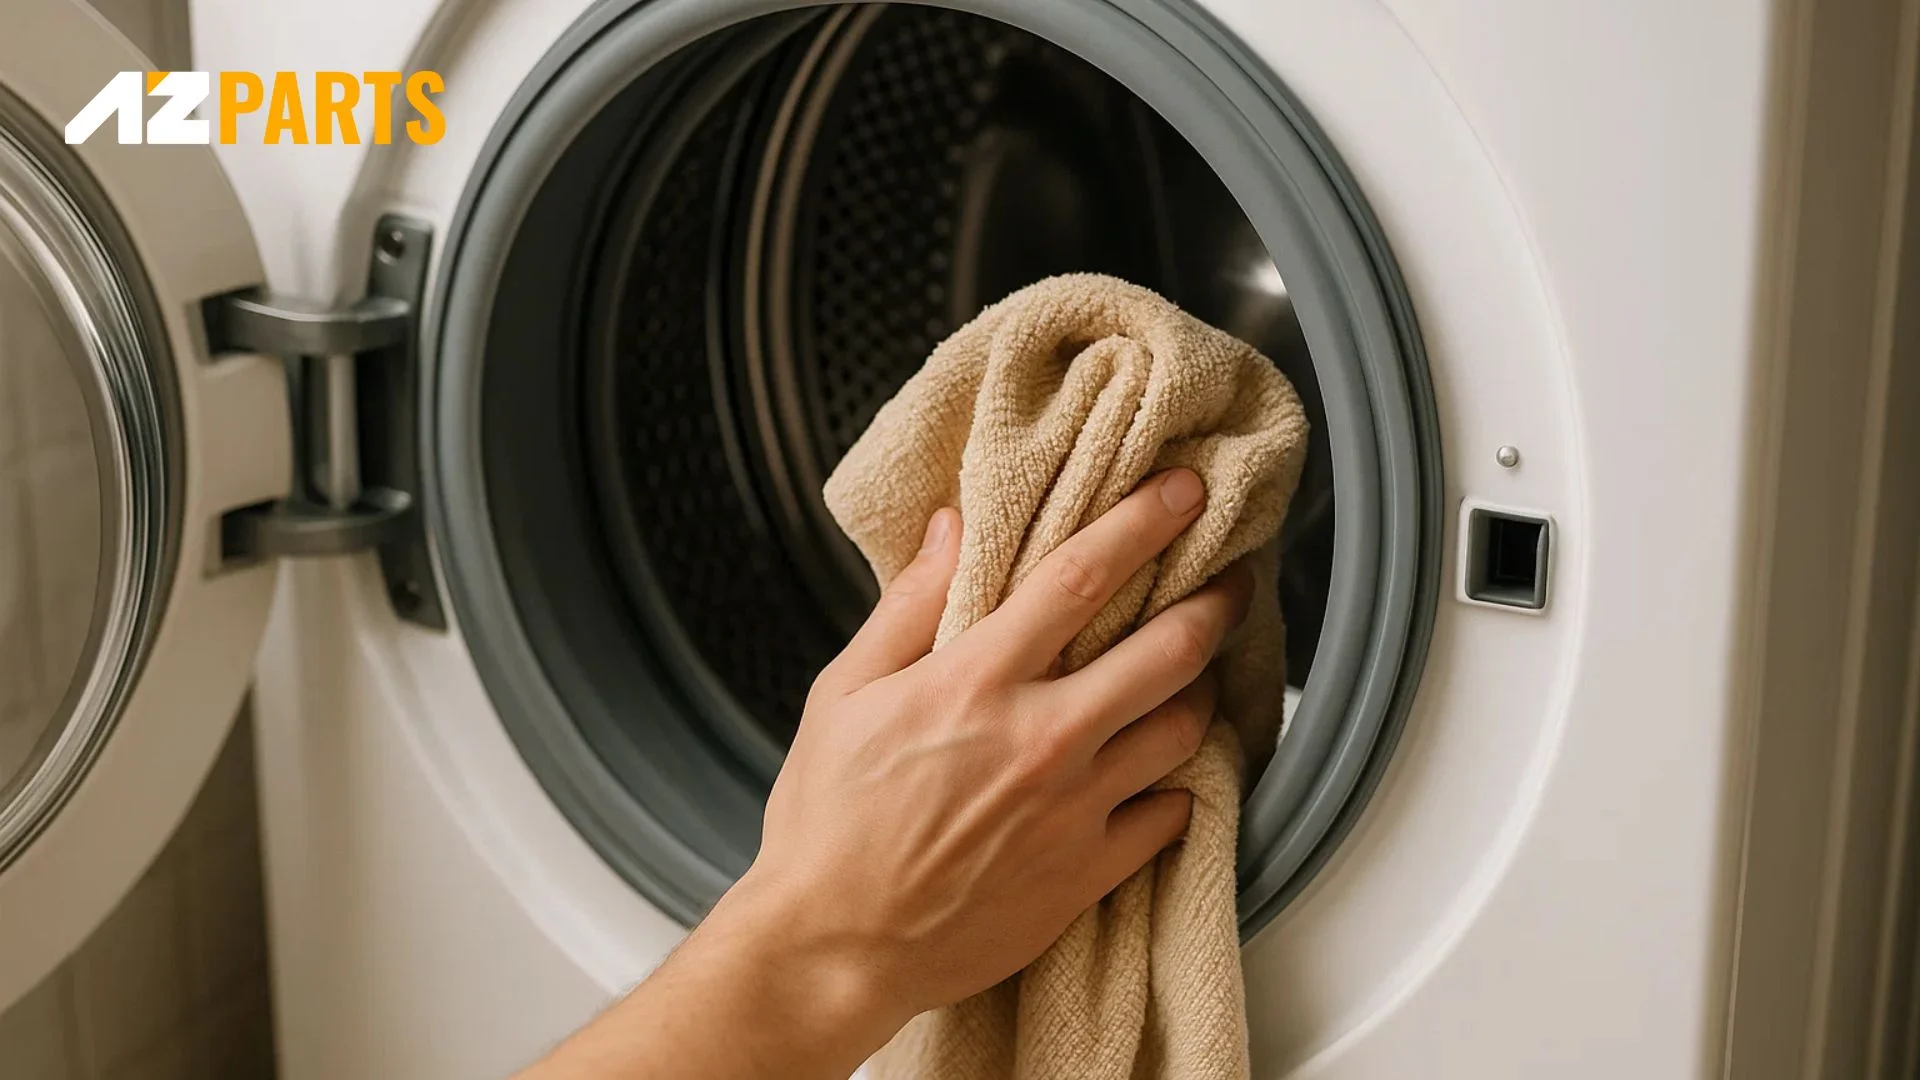
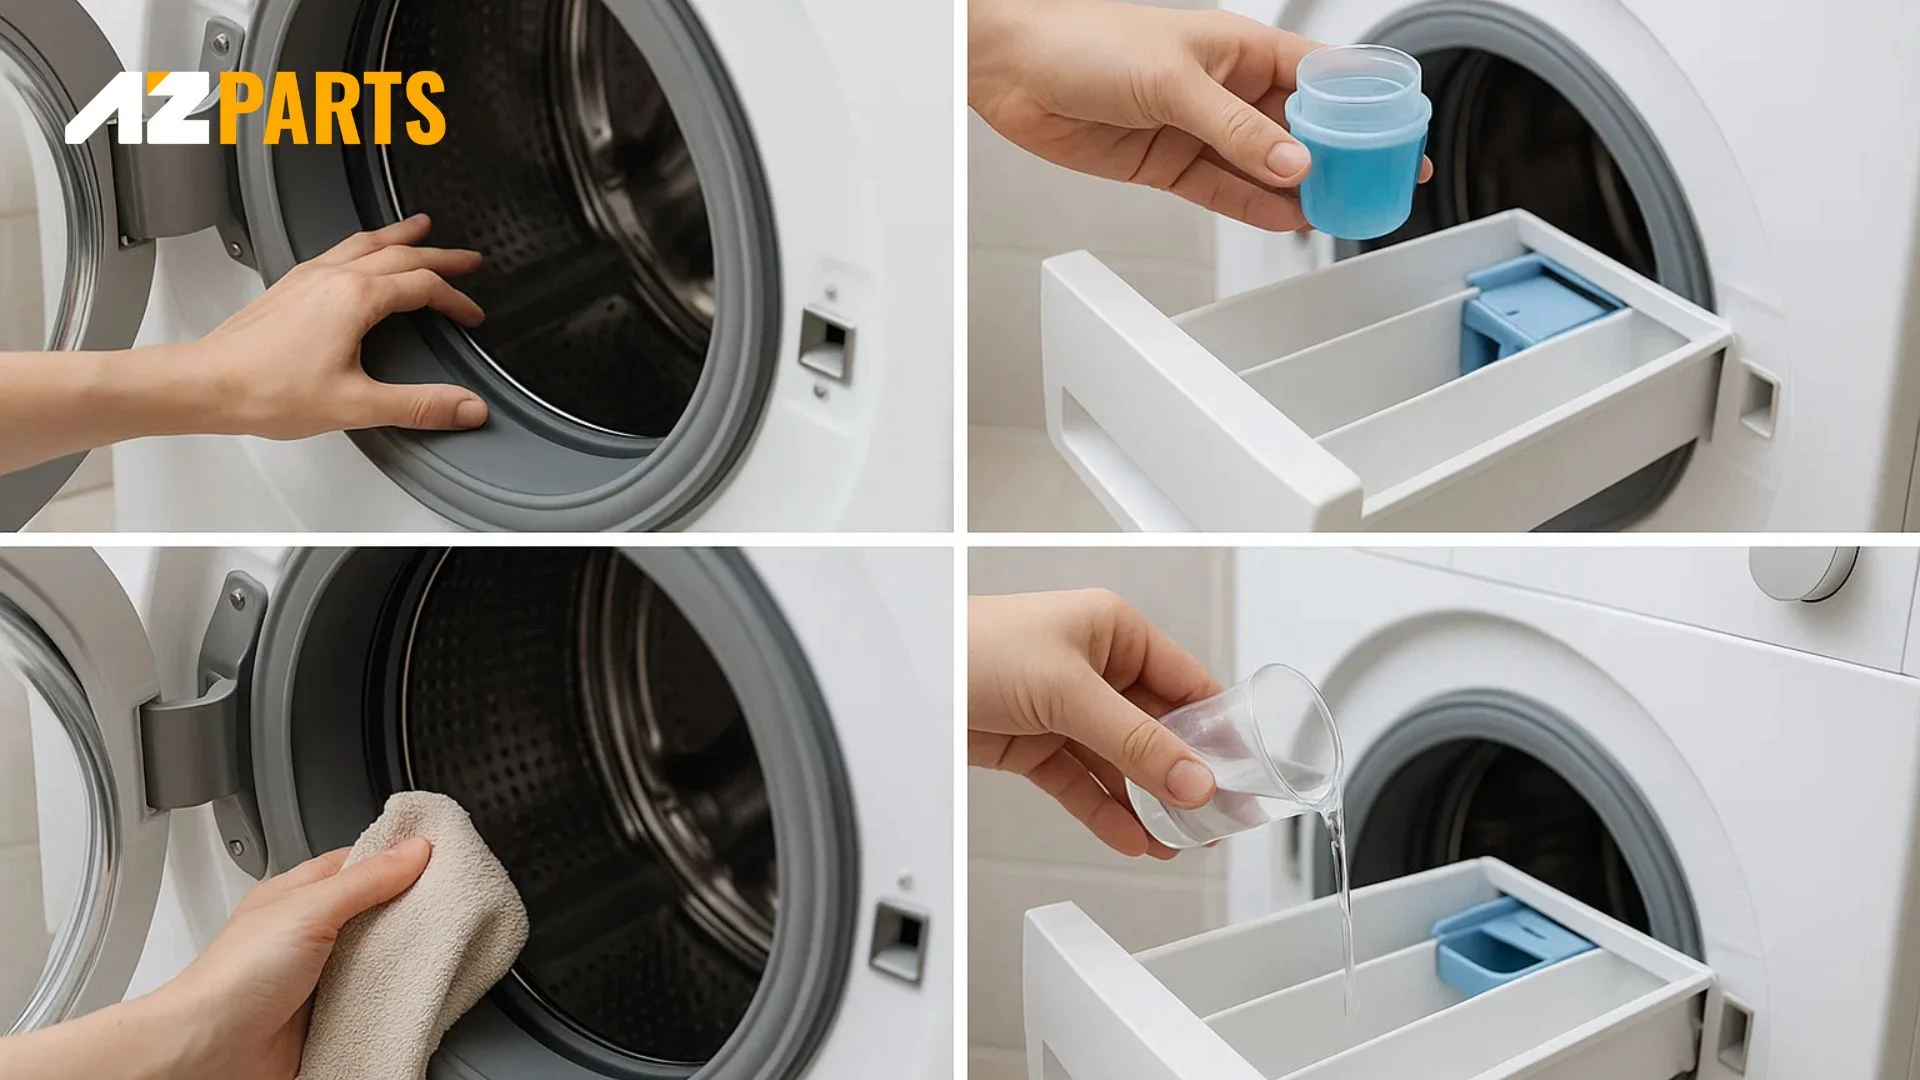
2.2. Step 2: Clean the Washer Drum and Gasket Seal
Start by running an empty hot water cycle with two cups of white vinegar or one cup of bleach to sanitize the drum and initial gasket area. This preliminary cleaning helps loosen debris and kills surface bacteria and mold spores.
High quality washing machine door seals from AZParts (Source: AZParts)
If your current gasket is severely damaged or beyond cleaning, consider replacing it with a high-quality option. AZParts offers reliable washing machine door seals that provide excellent durability and performance. Our replacement seals are designed to meet or exceed original manufacturer specifications.
After the initial cycle, wipe down the drum interior and visible gasket areas with a damp cloth to remove loosened debris and cleaning solution residue.
2.3. Step 3: Remove Any Loose Debris and Grime
Carefully pull back the rubber gasket folds to expose hidden areas where debris typically accumulates. Use your flashlight to inspect all crevices and folds thoroughly. Remove any visible hair, lint, coins, or other debris by hand or with tweezers.
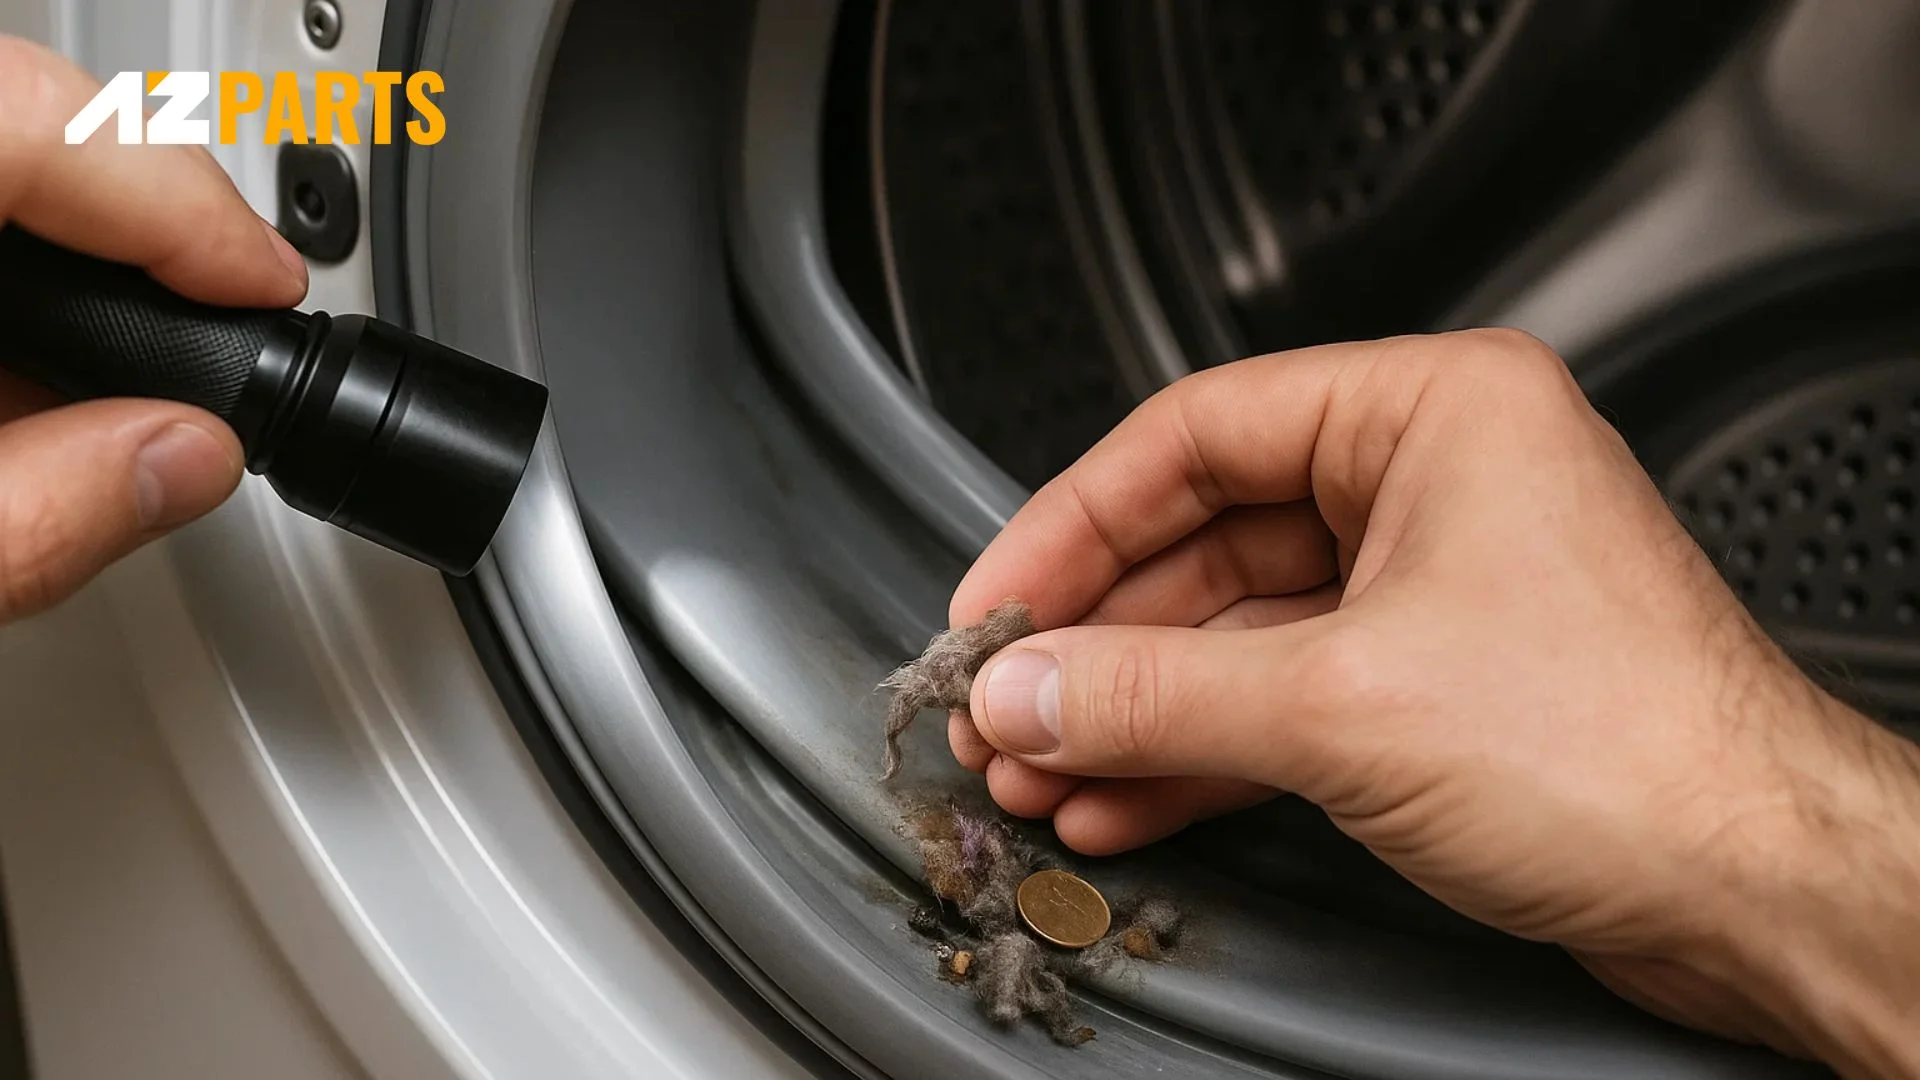
Remove Any Loose Debris and Grime (Source: AZParts)
Pay special attention to the bottom portion of the gasket, where gravity causes debris to settle. This area often contains the most accumulation and requires extra attention during cleaning.
2.4. Step 4: Remove Mold, Mildew or Tough Stains from Washer Door Seal
For stubborn mold and mildew stains, create a paste using baking soda and water. Apply this paste to affected areas and let it sit for 15-20 minutes to break down the organic matter. The alkaline nature of baking soda helps neutralize odors and lift stains from the rubber surface.
Alternatively, spray a solution of equal parts water and white vinegar on moldy areas. The acetic acid in vinegar effectively kills mold spores and dissolves mineral deposits. For severe cases, use a diluted bleach solution (1 part bleach to 10 parts water), but ensure proper ventilation and never mix bleach with other cleaning products.
2.5. Step 5: Scrub the Gasket Thoroughly
Using your soft-bristled brush or old toothbrush, gently scrub all gasket surfaces, paying particular attention to the folds and crevices where mold typically grows. Work systematically around the entire gasket, ensuring no area is overlooked.
Apply gentle pressure to avoid damaging the rubber material while effectively removing buildup. For textured gasket surfaces, use circular motions to work the cleaning solution into all the grooves and patterns.
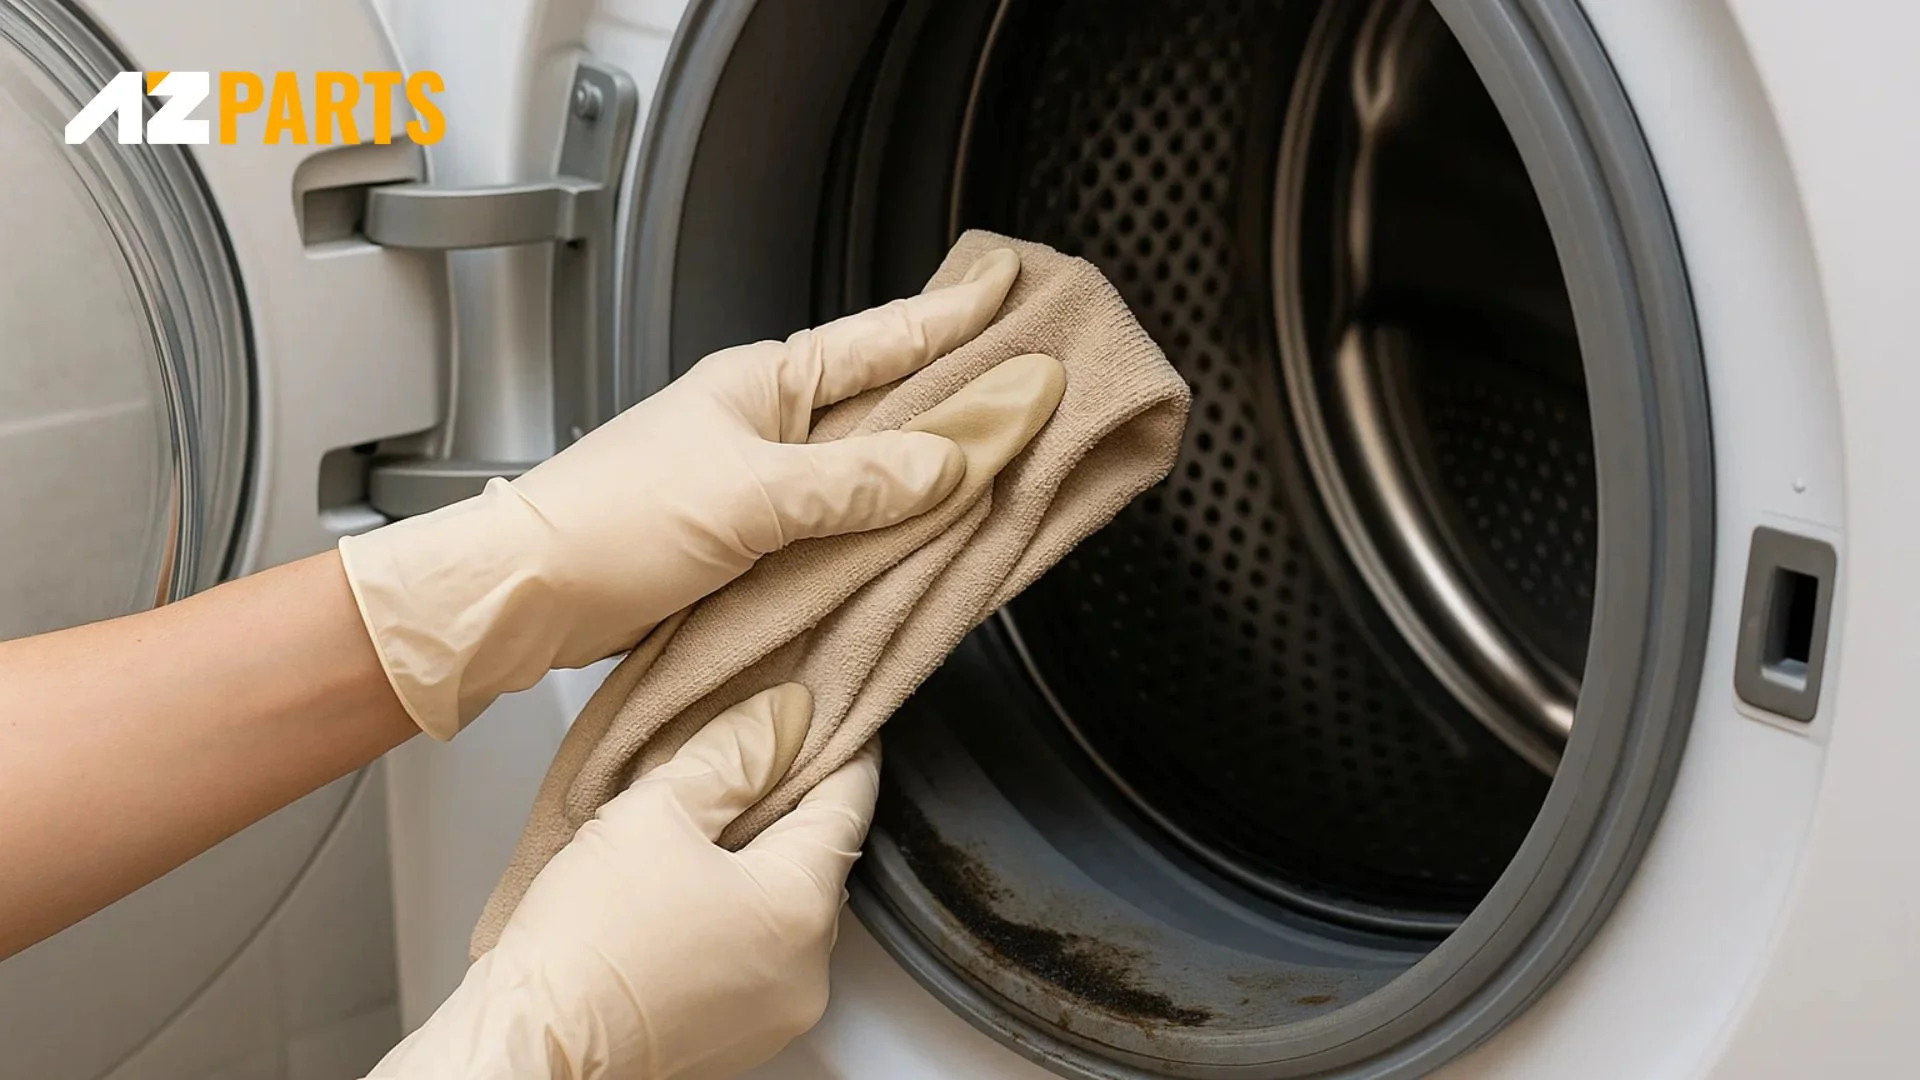
2.6. Step 6: Dry the Washer Gasket Completely
After thorough cleaning, use clean, dry towels to remove all moisture from the gasket folds and surfaces. Proper drying is crucial for preventing immediate mold regrowth. Leave the washer door open for several hours to allow air circulation and complete drying.
Dry the Washer Gasket Completely (Source: AZParts)
Consider using a fan to accelerate the drying process, especially in humid environments. Ensure the gasket is completely dry before closing the door or running another wash cycle.
3. Tips for Preventing Buildup and Mildew on a Washer Seal
Prevention is always better than remediation when it comes to gasket maintenance. These simple habits will help keep your front load washer gasket clean and odor-free between deep cleaning sessions.
- Always leave your washer door slightly open after completing a load to allow air circulation and moisture evaporation. This simple step prevents the humid environment that encourages mold growth.
- Use the appropriate amount of detergent according to manufacturer guidelines. Excess soap creates more residue that can accumulate in gasket folds.
- Wipe down the gasket after each use with a dry cloth, paying attention to the folds where moisture tends to collect.
- Run a monthly cleaning cycle using hot water and vinegar or a commercial washing machine cleaner.
Tips for Preventing Buildup and Mildew on a Washer Seal (Source: AZParts)
4. How Often Should You Clean the Rubber Seal on a Front Load Washer?
The frequency of deep gasket cleaning depends on several factors, including usage patterns, local water quality, and environmental conditions. Most manufacturers recommend thorough gasket cleaning every 4-6 weeks for average household use.
How Often Should You Clean the Rubber Seal on a Front Load Washer? (Source: AZParts)
Households with heavy laundry loads, hard water, or high humidity may need more frequent cleaning, possibly every 2-3 weeks. Signs that your gasket needs immediate attention include visible mold growth, persistent odors, or residue buildup in the folds.
For optimal results, combine monthly deep cleaning with weekly maintenance wipes and daily air-drying practices. This comprehensive approach ensures your front load washer gasket remains clean, odor-free, and functional for years to come.
Regular cleaning of your front load washer gasket is essential for maintaining appliance performance, preventing health hazards, and ensuring fresh-smelling laundry. By following this comprehensive guide and implementing preventive maintenance practices, you can keep your washer gasket in optimal condition for years to come.
For all your washing machine maintenance needs, including washer replacement parts and accessories, visit AZParts. Our extensive selection of high-quality components ensures your appliances continue operating at peak performance.
Learn more about maintenance tips for washing machine:
- How to clean a washing machine detergent drawer
- Replace washing machine door seal
- How to replace a drive belt on a washing machine
Contact Info
Address: 8 The Green, Ste A, Dover, Delaware 19901-3618, United States
Email: support@azparts.com
Washer
Further Reading
Further Reading

Repair help
July 17, 2025
A washer that makes loud noise can be both annoying and concerning. Whether it's grinding, banging, or rattling sounds, these noises often signal underlying issues that need immediate attention. Understanding different noise types helps you address problems quickly and avoid costly repairs. At AZParts, we provide quality replacement parts and expert guidance to resolve your washing machine noise issues effectively.

Repair help
July 11, 2025
When your washer lid won't lock, this problem prevents your appliance from starting its cycle, leaving you with wet clothes and a non-functional machine. Understanding the root causes and knowing how to troubleshoot effectively can save you time, money, and unnecessary stress. This guide from AZParts will walk you through the most common causes of lid locking problems and provide step-by-step solutions to get your washing machine back to working order.

How-To Guides
July 11, 2025
A washer that won’t spin is a fairly common issue, often causing inconvenience in daily life when clothes remain soaking wet after a wash cycle. This problem can stem from various causes, from user errors such as overloading or unbalanced laundry, to internal component failures like a faulty lid switch, broken drive belt, or clogged drain pump filter. In this article, AZParts will help you identify the exact cause and guide you through effective solutions so you can get your washer back up and running without needing to call a technician right away.

Repair help
June 24, 2025
Kenmore washers are built to last and widely trusted for their reliability and efficiency. However, like any appliance used frequently, they can develop issues over time. From a washer that refuses to start to one that leaks or makes unusual noises, understanding the root causes is essential to fixing the problem quickly and effectively.
This guide offers a detailed look at Kenmore washers troubleshooting, covering the five most common issues, likely causes, and step-by-step instructions on how to diagnose and repair them. Whether you’re a DIY enthusiast or simply want to understand what’s wrong before calling a technician, this resource will help you get your Kenmore washer back in working order.
_1748341252.jpg&w=3840&q=75 "Where to Find the Model and Serial Number on a Washer")
How-To Guides
May 27, 2025
Whether you need to schedule a repair, register your appliance, or order a replacement part, knowing where to find the serial number for washing machine models is essential. This unique identifier helps technicians match the right components and ensures your warranty is valid. However, each brand places its label in different locations, which can make the search confusing. In this article, AZParts will show you exactly where to find the model and serial number on washers from leading brands so you can take the next step with confidence.