How-To Guides
Replace Pull Cord Snowblower in Simple Steps
AZparts Team
Updated on December 28, 2025
6 min read
When a snowstorm hits, the last thing you want is a snowblower that won't start. A damaged starter cord can bring your snow clearing to a halt. If you spot any fraying or signs of wear, it's essential to replace the pull cord on your snowblower before it completely breaks. In this article, AZParts will guide you through the process, offering top-quality replacement cords that ensure uninterrupted snow removal.

Key Takeaways
- Pull cord replacement varies by snow blower type, with single-stage models being the simplest and three-stage models requiring more care.
- Replacing the pull cord is a manageable DIY task when you follow the correct steps and use proper tools.
- Always disconnect power and remove the spark plug before starting to ensure safety.
- Properly winding the recoil pulley is crucial for smooth cord retraction and long-term performance.
- Using high-quality recoil starter, handle, and rope parts helps prevent future failures and keeps your snow blower ready for heavy winter use.
1. Differences in Pull Cord Replacement for Various Snow Blower Types
The snow blower pull cord replacement process depends on the type of snow blower you own, as each model uses a recoil starter system with a different level of complexity. Here’s how the replacement steps can vary by snow blower type:
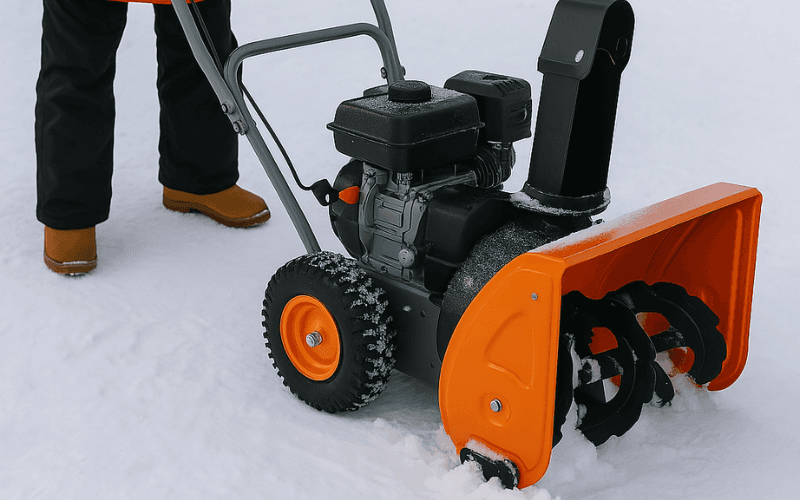
Comparing Pull Cord Replacement Across Different Snow Blower Types (Source: Freepik)
1.1. Single-stage snow blowers
Single-stage snow blowers are lightweight and designed for clearing small to moderate snow. These models usually have a simpler recoil starter, making the pull cord replacement process straightforward. The recoil starter mechanism is uncomplicated, so replacing the cord can be done quickly with minimal effort. For a smooth replacement, snow blower starter handle and rope parts are essential to ensure long-lasting performance.
1.2. Two-stage snow blowers
Two-stage snow blowers are designed for heavier snow, and their recoil starters are more robust compared to single-stage models. Replacing the pull cord on these machines may involve a bit more work, as the recoil starter system is more complex, but the replacement remains manageable with the proper tools and attention to detail. Using high-quality snow blower recoil starter parts ensures that your snow blower works efficiently even in tougher conditions.
1.3. Three-stage snow blowers
Three-stage snow blowers, built for the toughest snow conditions, have the most complex recoil starter systems. The pull cord replacement on these models requires a higher level of care due to the more intricate recoil mechanism. It may take a bit more time and precision to ensure proper installation, but with the right snow blower parts, the process is still doable, keeping your snow blower ready for any snowstorm.
2. How to Replace the Pull Cord on a Snow Blower
Replacing the pull cord on a snow blower is a simple yet crucial maintenance task to ensure your snow blower works efficiently. Here’s a detailed, step-by-step guide:
2.1. Step 1: Detach the Starter Cord Assembly
Before beginning, make sure the snow blower is turned off and disconnected from any power sources. For gas-powered models, remove the spark plug to avoid accidental engine starts. Locate the starter assembly, which is typically at the front of the snow blower, near the handle.
Use a screwdriver or wrench to remove any screws or bolts securing the assembly to the snow blower. Keep track of the screws so you can reattach the assembly later.
How to Safely Remove the Starter Cord Assembly from Your Snow Blower ( Source: AZParts)
2.2. Step 2: Take Off the Old Cord
With the starter assembly detached, you'll have access to the old pull cord. Carefully examine the cord and pull it out if it's still connected to the pulley or handle. If the cord is tightly wound, gently release it by rotating the recoil pulley in the direction it’s designed to wind, but avoid letting the spring unwind. Cut the old cord if necessary and remove it completely. Check for any other damage to the assembly before proceeding.
2.3. Step 3: Secure the New Cord to the Starter Handle
Now that the old cord is removed, it’s time to attach the new pull cord. Take your replacement pull cord and thread one end through the handle. The handle is where you’ll pull the cord to start the snow blower. Snow blower starter handle & rope parts are crucial to ensure durability and smooth operation. The cord should be long enough to allow you to pull comfortably without straining. Tie a secure knot at the end of the cord inside the handle to ensure it doesn't slip out while in use. Make sure the knot is tight and will hold under the stress of repeated pulling.
Securing the New Pull Cord to the Starter Handle on a Snow Blower (Source: AZParts)
2.4. Step 4: Connect to the Recoil Pulley
Once the cord is securely tied to the handle, it's time to connect it to the recoil pulley system. Insert the other end of the pull cord into the recoil pulley slot or mechanism. The pulley is responsible for winding the cord back into place after each pull. Ensure the cord fits properly in the grooves of the pulley system. Depending on your snow blower model, you may need to adjust the alignment slightly. Check that the recoil spring inside the pulley is not damaged or overly stretched.
2.5. Step 5: Wind the Recoil Pulley
Now that the cord is in place, it’s time to wind the recoil pulley. Wind the pulley by rotating it in the direction that will coil the cord back onto the spool. Some models may require you to pull the cord a few times manually before it catches in the spring mechanism. Be careful not to overwind the cord, as this can cause tension in the spring and reduce its effectiveness. If the cord isn’t retracting smoothly, unwind and try again. Once the cord is wound correctly, test the pull mechanism by gently pulling the cord to ensure it returns smoothly into place.
With these steps completed, your snow blower should now have a new, fully functional pull cord. Make sure to reconnect the starter assembly to the snow blower and tighten any screws or bolts you removed earlier. Finally, reattach the spark plug (for gas-powered models) and test the snow blower to ensure the cord operates correctly. By following these detailed steps, you can replace the pull cord and ensure your snow blower is ready to tackle any snowstorm.
Winding the Recoil Pulley on a Snow Blower (Source: Freepik)
Replacing the pull cord on your snow blower is essential for keeping it running smoothly. From detaching the starter assembly to winding the cord into the recoil pulley, each step is important. For quality and reliable parts, AZParts offers everything you need to make the replacement process quick and efficient, ensuring your snow blower performs at its best.
Contact Info
Address: 8 The Green, Ste A, Dover, Delaware 19901-3618, United States
Email: support@azparts.com
Read more:
Snowblower
Further Reading
Further Reading


_1747325797.png&w=3840&q=75)


